Setup, Network – Denon ASD-3N User Manual
Page 19
ENGLISH
Get
ting Star
ted
Connections
Pla
ybac
k
Inf
or
mation
Tr
oubleshooting
Make detail settings for various parameters.
Setup
Network
Make network settings.
Setup
Network
a
Network Setup
s
Network Information
Set
up
• If you are using a broadband router (DHCP function),
there is no need to make the settings at “Setting the
IP Address” and “Setting the Proxy”, since the DHCP
function is set to “ON” in the ASD-3N’s default
settings.
• If the ASD-3N is being used connected to a network
without the DHCP function, the network settings
must be made. In this case, some knowledge of
networks is required. For details, consult a network
administrator.
• If you cannot connect to the Internet, recheck the
connections and settings (vpage 7).
• If you do not understand about Internet connection,
contact your ISP (Internet Service Provider) or the
store from which you purchased your computer.
• DHCP (Dynamic Host Confi guration Protocol) :
These are systems by which the IP address and
other network settings are automatically set for the
ASD-3N, computer, broadband router and network
devices.
• DNS (Domain Name System) :
This is a system for converting the domain
names used when browsing Internet sites (for
example, “www.denon.jp”) into the IP addresses
actually used for communications (for example,
“202.221.192.106”).
a
Network Setup
Make settings for wired.
1
Connect the LAN cable (vpage 7).
2
Plug the ASD-3N’s AC adapter into a
wall socket (vpage 6).
ASD-3N performs automatic network setup due
to the DHCP function.
When connecting to a network that has no
DHCP function, perform the setting in step 3.
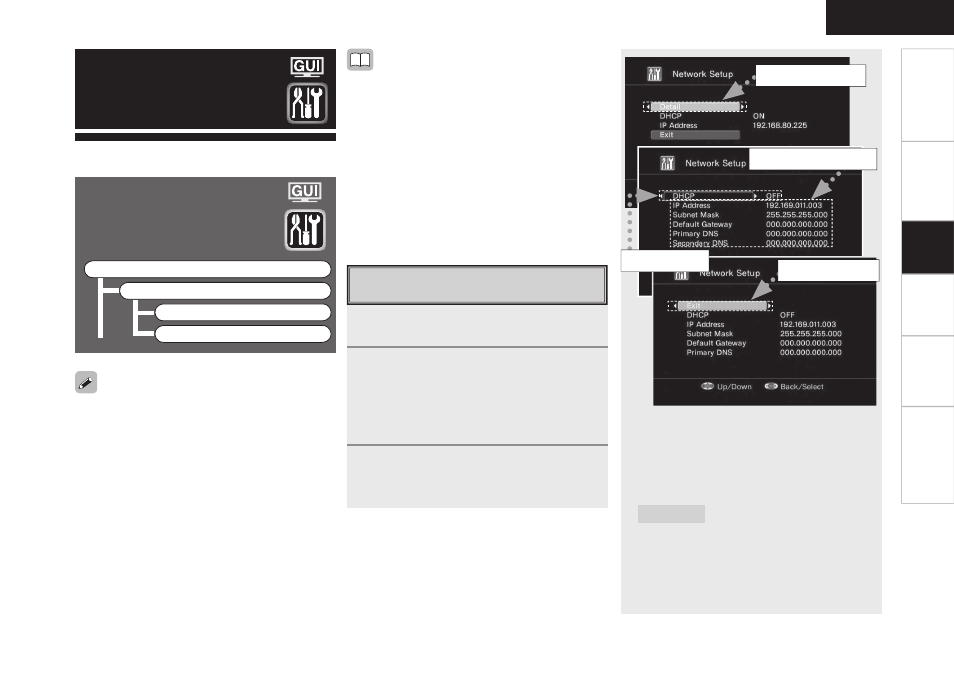
3
Set the IP address at the GUI menu
“Setup” – “Network” – “Network
Setup”.
q
Select “Detail” and press
ENTER
.
w
Use
o
p
to set “DHCP” to “OFF”, then press
i
.
The DHCP function is disabled.
e
Use
ui
p
to input the address and press
ENTER
.
IP Address
:
Set the IP address within the ranges shown
below. The Network Audio function cannot be
used if other IP addresses are set.
CLASS A: 10.0.0.0 ~ 10.255.255.255
CLASS B: 172.16.0.0 ~ 172.31.255.255
CLASS C: 192.168.0.0 ~ 192.168.255.255
e
Input the address.
w
Set “OFF”.
r
Select “Exit”.
q
Select “Detail”.