General installation recommendations installation – Hatteland Display HT B18 (Fanless) User Manual
Page 18
18
IND100210-6
General Installation Recommendations
Installation
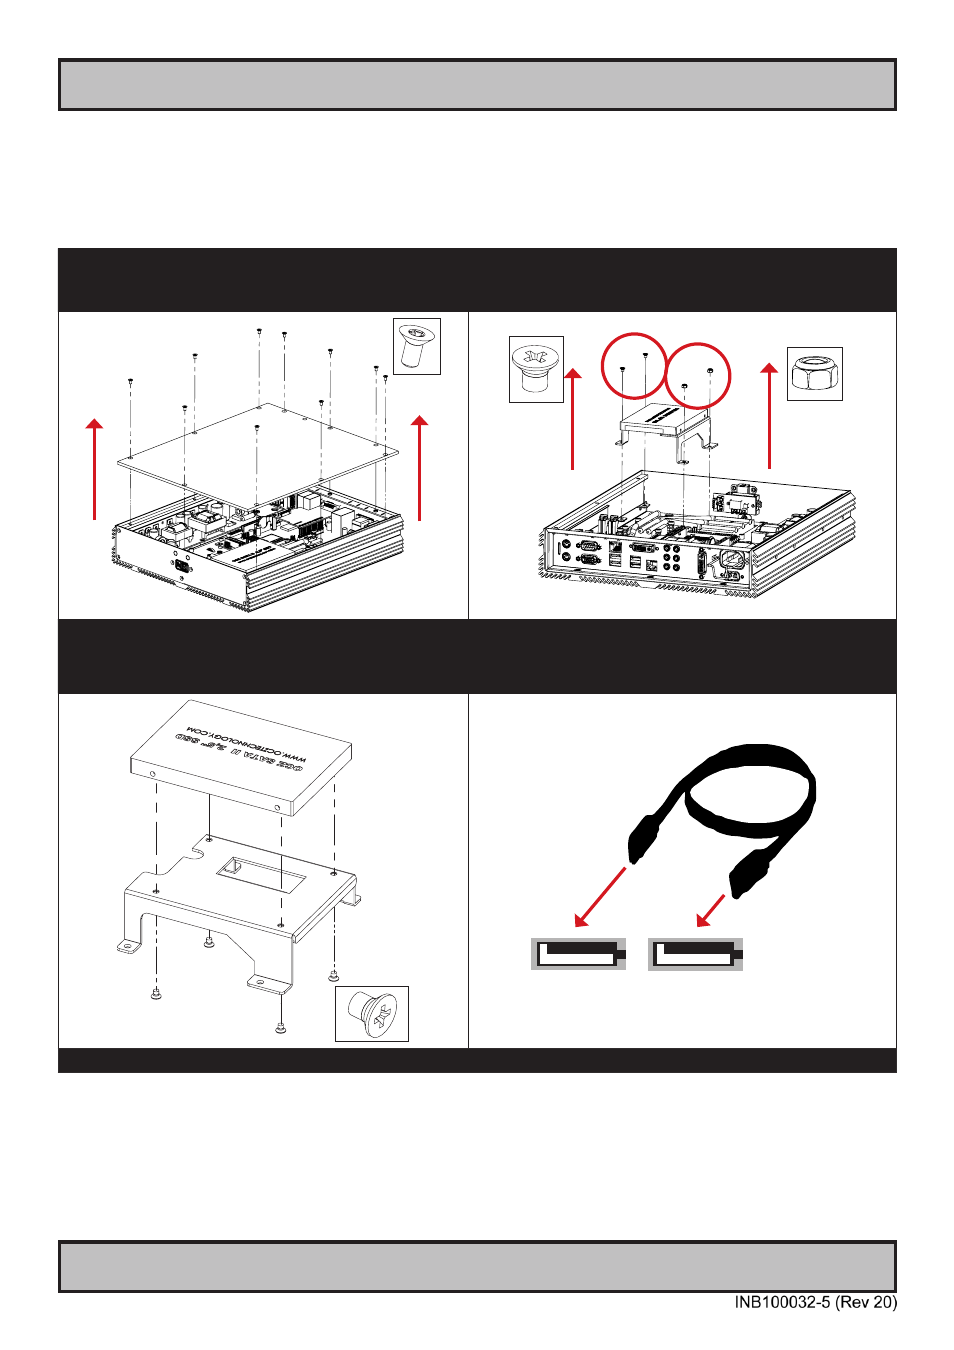
Internal SSD (Hard Drive HDD) removal / replacement HT B1x
Note: Areas of interest are marked in this section with symbols in
RED
color. Please power off and disconnect ALL
cables from the computer unit before proceeding! HT B17 used as illustration in this procedure, but it is valid for both
HT B17 and HT B18 computers.
▼ 1: Unscrew the bottom cover plate (10 pcs of
M3x6mm Torx countersunk screws and lift the cover
up.
▼ 2: Unscrew 2 pcs x M3x4mm Phillips countersunk
screws and 2 pcs x M3 Fastener Nut as indicated. Then
lift the entire SSD Device bracket up.
▼ 3: Unscrew 4 pcs x M3x4mm Phillips countersunk
screws as indicated and replace or remove the SSD
drive as needed.
▼ 4: Connect your Serial ATA cable ~20cm (not included)
to the SSD. Power Cable is already available from the
internal power module.
To SSD To HT B1x Motherboard
- Repeat the procedure backwards to finalize operation -