19 replacement of parts – Glow-worm Xtrafast 96-120 User Manual
Page 37
37
2000221595
19 Replacement of Parts
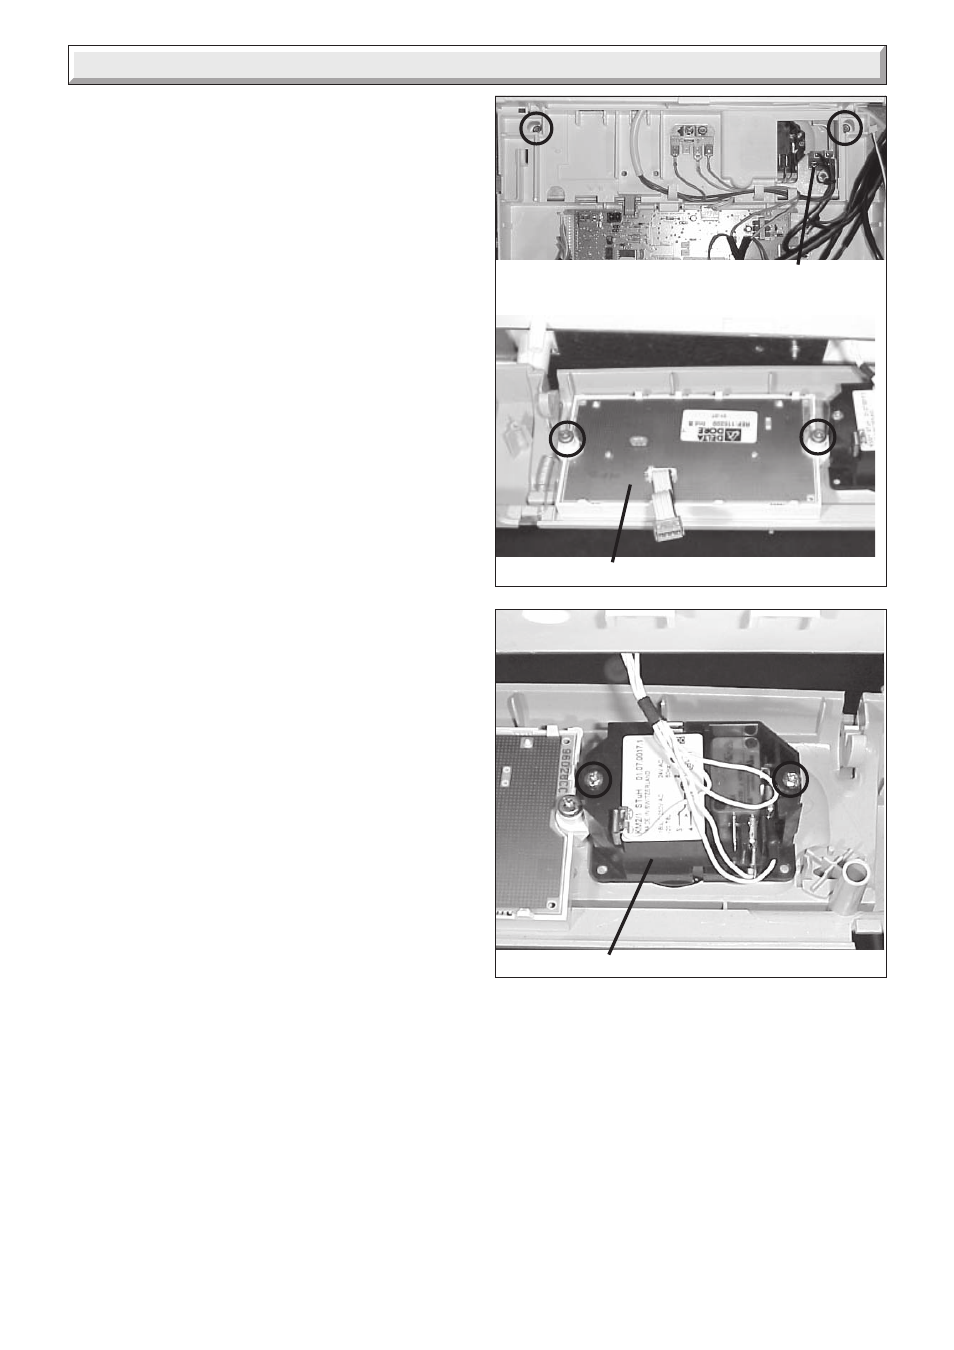
19.27 User interface board assembly, refer to
diagram 19.17.
Before starting refer to the front of Section 19 Important
information.
• Remove the front panel, refer to Section 16.3.
• Lower the control panel, refer to Section 16.4.
• Gain access to rear of control panel.
• Unclip side clips and hinge up control panel cover, see
diagram 11.2.
• Carefully pull off electrical connection from the user interface
board to PCB at (B4).
• Remove the two securing screws to release the control panel
fascia.
• Remove the two user interface board assembly securing
screws to remove the user interface board assembly.
• Fit replacement user interface board.
19.28 Clock-timer, refer to diagrams 19.17 and
19.18.
Before starting refer to the front of Section 19 Important
information.
• Remove the front panel, refer to Section 16.3.
• Lower the control panel, refer to Section 16.4.
• Gain access to rear of control panel.
• Unclip side clips and hinge up control panel cover, see
diagram 11.2.
• Carefully pull off electrical connection from the clock-timer to
PCB at (B5).
• Remove the two securing screws to release the control panel
fascia.
• Remove the two clock-timer securing screws to remove clock-
timer.
• Fit replacement clock-timer.
19.29 Mains power switch, refer to diagram
19.17.
Before starting refer to the front of Section 19 Important
information.
• Remove the front panel, refer to Section 16.3.
• Lower the control panel, refer to Section 16.4.
• Gain access to rear of control panel.
• Unclip side clips and hinge up control panel cover, see
diagram 11.2.
• Slide back and up to remove the mains power switch.
• Carefully pull off electrical connections from the mains power
switch.
• Fit replacement mains power switch.
Diagram 19.18
Diagram 19.17
➜
➜
USER INTERFACE BOARD
B4
B5
CLOCK-TIMER
MAINS POWER
SWITCH
9890
9891
9892