Bolens TRANSMATIC LAWN TRACTOR 660 User Manual
Page 22
Attention! The text in this document has been recognized automatically. To view the original document, you can use the "Original mode".
SECTION 8: SERVICE
A
WARNING: Disconnect the spark plug wire
and
ground
against
the
engine
before
performing
any
adjustments,
repairs
or
maintenance.
Cutting Deck Removal
A
A
WARNING: Shut the engine off, remove
ignition key, set the parking brake, disconnect
the spark plug wire(s) and ground against the
engine to prevent unintended starting before
removing the cutting deck.
WARNING: Always wear safety glasses or
safety goggles to protect your eyes while
removing the cutting deck.
For performing service on your tractor and in order to
properly mount some (separately available)
attachments, it may be necessary to remove the
tractor’s cutting deck. To due so, proceed as follows:
*
Place the deck engagement/lifl lever in the
engaged (all the way forward) position.
*
Using a spring puller {MTD Part No. 732-0571 )or
other suitable tool, disconnect the spring which is
attached to a small hook found on the left, rear
portion of the transmission. See Figure 24.
*
Place the deck engagement/liflt lever in the
BLADES STOP position.
* Locate the two belt keeper pins, found on either
side of the engine pulley, and use a 1/4-inch socket
wrench to remove them from the lower frame. See
Figure 25.
NOTE: When reassembling, make certain belt keeper
pins are assembled in the same locations from which
they were removed.
*
Unpile the deck belt from around the engine
pulley.Return the deck engagement/lift lever to the
engaged (all the way forward) position.
*
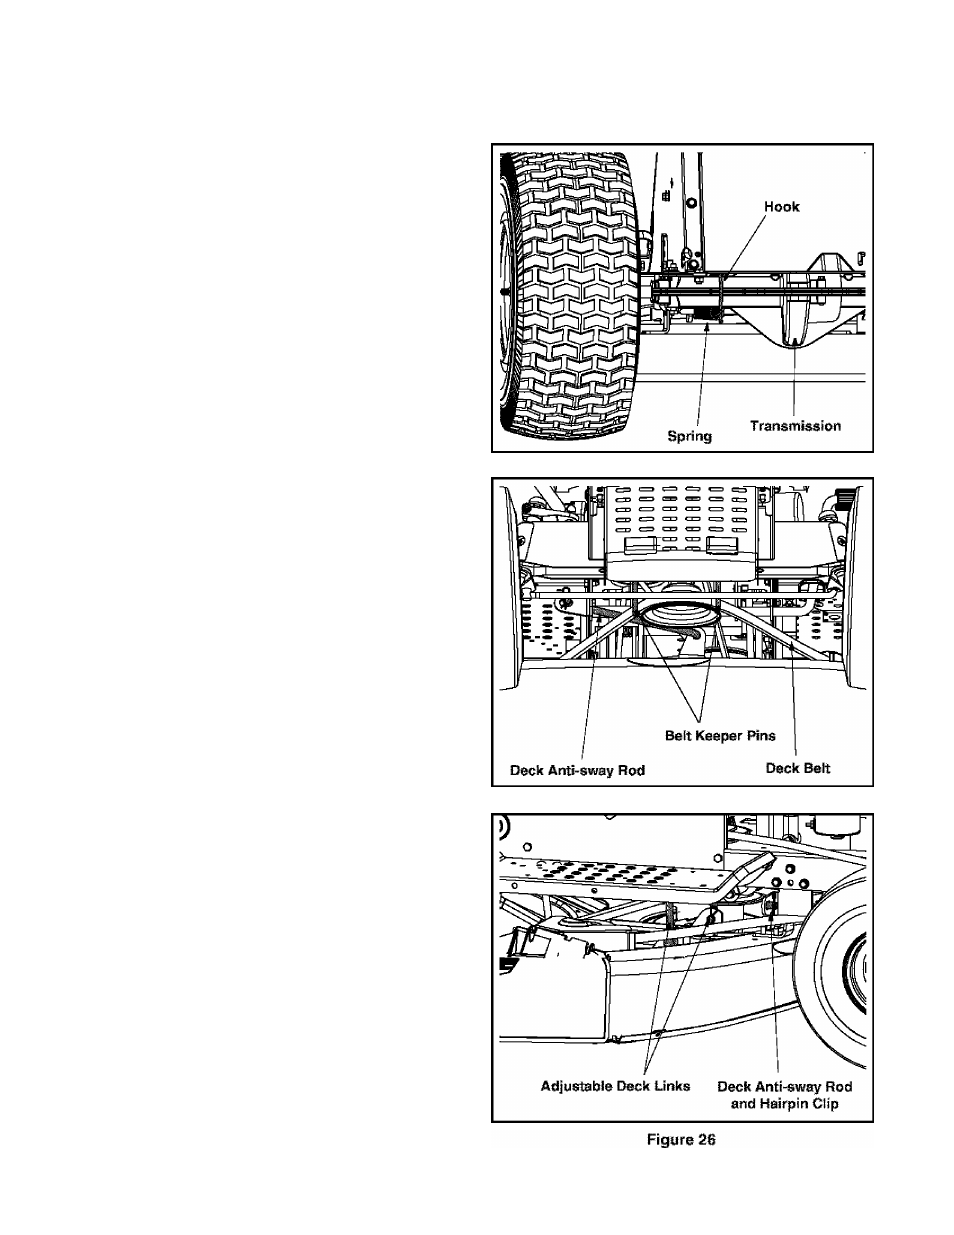
Locate the deck anti-sway rod and adjustable deck
links found near the front of the cutting deck. See
Figure 25 & Figure 26.
*
First remove the hairpin clip which secures the anti
sway rod to the front portion of the cutting deck,
then remove the hairpin clips which secure the
adjustable deck hangers. Retain the hairpin clips.
*
Carefully lower the front portion of the deck to the
ground.
Figure 24
Figure 25
22