Converting surface burners, Conversion of oven burner – Avanti DG24CSS User Manual
Page 20
Attention! The text in this document has been recognized automatically. To view the original document, you can use the "Original mode".
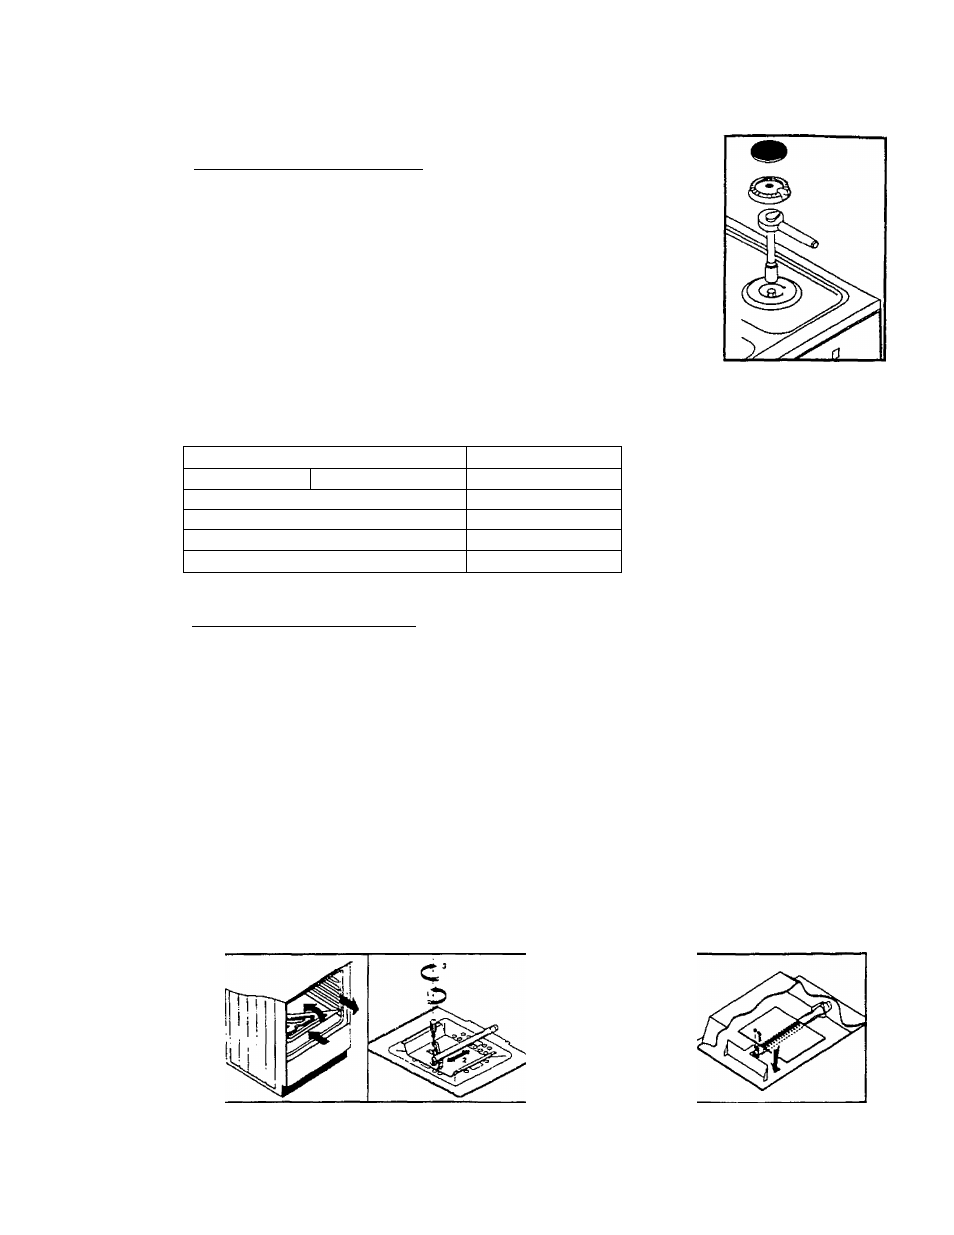
Figure 3
Converting Surface Burners
•
Unplug the main supply cord of the range.
•
Remove the rings of surface burners.
•
Pul!
up the burner rings with their caps and unscrew the orifices
using a 7mm-spanner socket.(See Figure
3)
•
Use orifices located on the information card in a plastic bag at
lower rear side of the range. In order to choose the required
orifice for particular burner and gas type; see the mark located
on orifices and look at the information card.
•
Screw each orifice to proper matching burner.
•
Place the burner rings to their original locations. Be careful that
the burner rings are level with the surface of the main top.
•
Keep the remaining orifices in their plastic bag for future use. (See Figure 3 and
Table 1)
BURNERS
LP GAS ■
NATURAL GAS
RAPID
0.92
1.40
SEMI-
rapid
"
0.65
0.97
SIMMER
0.50
0.75
OVEN
0.90
1.32
BROILER*
0.90
1.32
Table 1 - Marks on orifices
Conversion of Oven Burner
• Unplug the main supply cord of the range.
• Open oven door.
• Remove the bottom panel of oven. Do this by pushing it backwards, then lifting the
front edge up and out as shown in Figure 4.
• Undo the screw, which holds the burner in place, and remove the burner
completely. (See figure 5)
• Loosen and remove the orifice at the bottom rear of oven. Using a
7mm-spanner socket. Replace the orifice supplied with the range.
For the mark of orifice, see Table 1.
• Loosen the retaining screw on the burner ring., If setting for LP-Propane gas
operation, slide the ring towards the burner to open the burner hole completely. In
the factory setting for Natural Gas operation, the ring must be located in a place
that maintains a gap of 1/6”. (See Figure 6)
• Replace the burner in the oven and replace the screw. Replace the bottom panel
of oven.
• Keep the remaining orifice in its plastic bag for future use.
NG
Fieure 4
Figure 5
Figure 6
Figure 7
1601107SRO