Replacing the spark plug, Accessories/replacement parts, E. replacing the spark plug – Ryobi 310BVr User Manual
Page 19: F accessories/replacement parts, Maintenance and repair instructions
Attention! The text in this document has been recognized automatically. To view the original document, you can use the "Original mode".
MAINTENANCE AND REPAIR INSTRUCTIONS
Initial High Speed Mixture and Idle Speed Mixture
Needle Settings
4. Insert a small flat blade screwdriver through the hole
at the back of the top handle (Fig. 37). Turn both the
high speed mixture and idle speed mixture needles
out (counterclockwise) until the limiter caps stop.
-------------------------------------------- Fig. 37-------------------------------------------------
5. Start the engine and let it run for a minute.
6. Release the throttle trigger and let the engine idle. If
the engine stops, turn the idle speed screw (Figs. 35
and 36) in (clockwise) 1/8 turn at a time (as required)
until the engine idles.
NOTE; Forcing the limiter caps with a screwdriver will
damage the needle tips and the seat in the
carburetor body.
Final Idle Speed Screw and Idle Speed Mixture
Needle Settings
Adjust the idle speed screw and idle speed mixture
needle for smoothest engine idle.
7. Turn the idle speed mixture needle (Fig. 36) in
(clockwise) until you hear the fastest idle; then turn
the needle out (counterclockwise) 1/8 turn.
8. Squeeze the throttle trigger. If the engine falters or
hesitates as it accelerates, turn the idle speed mixture
needle (Fig. 36) out (counterclockwise) 1/16 turn at a
time until the engine accelerates rapidly.
9. If the idle speed changes significantly because of
Steps 7 and 8, readjust the idle speed screw (refer to
Steps 1 through 3).
Final High Speed Mixture Needle Adjustment
The factory presets the high speed mixture needle at 1-
1/4 turns out from the closed position. Your unit should
perform well at this setting. If additional adjustment of
the high speed mixture needle is required, contact your
local authorized service dealer.
NOTE: High speed mixture needle adjustment is not
recommended without a precision high speed
tachometer.
REPLACING THE SPARK PLUG
Use a Champion RDJ7Y spark plug (or equivalent).
The correct air gap is 0.020 Inch (0.5 mm). Remove the
plug after every 25 hours of operation and check its
condition.
1. Stop the engine and allow it to cool. Grasp the spark
plug wire cap firmly and pull it from the spark plug.
2. Clean around the spark plug. Remove the spark plug
from the cylinder head by turning a 5/8 in. socket
counterclockwise.
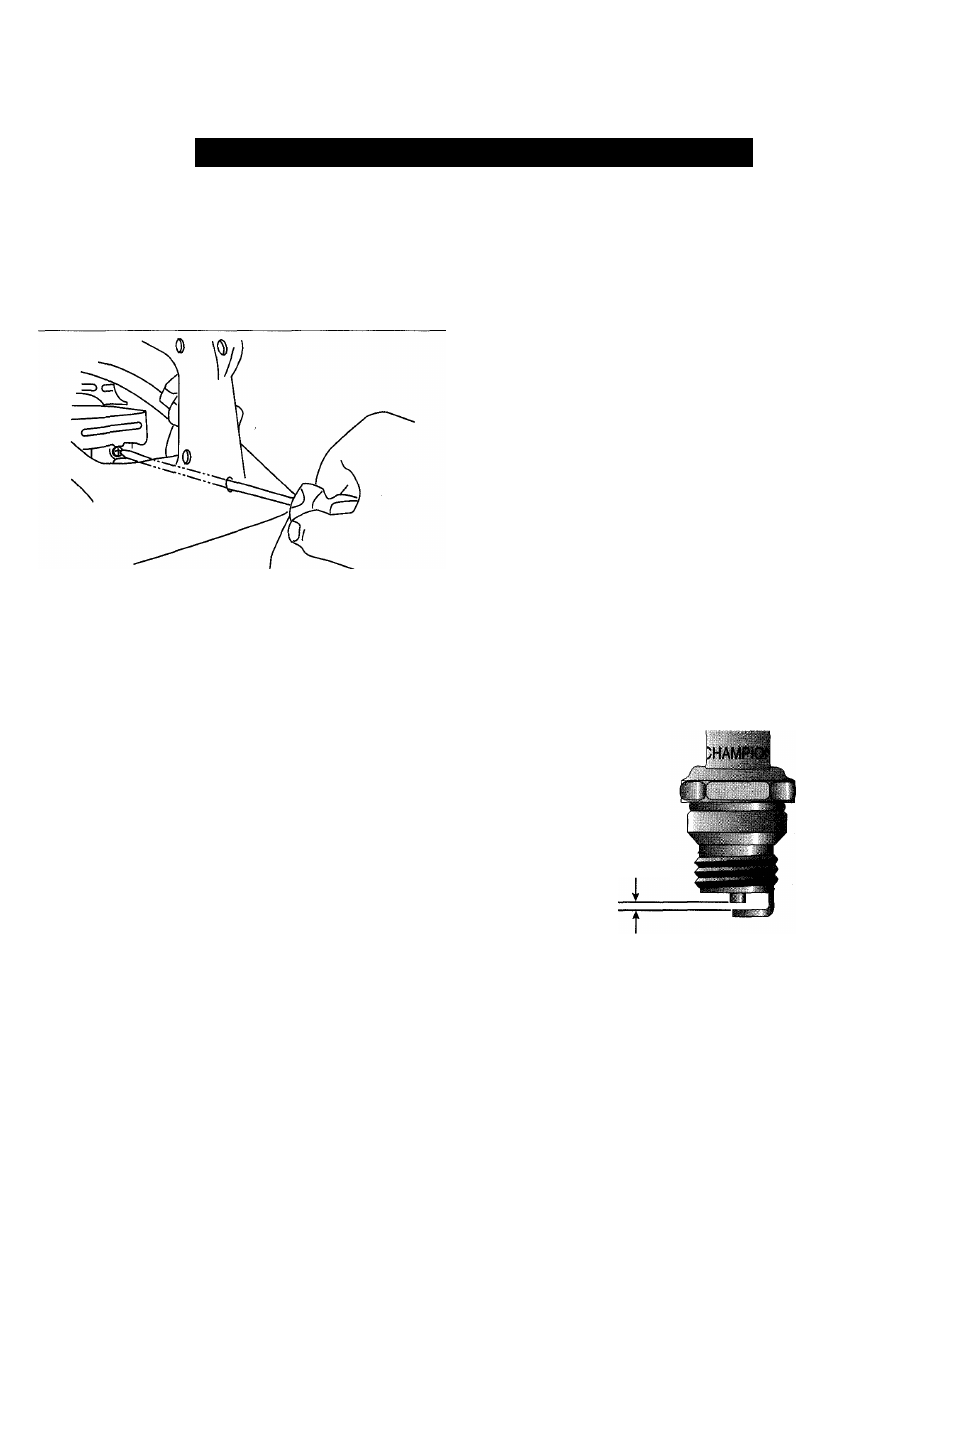
3. Replace a cracked, fouled, or dirty spark plug. Set
the air gap at 0.020 In. (0.5 mm) using a feeler gauge
(Fig. 38).
A
CAUTION:
Do not sand blast, scrape, or
clean electrodes. Grit in the engine could
damage the cylinder.
4. Install a correctly gapped spark plug in the cylinder
head. Tighten by turning the 5/8 inch socket
clockwise until snug.
If using a torque wrench torque to:
110-120 ln.*lb. (12.3-13.5 N*m).
Do not over tighten.
0.020 in.
(0.5 mm)
-------------------------------------------- Fig. 38--------------------------------------------------
ACCESSORIES/REPLACEMENT PARTS
2-Cycle Oil............................................................... 147543
Sparkplug ................................................................ 610311
Exhaust Gasket........................................................181521
Spark Arrestor...........................................................182747
Fuel Cap.................................................................... 180000
Vacuum Bag Assembly (Model 310BVr only) ... .180490
Shoulder Strap.......................................................... 682075
These replacement parts can be purchased from your
local authorized dealer.
19