A. basic cutting technique, B. tree felung techniques, A basic cutting technique – Poulan 2100 User Manual
Page 12: B. ti^ felling techniques, Types of cutting
Attention! The text in this document has been recognized automatically. To view the original document, you can use the "Original mode".
b
. For а warm engine:
l.)Leave choke lever in off position* Figure 11.
2*) Pull the starter rope quickly with your right
hand until the engine starts. Figure 12 .
3.) Stop the engine by moving the Start/Stop
Switch to the “Stop” position. Figure 11.
c. For a reftieled warm engine after running
out of fiieb
1. ) Move the choke lever to full choke. Figure 11.
2. ) Pull the starter rope quickly with your right
hand until the engine attempts to start.
3. ) Move the choke lever to off Figure 11.
4. ) Pull the starter rope quickly with your right
hand until the engine starts. Figure 12 .
3. IMPORTANT POINTS TO REMEMBER
a. When pulling the starter rope, do not use the
full extent of the rope as this can cause the rope to
break. Do not let the starter rope snap back—
hold the handle and let the rope rewind slowly.
b. If the engine floods, let the unit sit for a few
minutes, then repeat starting procedure usiugthe
half-choke position.
c. For cold weather starting, ahow the engine to
warm up (1-2 min.) at the half-choke position,
then move choke to the“Off” position. Do not cut
material with choke at “Full” or “Half” position.
TYPES OF CUTTING
A. BASIC CUTTING TECHNIQUE
1. IMPORTANT POINTS
a. Cut wood only. Do not cut metal; plastics; ma-
soniy; non-wood building materials; etc.
b. Stop the saw if the chain strikes a foreign
object. Inspect the saw and repair or replace
^
arts as necessary.
keep the chain out of dirt and sand. Even a
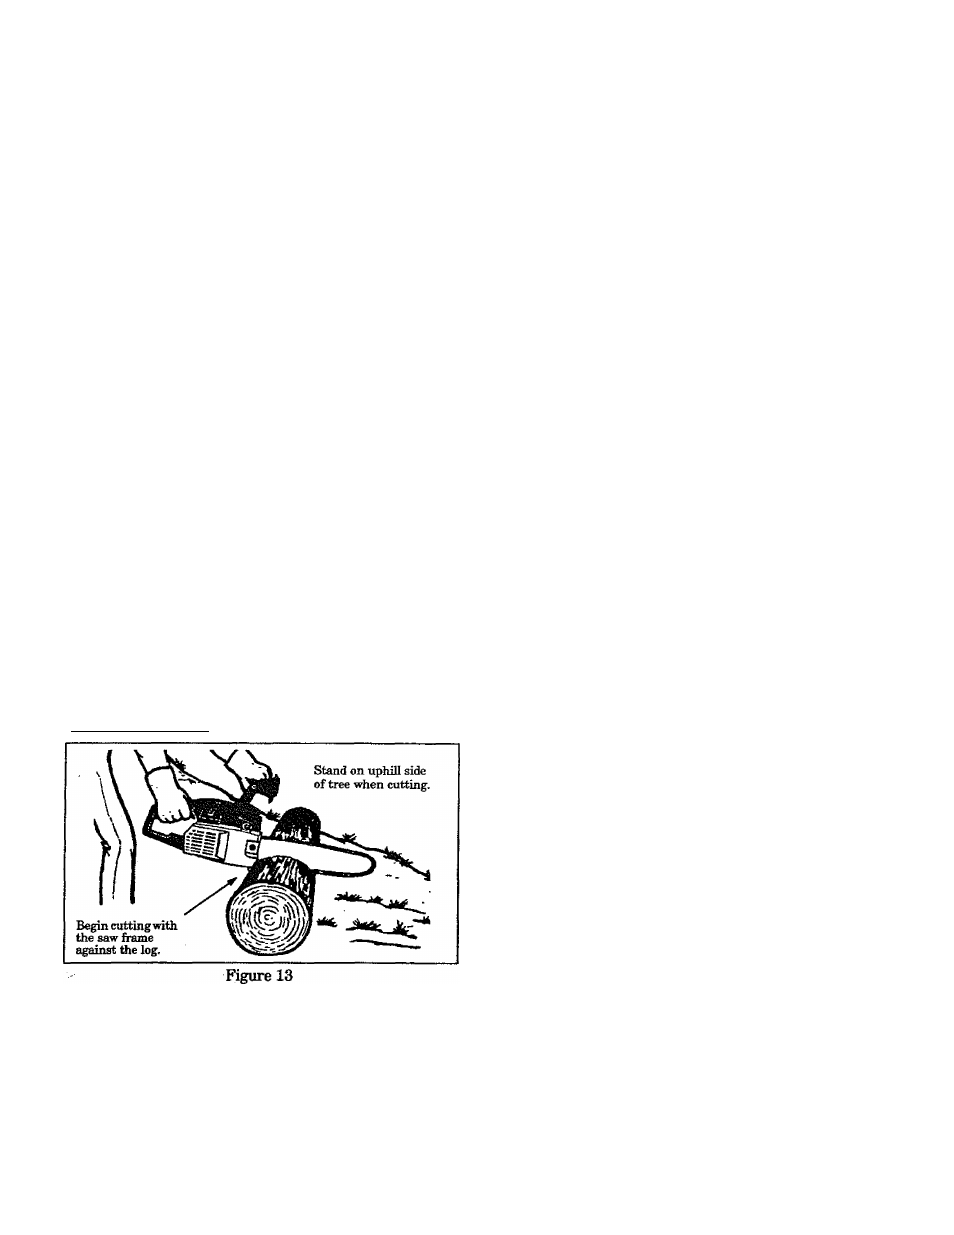
small amotmt of dirt will ______thus increase the possibihty ofldckback. A WARNING Kickback can occur when the moving chain con tion of the tip of the guide bar can cause the chain to dig into the object and stop the chain for an in kicks theguide barupandback toward the operator If the saw chain is pinched along the result in serious injury.______________________________ 2. UMIERSTANDING REACTIVE FORCES Pinch-kickback and Pull-In occur when the the wood. This stopping of the chain results in a re the saw to move in the opposite direction of chain ro — occurs when the chain on top of the har is sudden ly stopped. — rapidly drives saw straight back toward operator. • PuU-In~ — occurs when the chain on the bottom of the bar is suddenly stopped. — pulls the saw rapidly forward. 3. PROCEDURE Practice cutting a few small logs using the following technique to get the “feel” of using your saw before you begin a mqjor sawing operation. a. Accelerate engine to full throttle before entering cut by squeezing the throttle trigger, b. Begin cutting with the saw frame against the log. Figure 13 . c. Keep the engine at full throttle the entire time you are cutting. d. Allowthe chain to cut for you; exert only light downward pressure. Kyou force the cut, damage to the har, chain, or engine can result. e. Release the throttle trigger as soon as the cut is completed, allowing the engine to idle. If you run the saw at full throttle without a cutting load, unnecessaiy wear can occur to the chain, bar, and engine. £ To avoid losing control when cut is complete, do not put pressure on saw at end of cut. g. Stop the engine before setting the saw down af ter cutting. B. TREE FELUNG TECHNIQUES 1, CAREFULLY PLAN YOUR SAWING OPERA TION IN ADVANCE around the tree whereyou can have secure footing h. Study the natural conditions that can cause the tree to fell in a particular direction. might not be apparent due to uneven or slop- -12 - ing terrain. Use a plumb or level to determine 3. ) WEIGHTED and BRANCHES on one side. 4. ) Surrounding TREES and OBSTACLES. c. Look for decay and rot. If the trunk is rotted, it can snap and unexpectedly, ^ d. Check for broken or dead branches which can fall on you while cutting. e. Make sure there is enou^ room for the tree to falL Maintain a distance of 2 1/2 tree Engine noise can drown out a warning call.
tacts an object at the upper portion of the tip of the
guide har or when the wood closes in and pinches
the saw chain in the cut. Contact at the upper por
stant. The result is a lightning fast, revere re€te-
tionwhieh
top of the guide bar, the guide bar can be driven
rapidly back toward the operator. Either of these
reactions can cause loss of saw control which can
chain is suddenly stopped by being pinched,
cau^t, or by contacting a foreign object in
versal of the chain force used to cut wood and causes
tation, Either reaction can result in loss of control
and possible serious injuiy.
• I^ch-Eickback—
a. Clear the work area. You need a clear area all
at all times.
1. ) The WIND direction and speed.
2. ) The LEAN of the tree. The lean of a tree
the direction of tree lean.
leng^s from the nearest pereon or other objects,