Machine controls, Work bowls, Machine functions – Cuisinart FP-14 User Manual
Page 10: Chopping
9
If using the reversible shredding disc,
determine whether the fine or medium side
will be used and use the plastic hub to
twist into position on the stem adapter. The
plastic hub may be used for removal of this
disc.
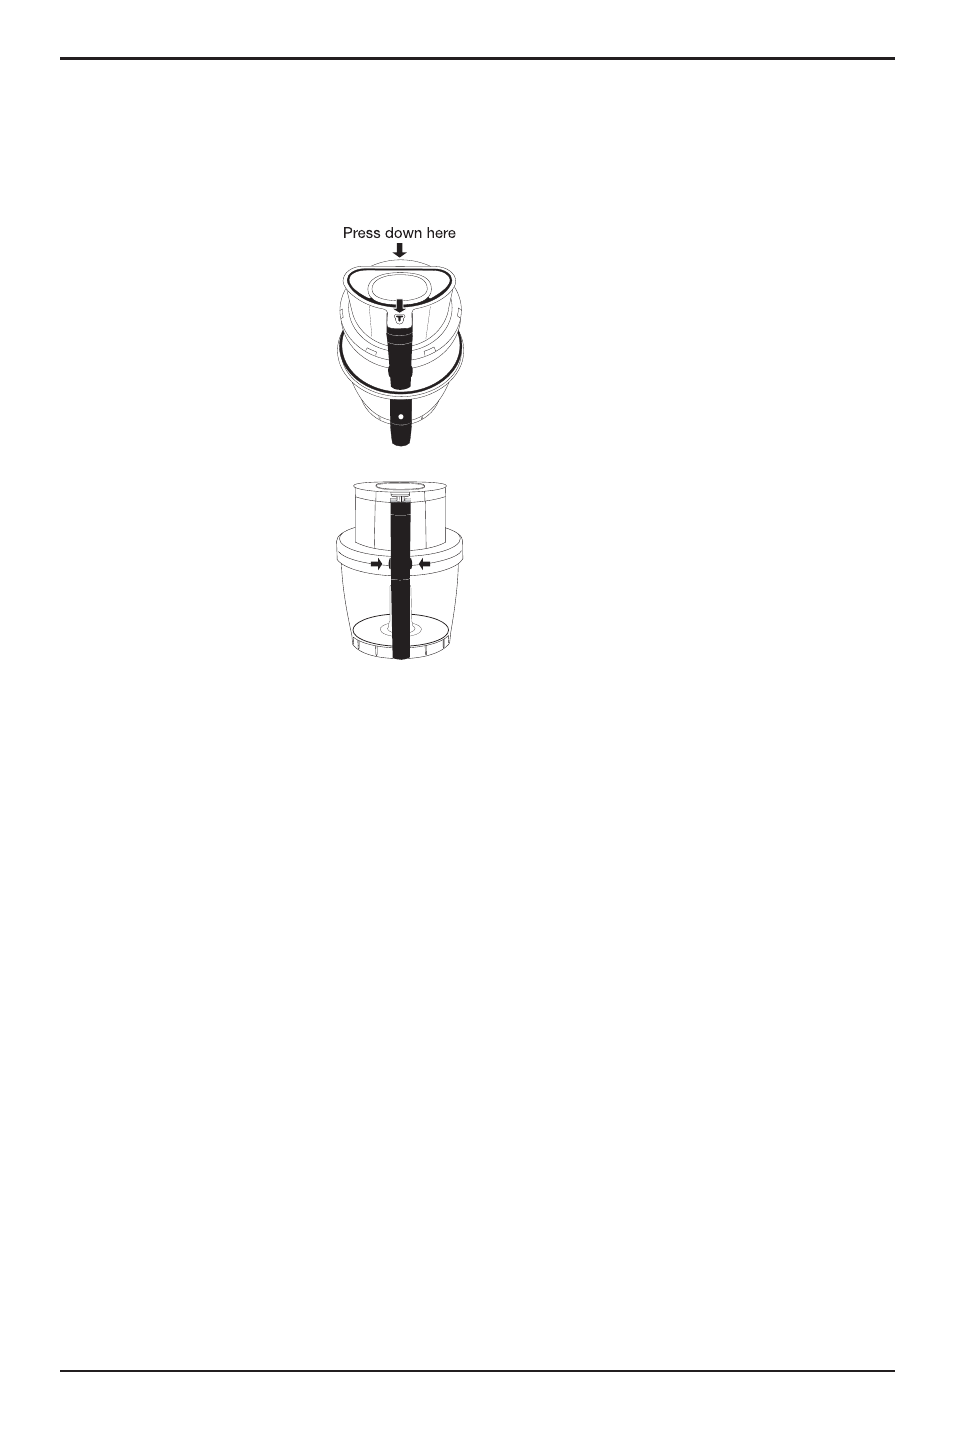
Cover Operation
7. Place the work bowl
cover onto the work bowl
by positioning it directly
over the bowls, and push
down on the front and
back to lock into place.
Another way to put the
cover on is by latching
the back on first and then
pushing down on the
front to lock into place.
Be sure both front and
back locks are fully
engaged.
To remove the cover,
push in both sides of the
release button (located
on the cover interlock)
and lift up to remove.
Note: The work bowl cover fits, locks
and seals on the large bowl with any
nested bowl combination. The work
bowl cover will become easier to engage
with repeated use.
8. Align pusher assembly and activating rod
with the feed tube opening on the work
bowl cover and slide it down completely.
9. Plug the food processor into a proper
electrical outlet. It is now ready for use.
Note: The bowl, lid and pushers must be
securely in place for the unit to operate.
MACHINE CONTROLS
On Button
The On control is a continuous button that
allows the machine to run until OFF is selected.
1. Properly assemble and engage the
machine.
2. Add ingredients to the work bowl, either
through the feed tube or directly into the
bowl.
3. Press the On button. The blue LED light will
illuminate and the motor will start.
4. Press the Off button when finished.
Pulse Button
The Pulse control is a momentary button that
allows the machine to run only while it is being
pressed. This capability provides more accurate
control of the duration and frequency of
processing. Unless otherwise specified, a pulse
is about one second.
1. With the machine properly assembled and
engaged, and ingredients in the work bowl,
press the Pulse button repeatedly as
needed. The blue LED On light will be
illuminated upon activation.
Dough Button
1. Prepare the dough ingredients and place in
work bowl fitted with the dough blade.
2. Assemble and engage the work bowl cover
and pusher.
3. Press the Dough button and the blue LED
light will illuminate.
4. Then press the On button to knead the
dough. The blue LED On light will also be
illuminated.
5. Press the Off button when finished.
Note: Kneading dough should only be
done in the large work bowl.
WORK BOWLS
Three nested work bowls are provided for a very
versatile processing experience. We recommend
using the work bowls in a manner that will
optimize efficiency. For example, if your recipe
requires using multiple bowls, begin with the
smallest bowl to minimize cleaning. This way the
small bowl can serve as a prep bowl to reserve
chopped ingredients for a recipe. A great example
of this would be the Cherry Crumb Muffins recipe
on page 18.
Note that the bowls lock into place to pour while
nested. The convenient finger recesses can be
used to remove the small and medium bowls with
ingredients, or the bowls can remain nested during
pouring or food removal.
Chopping certain foods may scratch or cloud the
work bowl; this will not affect the functionality of
your work bowl.
MACHINE FUNCTIONS
Chopping
(using the Chopping Blade)
r'PSSBXJOHSFEJFOUTQFFM DPSFBOEPSSFNPWF
seeds and pits. Food should be cut into even,