Tine removal & installation, A warning, Tine removal and installation – Troy-Bilt 12001 User Manual
Page 18: Warning
Attention! The text in this document has been recognized automatically. To view the original document, you can use the "Original mode".
TINE REMOVAL & INSTALLATION
A
WARNING
Worn tines may become sharp. Wear heavy
gloves when removing, handling, or rein
stalling tines to prevent personal injury.
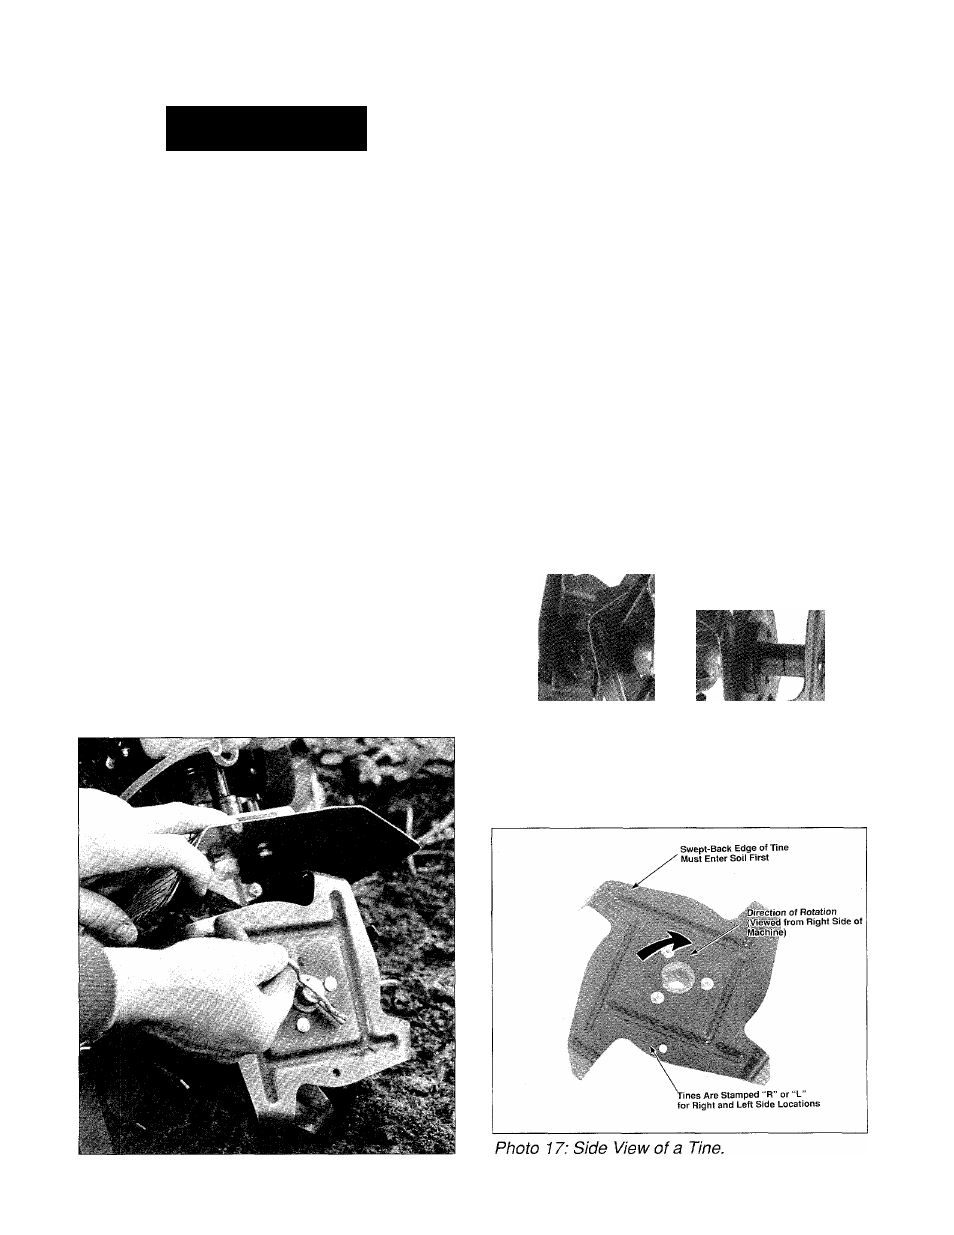
IMPORTANT
The four tines are not interchangeable.
They must be reinstalled in the same posi
tions from which you removed them and
their cutting edges must face forward in
order for the cultivator to function properly.
if you are replacing tines due to wear, you
should replace all four as a set, rather than
replacing a single, worn tine.
B.
Slide the two tines off the tine shaft.
NOTE;
If you don’t plan to reinstall the tines
right away, reinsert the hairpin cotter in the
hole in the tine shaft to prevent it from being
accidentally misplaced.
C.
Repeat steps A and B for the other side.
2. To reinstall the tines:
When reinstalling the tines, refer to Photo 16
for the correct location of each tine.
A.
Double check that the dust cover and felt
washer (underneath the dust cover) are in place.
They should be on the tine shaft, against the
side of the transmission. The set screws on the
dust covers should be tight and not allow the
dust covers to move. See Photo 18.
To be sure of reinstalling the tines in the cor
rect order, mark the tines as follows: (Do this the
very first time that you remove the tines to be
sure of marking them correctly.) Disconnect the
spark plug wire. Use a sharp nail or awl to
scratch the tine location on the tine (Outer L/H,
Inner L/H, Outer R/H, and Inner R/H).
1. To remove the tines:
A.
Pull the hairpin cotter out of the hole in the
outboard end of the tine shaft. It is easier to first
turn the hairpin cotter 90° (so it “stands” away
from the outer tine) and then slip it off, over the
tip of the axle, than it is to attempt to pull the
hairpin cotter out of the hole in the tine shaft.
Photo 16: The Correct Position of the Tines.
Photo 15: Removing the Hairpin Cotter.
18