Ystomfr rfspny<;ibtfc nn, Tractor, Tires – Poulan 168191 User Manual
Page 16: Operator presence system, Blade care, Blade removal (see fig. 9), To sharpen blade (see fig. 10)
Attention! The text in this document has been recognized automatically. To view the original document, you can use the "Original mode".
. - y S t o M F R RFSpny<;iBtfc
n n
<>
TRACTOR
Always obser/e safety rules when performing any mainte
nance.
n v ~ ~ k H f K i h r U
‘1 <■ I I ■- y ill C ' h' ri ll 1 Jl. I ('■ I It t ' *<'| p.ruj ~*i I- 11 >
£t hi«]r • pt Sfi ,n f'ntiPsigerii tr.en hrnte niu tboiijUatf j.
( fc. "w/ -An'iC-,1 ERAKt n i n e oe'-inre nj AHju.if~
i.iuiiis sectioii J tfiio indiiudli.
TIRES
•
Maintain proper air pressure in all tires (See “PROD
UCT SPECIFICATIONS” on page 3 of this manual).
•
Keep tires free of gasoline, oil, or insect control chemi
cals which can harm rubber.
•
Avoid stumps, stones, deep ruts, sharp objects and
other hazards that may cause tire damage.
NOTE: To seal tire punctures and prevent flat tires due to
slow leaks, tire sealant may be purchased from your local
parts dealer. Tire sealant also prevents tire dry rot and
corrosion.
OPERATOR PRESENCE SYSTEM
Be sure operator presence and interlock systems are
working properly. If your tractor does not function as
described, repair the problem immediately.
•
The engine should not start unless the clutch/brake
pedal is fully depressed and attachement clutch control
is in the disengaged position.
•
When the engine is running, any attempt by the opera
tor to leave the seat without first setting the parking
brake should shut off the engine.
•
When the engine is running and the attachment clutch
is engaged, any attempt by the operator to leave the
seat should shut off the engine.
•
The attachment clutch should never operate unless the
operator is in the seat.
BLADE CARE
For best results mower blades must be kept sharp. Re
place bent or damaged blades.
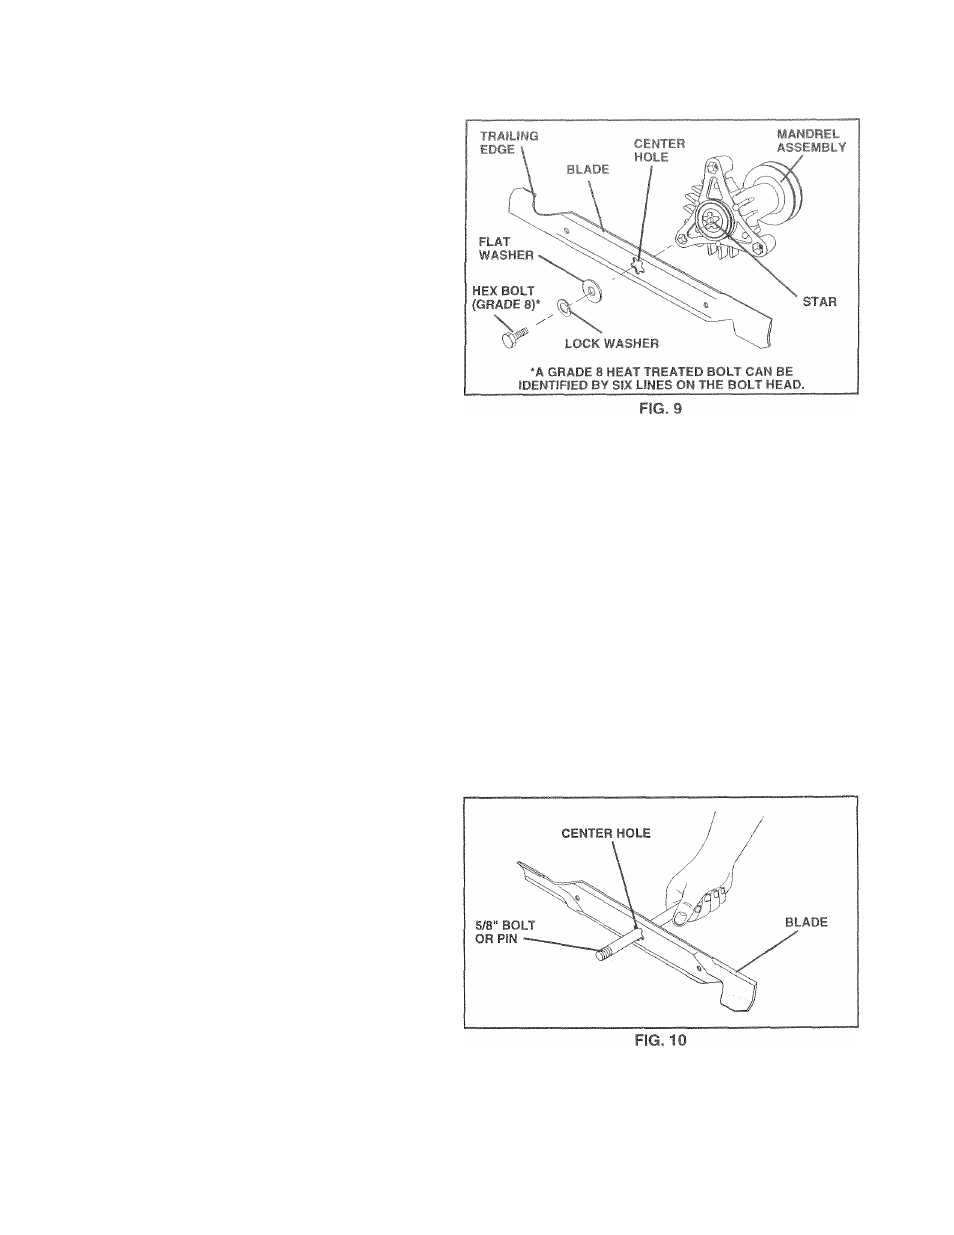
BLADE REMOVAL (See Fig. 9)
•
Raise mower to highest position to allow access to
blades.
•
Remove hex bolt, lock washer and flat washer securing
blade.
•
Install new or resharpened blade with trailing edge up
towards deck as shown.
IMPORTANT:
TO ENSURE PROPER ASSEMBLY,
CENTER HOLE IN BLADE MUST ALIGN WITH STAR ON
MANDREL ASSEMBLY.
•
Reassemble hex bolt, lock washer and flat washer in
exact order as shown.
•
Tighten bolt securely (27-35 Ft. Lbs. torque).
IMPORTANT: BLADE BOLT IS GRADE 8 HEAT TREATED.
TO SHARPEN BLADE (See
Fig.
10)
NOTE: We do not recommend sharpening blade - but if you
do, be sure the blade is balanced.
Care should be taken to keep the blade balanced. An
unbalanced blade will cause excessive vibration and even
tual damage to mower and engine.
•
The blade can be sharpened with a file oron a grinding
wheel. Do not attempt to sharpen while on the mower.
•
To check blade balance, you will need a 5/8" diameter
steel bolt, pin, or a cone balancer. (When using a cone
balancer, follow the instructions supplied with bal
ancer).
NOTE: Do not use a nail for balancing blade. The lobes of
the center hole may appear to be centered, but are not.
•
Slide blade on to an unthreaded portion of the steel bolt
or pin and hold the bolt or pin parallel with the ground.
If blade is balanced, it should remain in a horizontal
position. If either end of the blade moves downward,
sharpen the heavy end until the blade is balanced.
16