Making buttonholes – SINGER W1268 User Manual
Page 20
Attention! The text in this document has been recognized automatically. To view the original document, you can use the "Original mode".
.
5
!
17
le
le
ad
ng
First, mark the beginning and end
with a basting line or tailor's chalk,
(following directions below) to be
correct.
MAKING BUTTONHOLES
of the buttonhole on fabric
Make one on scrap fabric
machine adjustments
sure
are
1
.
2
.
3.
4.
5.
6
.
7.
8
.
9.
10
.
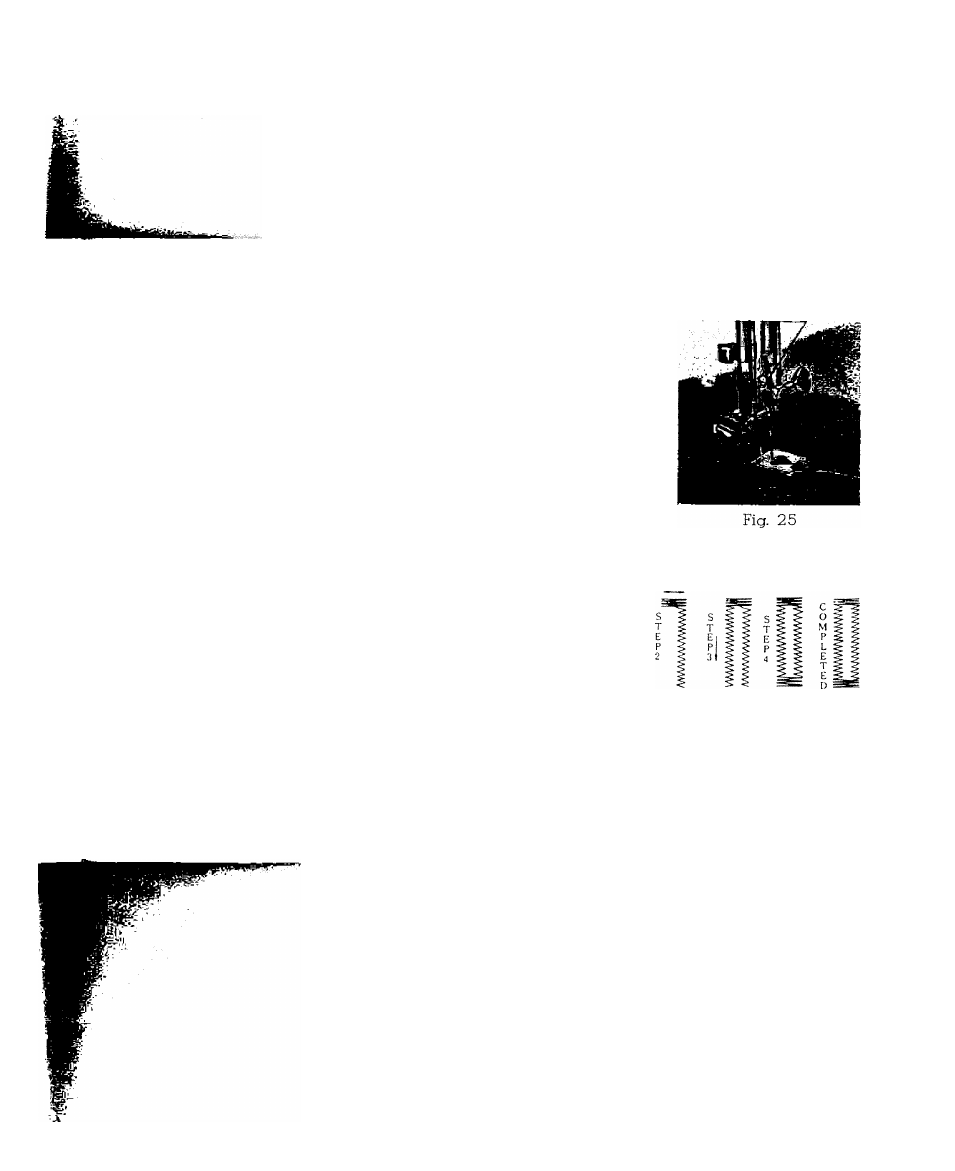
Replace presser foot with buttonhole foot which is grooved
deeply underneath to prevent piling up of thread. (See Fig. 25).
Lock the stitch width at 2 and set the stitch length near 0.
Lower needle carefully into the mark on fabric indicating the
beginning of buttonhole. Stitch to the mark for the end of the
buttonhole, step
1
, Fig. 26, stopping machine with needle in
fabric at right side of stitching.
Lift the presser foot and using the needle as a pivot,
turn the fabric end for end.
Lower presser foot and turn hand wheel just enough
to raise needle out of fabric.
Drop feed all the way down and move zigzag lever
to 4. While holding the lever at 4 width, take five
or six stitches to from bar tack, step 2, Fig. 26.
Raise needle out of fabric and return feed to "HIGH"
position and return stitch width lever to
2
.
Stitch second side of buttonhole, step 3.
Make bar tack by repeating 5 and
6
above (step 4).
Return stitch width to 0 and take two or three stitches to fasten
Fig. 26
bar threads and
ravelling.
stitchig.
Cut the buttonhole opening with a seam ripper, being careful not to
prevent
cut the