To regulate the length of stitch, Reverse sewing, To regulate the stitch formation – SINGER W217 User Manual
Page 8: Flfl. 16, To regulate the needle tension, 10 to regulate the stitch formation
Attention! The text in this document has been recognized automatically. To view the original document, you can use the "Original mode".
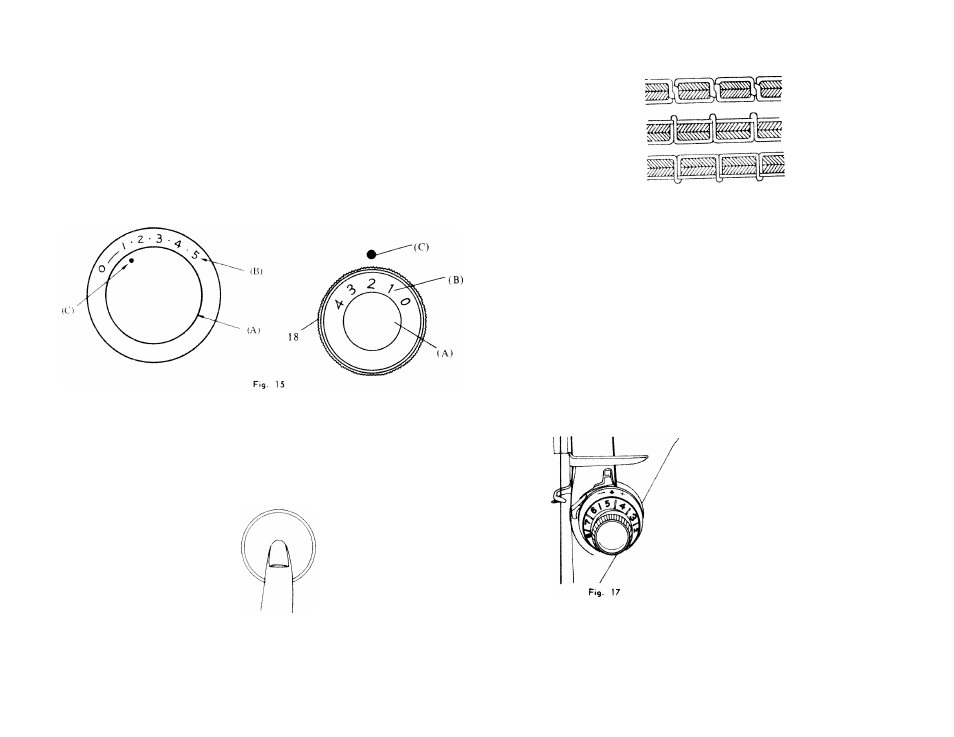
TO REGULATE THE LENGTH OF STITCH
The
"STITCH
REGULATOR
DIAL"
(18)
mokes
it
possible
to
obtain
different
stitch lengths by a simple turn. Numbers (Bi around the dial lAI and the
Indicotor vC) ore your stitch length guides. The higher the number the
longer the stitch. For heovier materials, use the high numbers. For silks,
nylons and thin moteriols, use the low numbers.
To regulate the stitch, turn the Dial (A) until the Indicator ¡C
stitch length you wont.
if too close to 0, the machine will not feed ot o
in one spot.
NEVER SEW OR USE THE MACHINE
IN ZERO POSITION
points to the
and wilt continue sewing
REVERSE SEWING
The stitch regulator dial (A) is also used to stitch in reverse.
When reverse stitching is wanted for tacking seams, push the Reverse button
(A) in until it stops. The stitch length will remain ttie same because this is
controlled by ttre mechanism.
10
TO REGULATE THE STITCH FORMATION
(A)
( B)
(C)
Flfl. 16
For perfect stitching, the tension on the upper ond under threads should be
equal and just sufficiently strong to lock both threads in the centre of the
moteriols os shown above (A).
If the tension of the needle threod is too tight, or if that of the bobbin thread
too loose, the needle threod will lie straight along the upper surfoce of the
moterial, thus moking on imperfect stitch, os shown in (B).
if the tension of the bobbin threod is too tight, or if that of the needle is too
loose, the bobbin threod will be stroight olong the under side of the materiol,
thus making on imperfect stitch, os shown above (C).
N o t e :
Be sure to uso the threod suitable to the material. (See page 4)
TO REGULATE THE NEEDLE TENSION
A correct stitch ccn usually be obtained by varying the tension on the needle
threod.
All adjustments should be made while
the presser foot is down since an
releose does not permit odjustments
to be made while the presser foot
is up.
To increose the tension, turn the thumb nut
on the tension dial (7) clockwise. To
decrease the tension, turn the nut in the
opposite direction. The thumb nut should
not be turned abruptly but regulated little
by little until the desired tension is ob-
toined.
The quality of sewing depends on the ten
sion of thread. Hence, it is necessary for the user to become fully fomiliar
with the correct tensions through proctice.
^
11