Inserting the bobbin case, Removing the bobbin case, Threading the bobbin case – SINGER W217 User Manual
Page 6: Adjusting the bobbin tension
Attention! The text in this document has been recognized automatically. To view the original document, you can use the "Original mode".
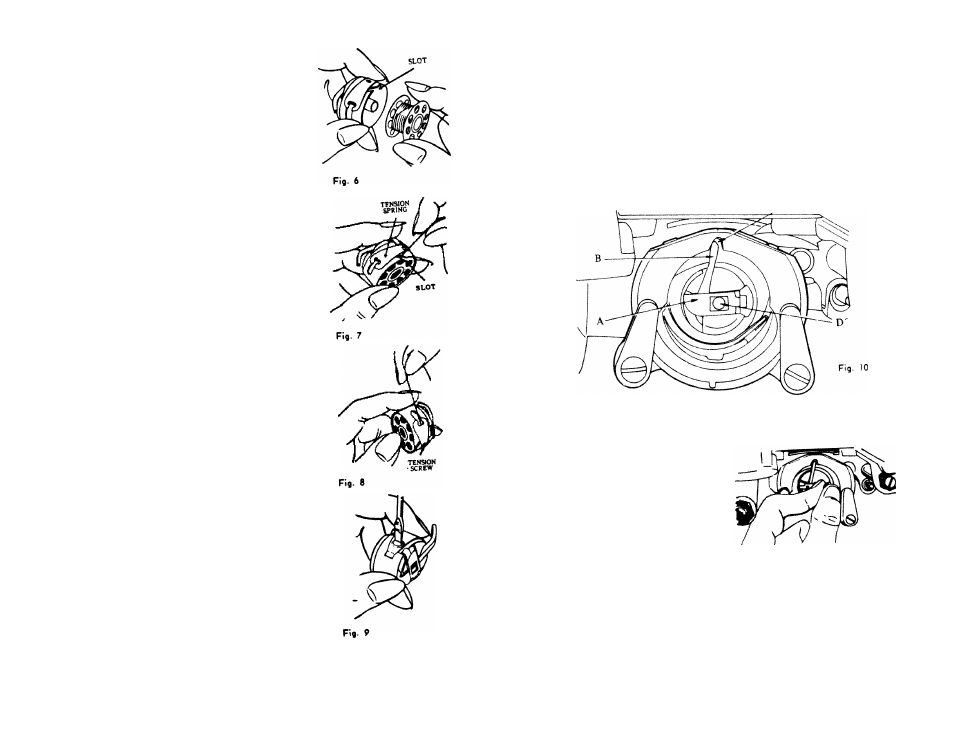
THREADING THE BOBBIN
CASE
Hold the bobbin cose between the thumb
Old forefinger of the left hcnd with the
slot focing upword. With 3 or 4 inches
of thread trolling in the pdm, hold the
bobbin between the thumb end first two
fingers of the right hend. (Fig. 6)
Insert the bobbin into the bobbin cose ond
pull the (roiling threod into the slot,
down ond to the left until it enters the
long opening under the tension spring.
(Fig. 7)
There should be
a slight tension on the
threod -s It IS pulled through the spring
ond the bobbin should unwind freely,
(Fig, 8) Bobbin rotates counter-clock
wise if, inserted correctly,
ADJUSTING THE BOBBIN
TENSION
All mochines ore correctly odjusted before
leaving the factory, therefore it is seldom
necessory to alter the BOBBIN tension.
Should
it
become
necessary,
however,
to do so. tighten the tension spring screw
slightly
to
increose
the
tension
ond
loosen the screw slightly to lessjn the
tension,
using
the
smoll
screw
driver
provided for the purpose. (See Fig. 9)
Make sure to turn the screw o quarter
turn or less in one adjustment ond test
•he tension.
-
6
-
INSERTING THE BOBBIN CASE
After winding о bobbin ond plocing it in the bobbin case (see родеs 5 ond
6) hold %e bobbin cose lotch with left thumb and forefinger (os expióme
bove) to prevent the bobbtn from falltng out. Keeping the protruding
finoer (ВТ stroight up toword the notch
(C) of the roce ring, press the
ьГып cose into the holder post (D) until the protruding finger enters he
notch When in correct position, the mechonism of bobbin cose
the holder post of shuttle hook holding the bobbin cose firmly m ploce^
This operotion is eosy-.. NEVER FORCE IT. Leove three
thread hanging free. This will be brought up through the needle plote hole
os shown on роде 8.
REMOVING THE BOBBIN CASE
Turn the bolonce wheel (20) toword
you until the needle is at its high
est position.
Slide the Slide Plate (14) to the left.
With left thumb ond forefinger, grasp
the
hinged
latch
(Fig.
10-A)
at
the front of the bobbin case, hold
ing it securely as you withdrew
the bobbin cose from the holder
post (D) toward you and out of
the machine, (As long os you hold
the hinged lotch (A) as exploined
above, -the bobbin will no. foil out of the bobbin cose.) To
bobbin from the bobbin cose, hold the bobbin cose downword ond permit
the lotch to snap bock .into ploce.
7
Fig. 11