Zigzag stitching, Needle position control – SINGER W951 User Manual
Page 16
Attention! The text in this document has been recognized automatically. To view the original document, you can use the "Original mode".
ZIGZAG STITCHING
Be sure zigzag needle plate and presser foot are in place.
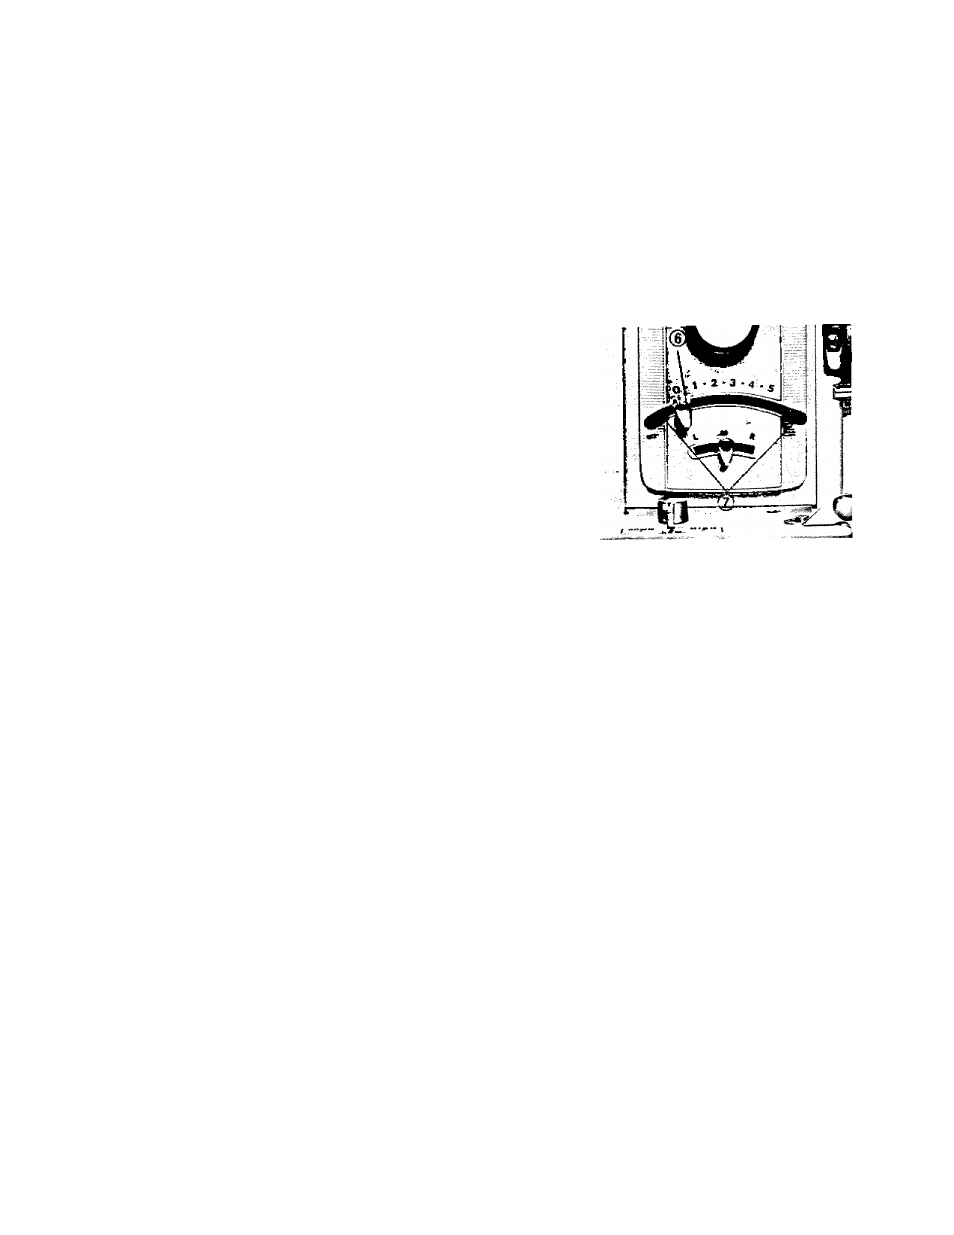
(1)
Set needle position lever at "M" position (Fig. 29)
(2)
By moving the zigzag width lever "6" (Fig. 29) gradually to the
right, it will produce zigzag stitches of ever increasing width. To
maintain selected widths of zigzag stitches, employ locks "7'
(Fig. 29)
(3)
Left lock determines the minimum width stitch, while right lock
controls the maximum. Locks can be set by pressing in slightly
and moved to the desired position.
Fig. 29
NEEDLE POSITION CONTROL
The needle should be at its highest point when adjusting needle position, to avoid tearing the fabric or bending the
needle.
Select needle position by pressing down slightly on control '31 (Fig. 1) and move to desired position.
R— Position
blind hemming
decorative stitch
designs
L— Position for
buttonholes
sewing on buttons
twin needle sewing
M— Position
straight stitching
decorative stitch designs
decorative stitch designs
_ 15 _