Ccessory, Setting up your machine – SINGER WSL216 User Manual
Page 4
Attention! The text in this document has been recognized automatically. To view the original document, you can use the "Original mode".
;
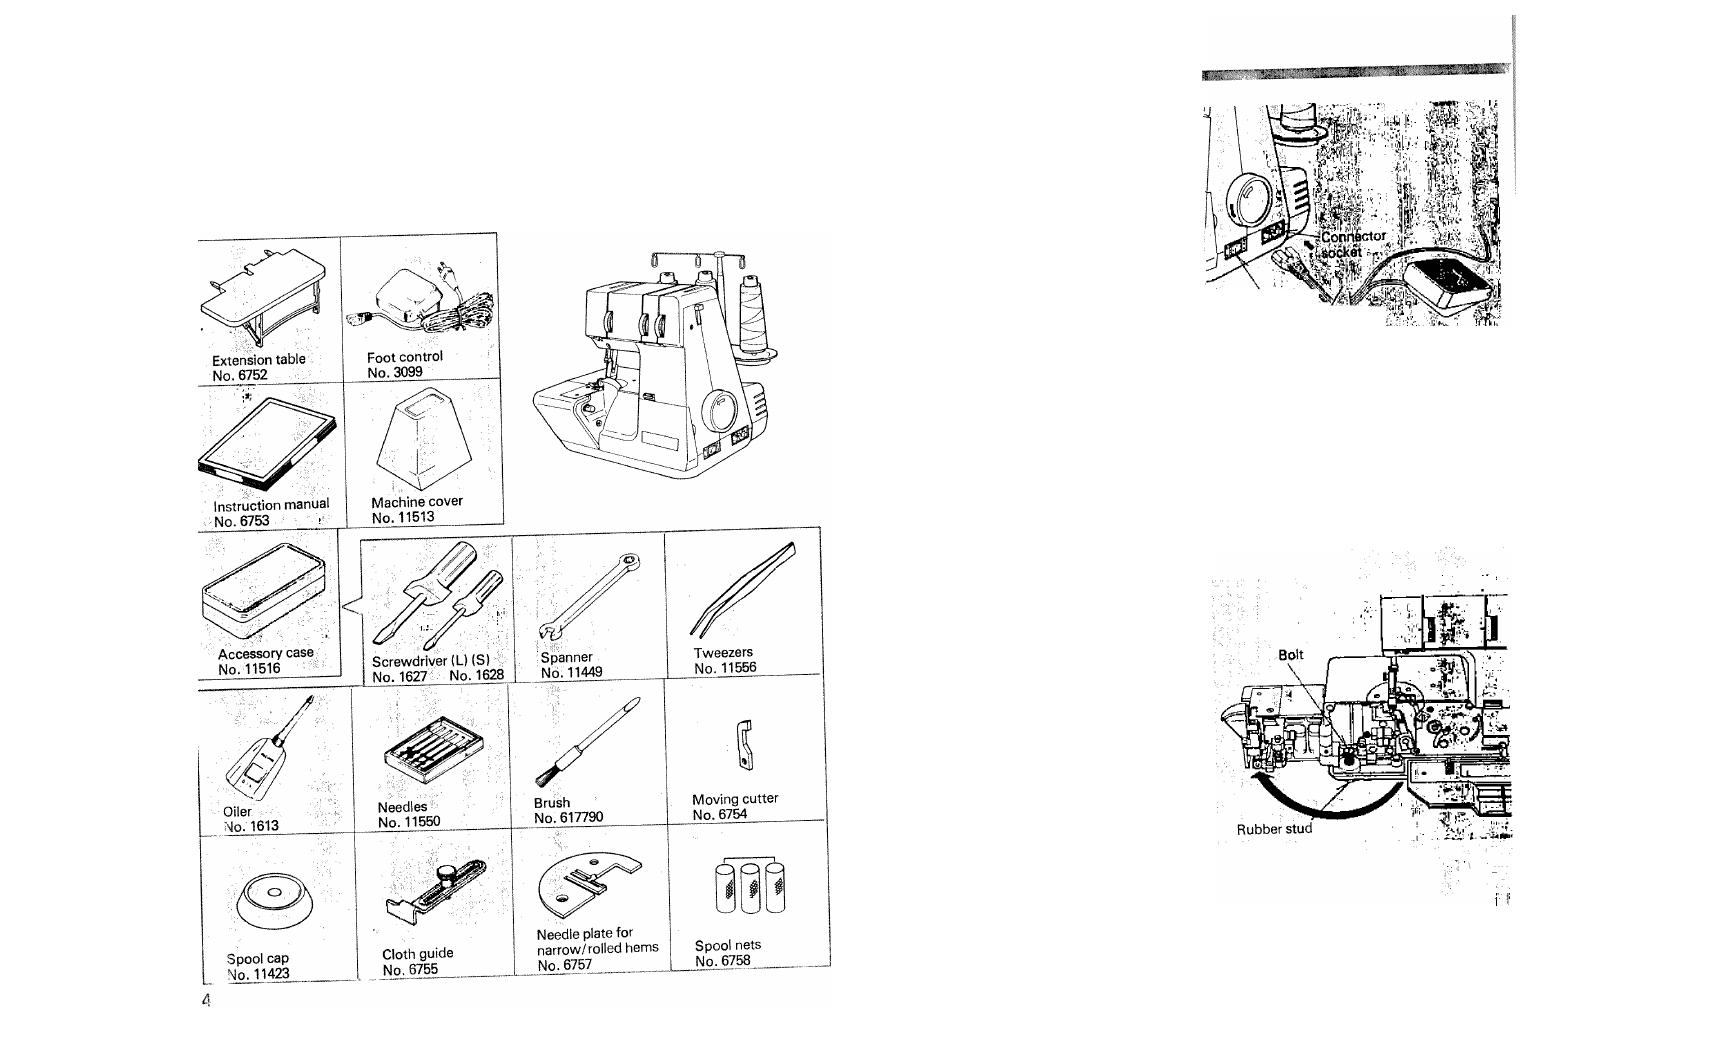
CCESSORY
1 parts listed may be obtained from your
¡arest dealer.
hen ordering, please give;
1. Part number and description.
2.
The model and serial number of your
machine, which you will find on the
identification plate, at the back.
SETTING UP YOUR MACHINE
2
.
Set your sewing machine on a sturdy, fiat
surface.
Your sewing machine has been thoroughly
oiled at the factory. Be sure to wipe off
the needle plate area and bed plate
carefully before sewing a garment. It is
wise to practice on a scrap of fabric so
any surplus oil is absorbed.
3. FOOT CONTROL
Push foot control plug into the connector
socket at the bottom right-hand side of
the machine.
4. POWER/LIGHT SWITCH
Your machine will not operate unless the
power/light switch is turned on. This
same switch controls both the machine
power and sewing light. When leaving
your machine unattended, the machine
MUST be switched off or the plug
removed from the socket-outlet.
When servicing the sewing machine, or
when
removing
covers
or
changing
lamps, the machine MUST be discon
nected from the supply by removing the
plug from the socket-outlet.
5. ADJUSTING MACHINE BALANCE
In order that you may be able to
compensate for any uneveness on your
working surface, the machine is fitted
with an adjustable rubber stud.
(1) Push release lever towards you to
open side cover.
(2) Adjust the height of the rubber stud
by turning the bolt.
In order to withdraw the rubber stud,
turn the bolt counter-clockwise.
Power/light
switch' : ■ ',jj
;i fi. ■ 'i?