Caring for your machine, Replacement of moving cutter, Changing light bulb – SINGER WSL216 User Manual
Page 17: Cleaning and oiling
Attention! The text in this document has been recognized automatically. To view the original document, you can use the "Original mode".
4. CARING FOR YOUR MACHINE
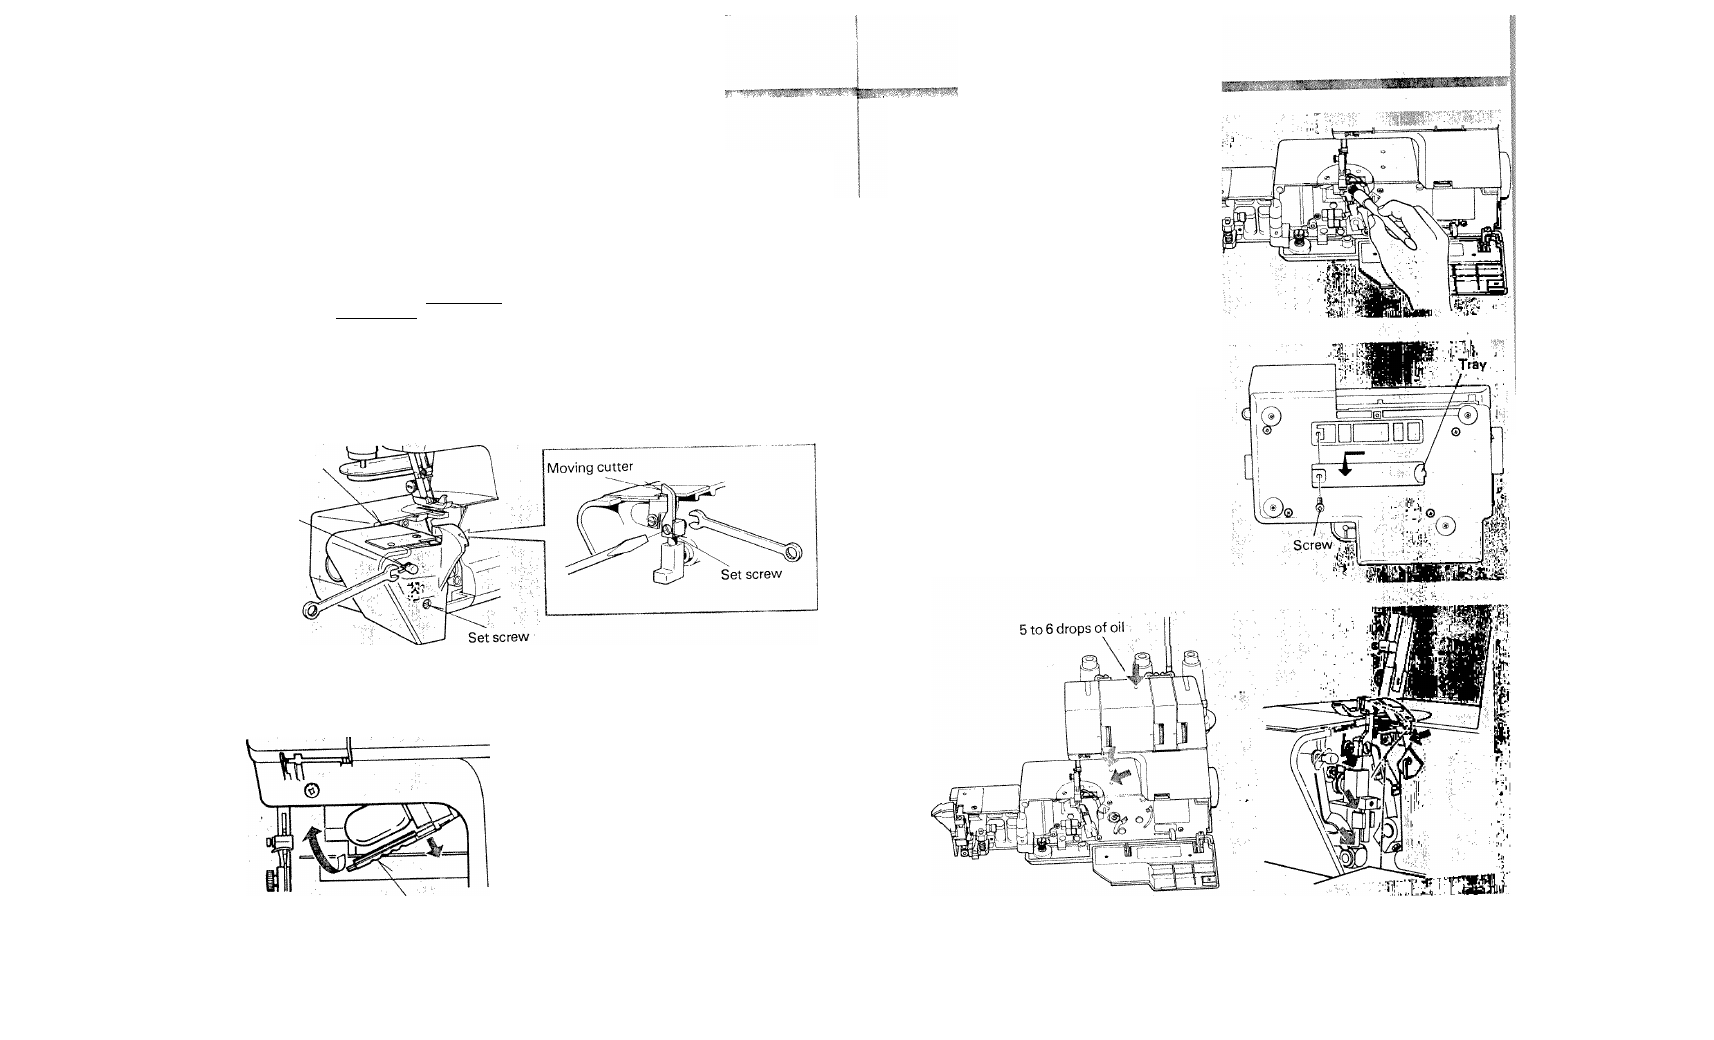
REPLACEMENT OF MOVING CUTTER
Should it become necessary to replace
moving cutter, due to it becoming blunt,
apply the following procedure. A spare cutter
will be found in your accessories.
NOTE: You should not need to replace fixed
cutter, which is made of a special
hard alloy material.
FIRST REMOVE THE POWER PLUG FROM
THF SUPPLY^SOCKET^OUTLET.
Open side cover. Loosen set screw for
protection cover with screwdriver in the
accessories. Loosen release lever with
spanner in the accessories, and take out
protection cover.
While keeping set screw of moving cutter
from rotating with screwdriver, loosen
nut on the other side with spanner, and
take out moving cutter.
Set the replacement cutter in positon,
and secure it with screw and nut.
Assemble protection cover in the reverse
way as described in step 1 above.
Side cover
Release lever
Light cover
CHANGING LIGHT BULB
The sewing light is located under the
machine arm, as shown, and illuminates the
sewing area only.
DISCONNECT
MACHINE
FROM
THE
POWER SUPPLY BY REMOVING PLUG
FROM SOCKET-OUTLET.
DO NOT REPLACE BULB OF MORE THAN
15 WATTS MAX.
To change bulb, pull down light cover,
remove old bulb by unscrewing. Replace
with new bulb.
CLEANING AND OILING
To keep you machine running smoothly, it is
necessary to keep it clean and lubricated at
ail times.
FIRST
DISCONNECT
MACHINE
FROM
POWER SUPPLY BY REMOVING PLUG
FROM SOCKET-OUTLET.
1. Open both front and side covers. Using
the brush provided, remove dust and lint
that have accumulated around the whole
exposed area.
2. Lay the machine on its back and take off
the lint tray by removing the single
securing screw.
Using the brush provided, remove any
dust and lint that may have accumulated
in the tray and bottom of the machine.
Replace the tray and secure by re-tighten-
ing the screw.
3.
Apply a few drops of oil to the points
indicated by arrows.
ALWAYS
USE
A
GOOD
QUALITY
SEWING MACHINE OIL.
4. Wipe off any stains with a soft cloth.
30