D/2"), Sewing a seam, Keeping the seam straight – SINGER 4314 User Manual
Page 19
Attention! The text in this document has been recognized automatically. To view the original document, you can use the "Original mode".
sewing a seam
•
Needle Position:
• Stitch Width: ;-i-'''AAAA
; 0 : t 2
3
4
• Stitch Length: To suit fabric
• General Purpose Needle Plate
• General Purpose Foot
1.
Raise
presser
foot.
Pull
thread
back
under
presser foot leaving at least 10 cm (4 inches)
of thread.
2.
Position
needle
approximately
1.2
cm
( ’ / 2
inch)
from
fabric
edge.
Then
lower
pres
ser
foot
and
backstitch
almost
to
the
edge
of
the
fabric
for
reinforcement
by
stitching
in
reverse
direction.
For
additional
informa
tion
on
reverse
stitching
refer
to
page
16.
Stitch
forward
to
end
of
seam
and
stop
machine
before
the
end
of
stitching
line.
(Do not sew beyond edge of fabric).
3.
Raise needle by turning hand wheel
toward
you.
Press
reverse
stitch
push
button
and
back stitch 1.2 cm (V
2
ipch) to reinforce end
of stitching.
4.
Raise needle by turning hand wheel
toward
you.
Raise
foot
and
remove
fabric
by
draw
ing it to the back and to the left. Cut threads
on thread cutter at rear of presser bar.
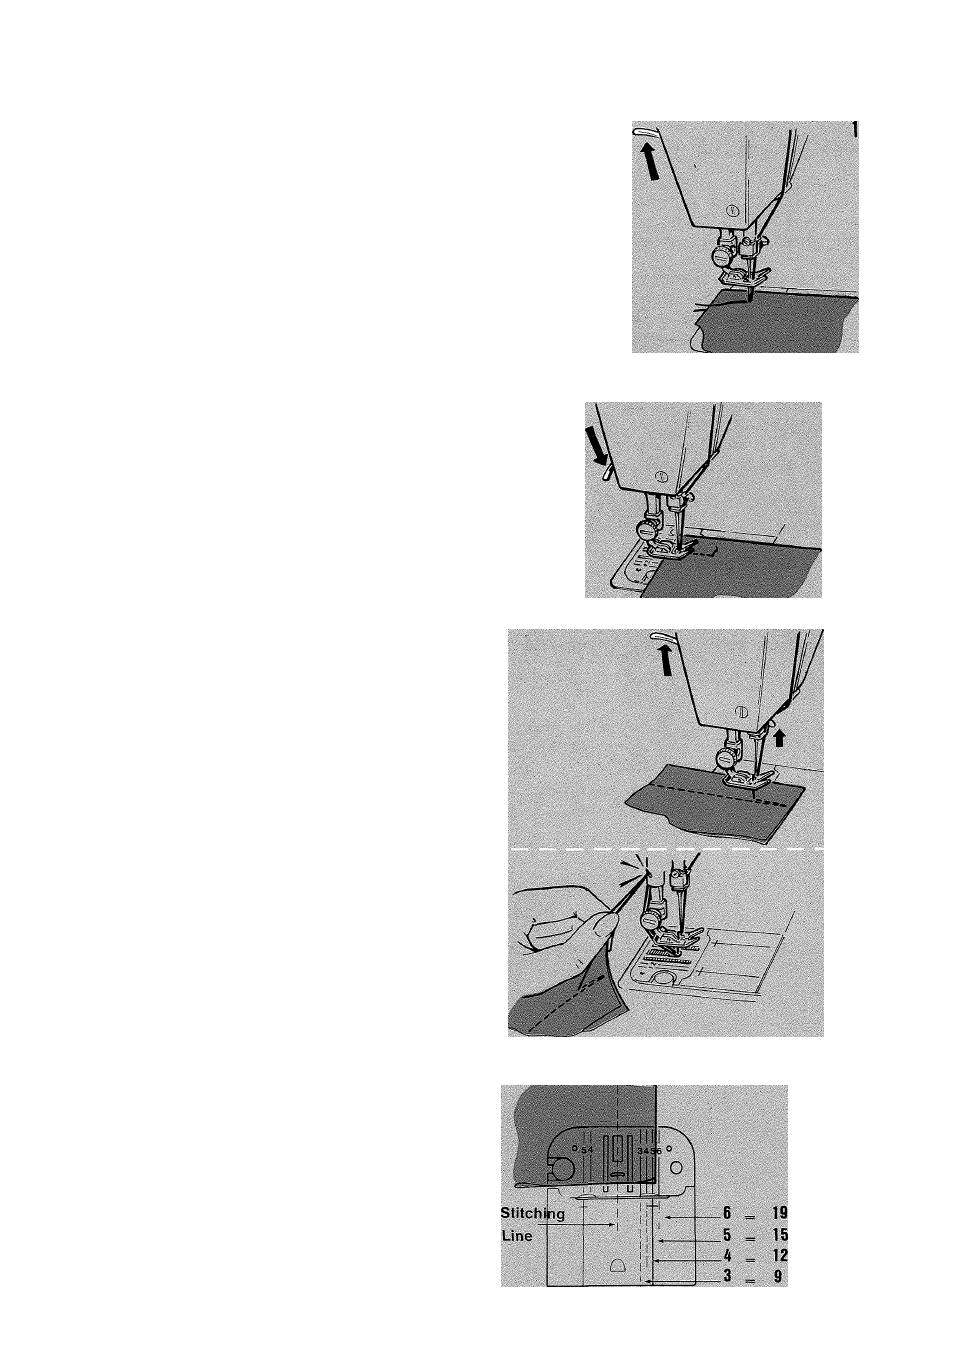
KEEPING THE SEAM STRAIGHT
To
keep
the
seam
straight,
use
one
of
the
numbered
guidelines
on
the
needle
plate.
The
dimensions
they
represent
are
shown
in
the
illustration.
CAUTION: Because of the up and down mo
vement of the needle, you must work care
fully and watch the sewing area when operat
ing the machine.
(3/4")
(5/8")
d/2")
(3/8")
17