Trial sewing – SINGER W1624 User Manual
Page 12
Attention! The text in this document has been recognized automatically. To view the original document, you can use the "Original mode".
°
1
D -
.
J
V
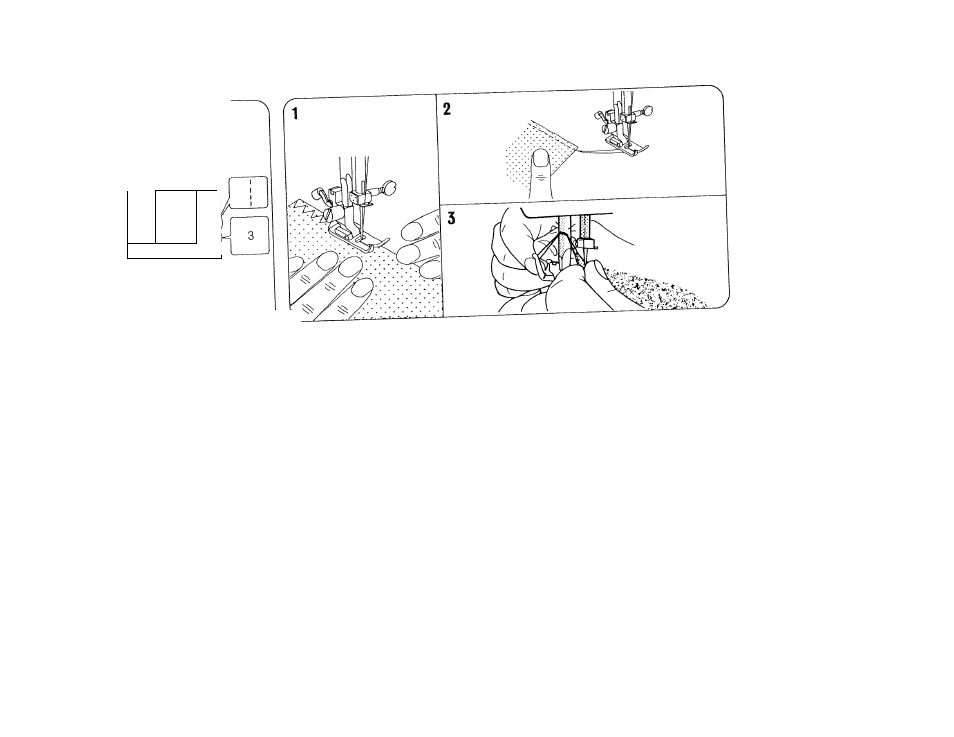
TRIAL SEWING
I
now
that, you have finished the
first steps (page 1-7). you are familiar
with the controls on your machine
and \with the accessories provided
lior the machine you are ready to
start to sew with your new sewing
Imachine.
- Let's try
to
sew straight stitch. -
|l. Make sure your machine is set
I
completely as illustrated.
?2. Pattern selection dial to { | )■
3. Upper thread tension dial to 4.
4. Place fabric under the presser
foot.
4= Fabric should be placed under
the presser foot with the bulk of
the material to the left of the
needle and the right edge of the
material placed on the appropri
ate seam allowance.
5. Lower presser foot lifter.
6. Press foot controller lightly and
commence forward sewing guid
ing the fabric by hand as it is fed.
Never push or pull the material.
*
The more you press the foot
controller, the faster the machine
runs.
7. Draw out fabric to left when sew
ing is finished.
*
Always finish sewing each seam
with the needle at its highest
position.
^ ^
,
* Leave at least '15cm (6") of thread
behind the needle so that :t will
not be drawn out of the eye of
the needle when next sewing.
8. Cut threads with thread cutter
behind the presser bar.
-
8
-