Needle position, To remove needle(s), To insert needles(s) – SINGER 14T970C User Manual
Page 12: Howto remove and insert needles
Attention! The text in this document has been recognized automatically. To view the original document, you can use the "Original mode".
8. HOWTO REMOVE AND INSERT NEEDLES
Needle Position
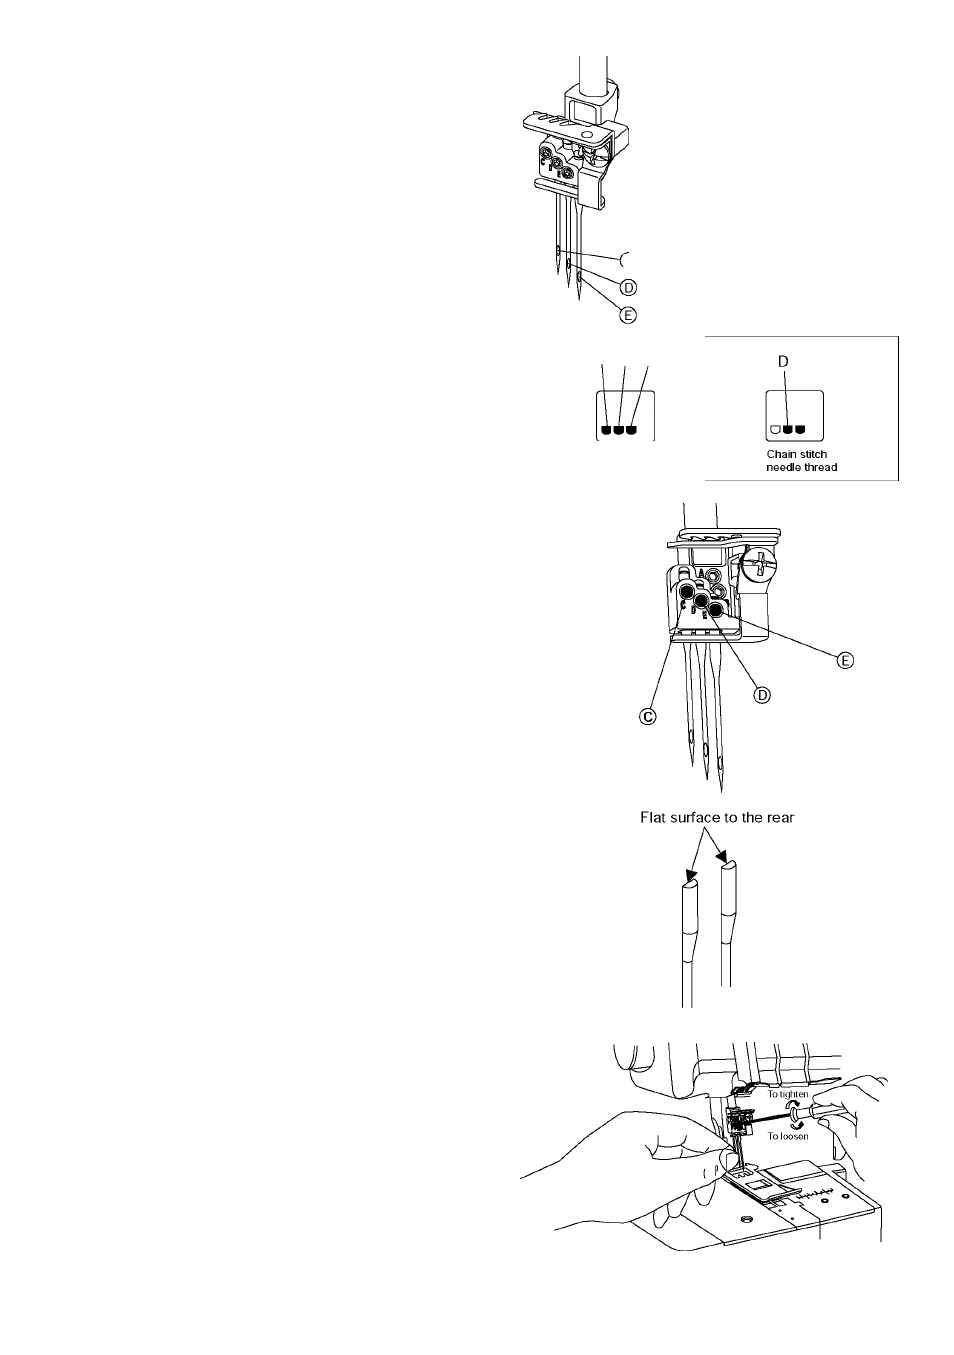
• With this machines, three needies can be inserted to
the needie clamp as shown in the drawing.
• The Instruction Book refers to different needie positions
by iliustrating the needle clamp at right.
Note: When all cover stitch needles are inserted,the left
needle will be slightly higher than the others.
To Remove Needle(s)
A
Caution:
Be sure to disconnect the machine from the
electric outlet before removing needle(s).
• Turn the hand wheel toward you until the needles are at
their highest position.
• Place a thick piece of fabric [such as felt] under the
presser foot. Lower the needles halfway into the fabric.
• Loosen, but do not remove the needle set screws
with the small alien screwdriver. Hold the needles with
your fingers and raise the needle bar. The needles will
remain in the fabric.
C. Cover stitch left needle
D. Cover stitch middle needle
E. Cover stitch right needle
Attention:
After removing the specific needle which is not currently to
be used for sewing, remember to fasten the set screw in
the screw hole of the needle clamp and to Just fasten tight
into the hole. Please do not over-tighten the screw into the
hole or the needle clamp will be damaged.
To Insert Needles(s)
• Hold the needle with the flat surface to the back.
• Insert the needle into the needle socket as far as it
will go.
• When inserting a needle, if you first lower it down
into the hole in the throat plate it will line up with the
needle socket. Then direct it upwards
This machine uses SINGER 2022 needles.
Do not use Standard Household Needles.
C
Cover stitch right needle
Cover stitch middle needle-|—I
/ Chain stitch needle
Cover stitch left needle -
V o
C D E
Left, middle and right cover
stitch needle thread
11