Ungerie seams, Method 1, Method 2 – SINGER 1021 User Manual
Page 35: Seam finishes
Attention! The text in this document has been recognized automatically. To view the original document, you can use the "Original mode".
UNGERIE SEAMS
To make seams in lingerie durable and
flexible, use a combination of straight and
zig-zag stitching.
Method 1
For 1.5 cm bias seam in woven fabric:
•
Straight-stitch the seam (with stitch
width at i ) on wrong side of fabric.
•
Press both seam allowances in the
same direction. Then, from the right
side, top-stitch with narrow zig-zag
stitching,
letting
needle
alternately
enter seam line and seam thickness.
Method 2
For narrow seams in nylon tricot:
• Cut fabric for 1.5 cm seam allowance.
• Straight-stitch seam line on wrong side
of fabric. Then place a line of medium
wide, open zig-zag stitching close to
the straight stitching.
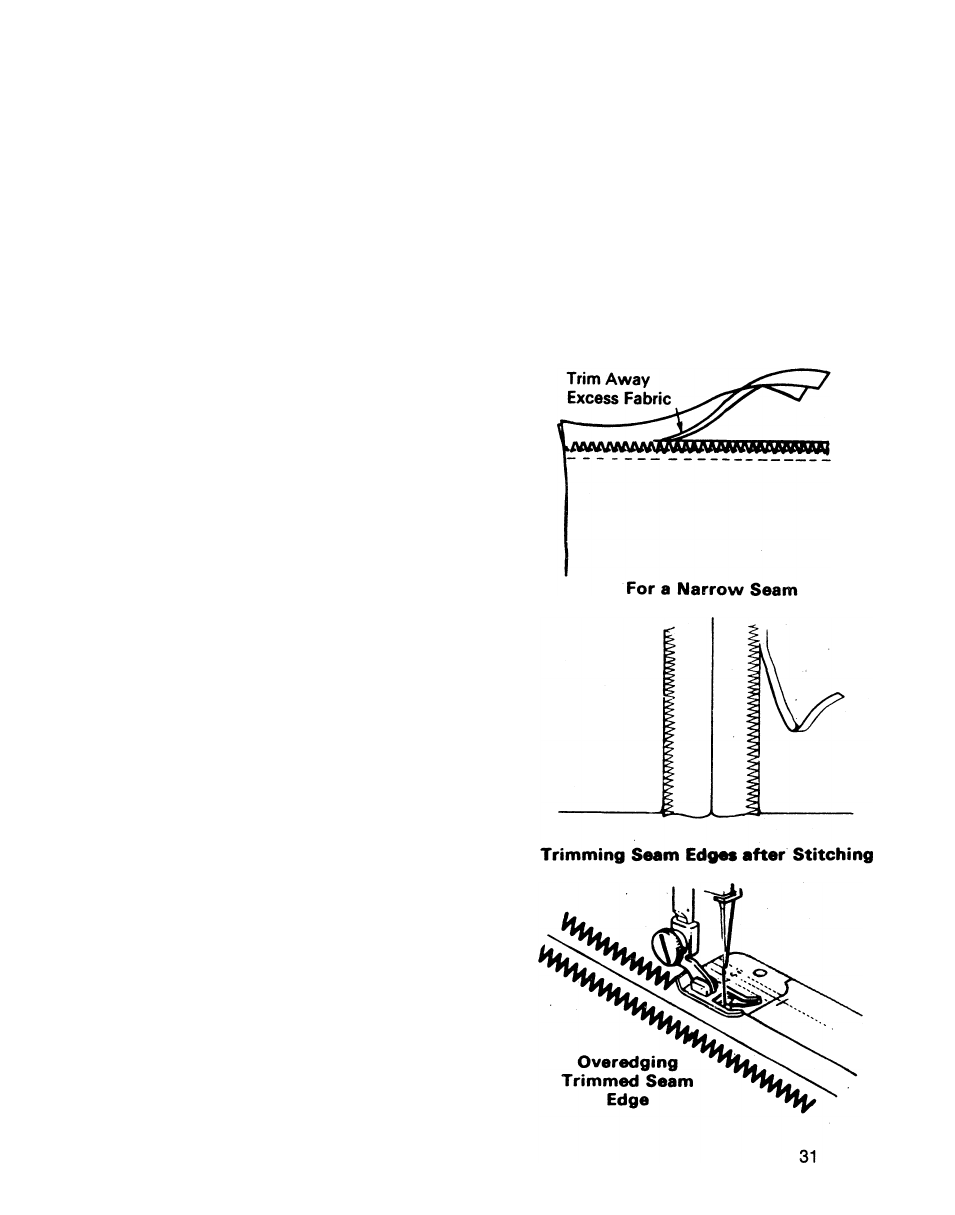
SEAM FINISHES
• Needle Position: JL
• Stitch Width:
\ or %
(maximum)
• Stitch Length: 1,2 to 3 mm depending on
choice of stitch and fabric
• General Purpose Needle Plate and Foot
Seam edges support the garment and
should be given a durable finish if the
fabric is likely to ravel. There are two
methods of finishing seams in such
fabfics: trimming seam edge or over
edging. Make a test sample first to deter
mine which method best suits your fabric.
For a 1.5 cm Seam