Attaching snap-in feed cover, Attaching the seam guide – SINGER 5102 User Manual
Page 7
Attention! The text in this document has been recognized automatically. To view the original document, you can use the "Original mode".
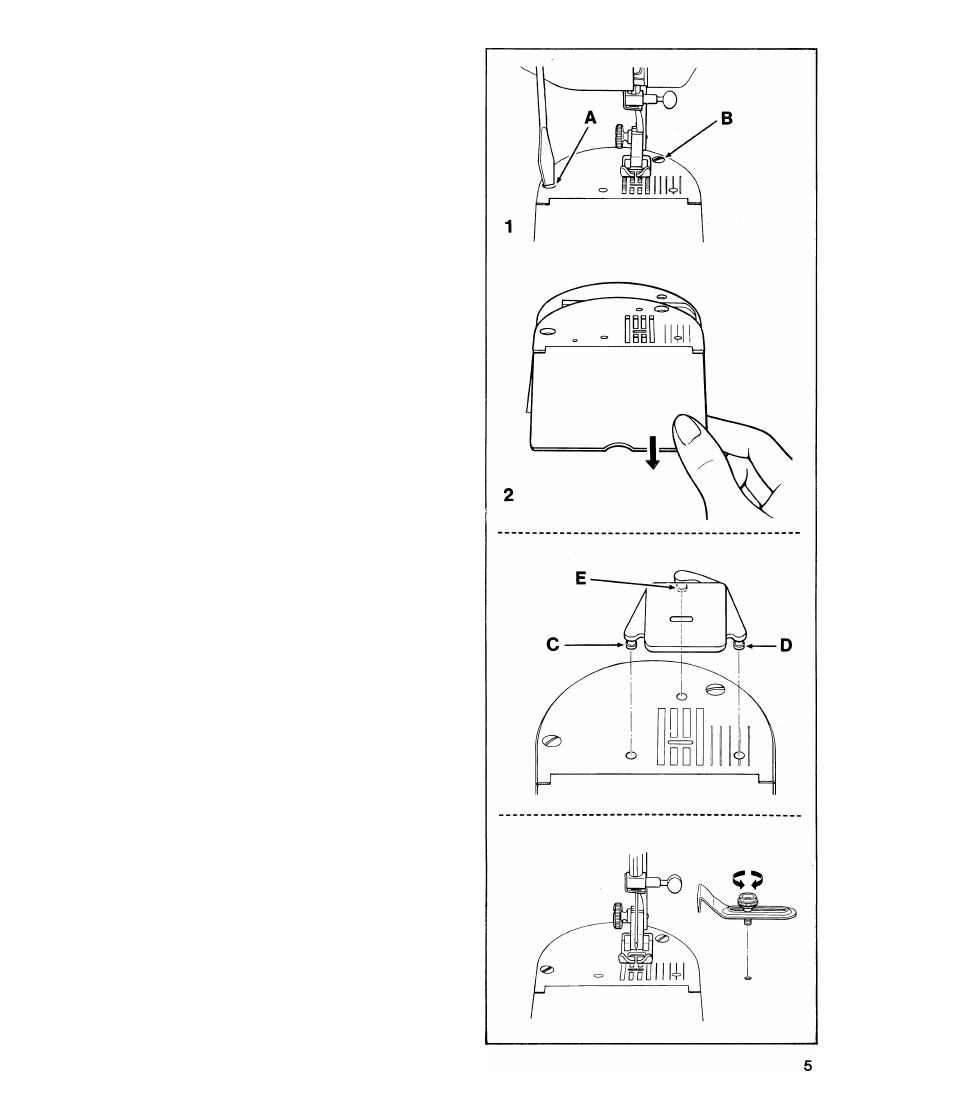
REMOVING AND REPLACING NEEDLE
PLATE AND COVER PLATE
• Raise needle to highest position and raise
presser foot.
1. Remove
screws
A and B using a large
screv\/drlver.
2. Remove the needle plate and cover plate by
simply guiding it toward you.
To replace needle plate and cover plate,
guide needle plate into position under the
presser foot. Replace screws A and B using
a large screwdriver and tighten securely.
ATTACHING SNAP-IN FEED COVER
• Raise needle to highest position by turning
handwheel
toward you.
• Raise presser foot.
• Slide snap-in feed cover away from you over
needle plate until points C and D are posi
tioned directly over holes In needle plate as
illustrated. Snap in point C. Then push point
D toward point C until it snaps into place.
Push down on point E until it also snaps Into
place.
• To remove, lift up edges of feed cover.
ATTACHING THE SEAM GUIDE
Place screw in either hole to the right of the
needle plate; line up straight edge of guide with
the needle plate guideline for desired seam
width, and tighten screw.