Adjusting bobbin-thread tension – SINGER 5102 User Manual
Page 15
Attention! The text in this document has been recognized automatically. To view the original document, you can use the "Original mode".
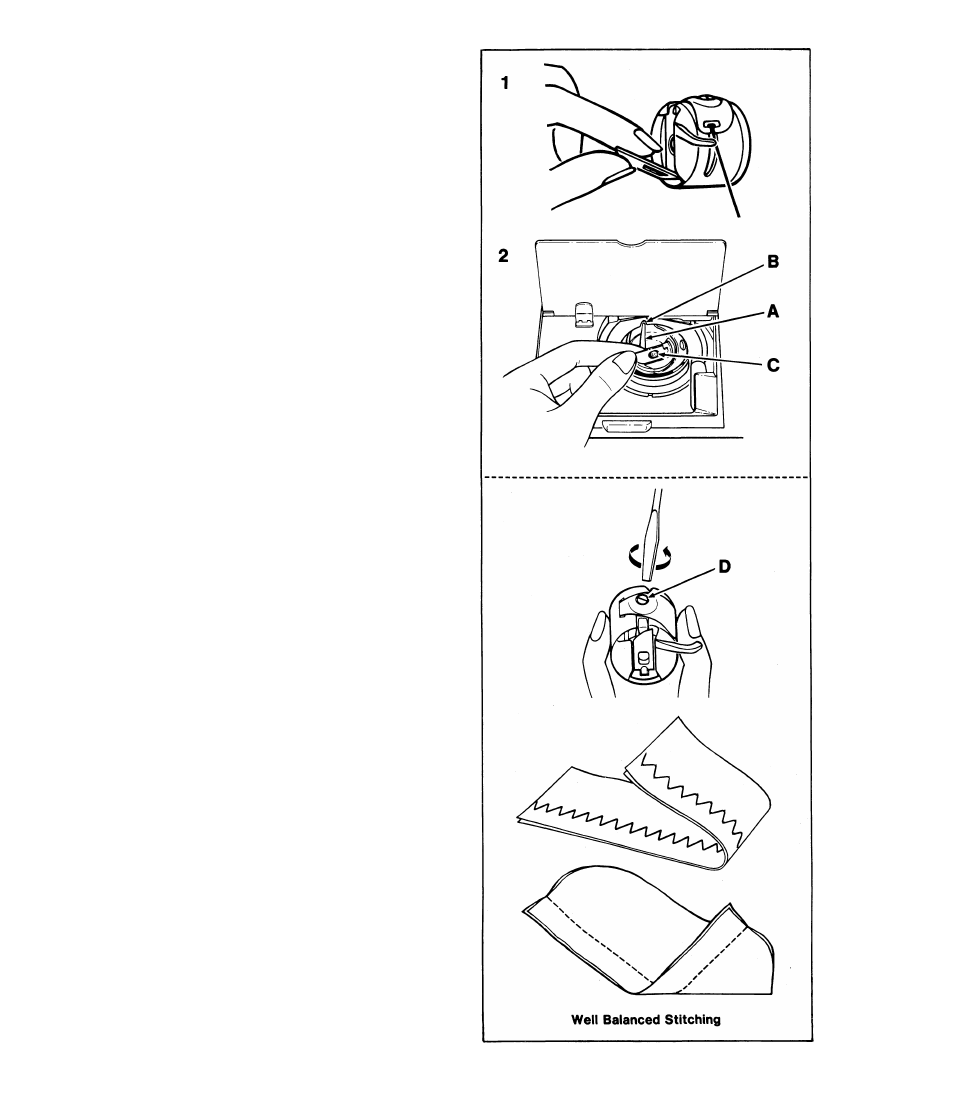
REPLACING THE BOBBIN CASE
1. Hold bobbin case by latch, with about 7.5cm
(3 inches) of thread leading off top of case.
2. Align protruding finger A with slot B and
slide case on to stud C.
• Release the latch and push case until it
clicks into place. Allow 7.5cm (3 inches) of
thread to hang free from bobbin case.
• Close cover plate. Be sure thread does not
get caught when cover plate is closed.
ADJUSTING BOBBIN-THREAD TENSION
The bobbin-thread tension has been set at the
factory for most types of stitching. You may
wish to adjust the bobbin-thread tension when
straight stitching on fine fabrics or to balance
an open zig-zag stitch. Bobbin and needle
threads lock at the corner of each stitch when a
zig-zag stitch is balanced. To adjust the bob-
bin-thread tension, follow the procedure below
using two layers of scrap fabric.
• Raise the presser foot.
• Raise needle to highest position by turning
the hand wheel toward you.
• Open cover plate and remove the bobbin
case as instructed on page 12.
• Slowly turn screw D to the left, using the
small screwdriver in your accessory box,
until desired stitch appearance is reached.
• When stitching is completed, turn screw D to
the right, back to original position, for all
other sewing.
13