Turn-around buttonholes – SINGER W1260 User Manual
Page 33
Attention! The text in this document has been recognized automatically. To view the original document, you can use the "Original mode".
TURN-AROUND BUTTONHOLES
It is possiole to make small and dainty
buttonholes if you desire or repair damaged
buttonholes. This entails a slight shifting of
•he cloth but with some practice, good
uttonholes can be achieved.
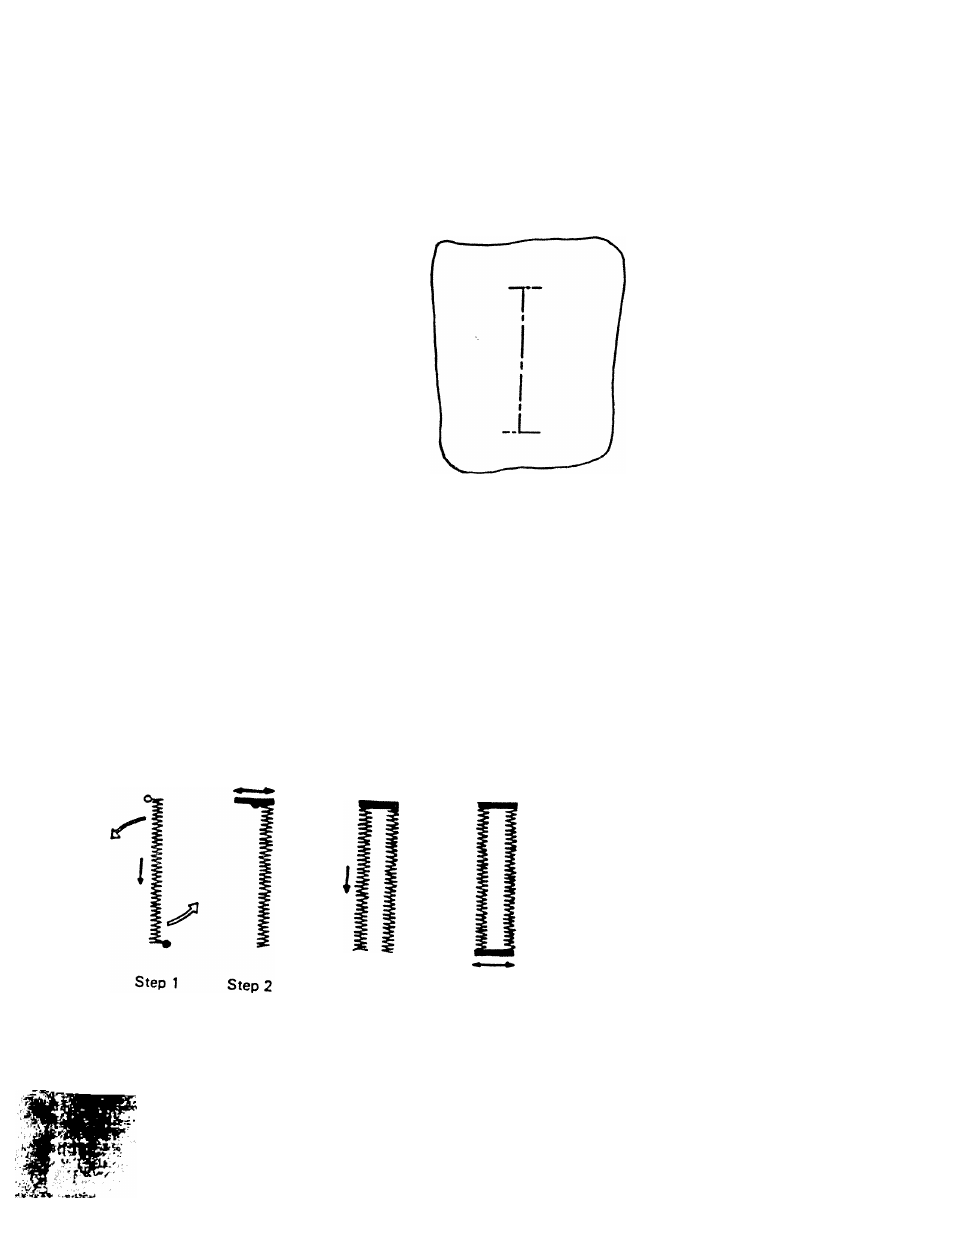
1
. Mark the length of the buttonhole on the
cloth as shown in figure.
2. Set the needle position to the left and
your stitch length dial near "
7
/
4
" or the
density your desire.
3.
Choose the desired width of your botton-
hola
Example: if you want a buttonhole with a
width of # 3 setting on the stitch width
dial, divide this setting in half, or
1
%
4. Start at your marked position, sew down
on the left side of buttonhole to the other
end of marking. Leave the needle in the
cloth at the right side of stitches and
rotate your cloth. Lift the presser foot and
slide the bottom of the foot back to the
front.
5
.
Lower the foot and raise the needle.
Reset
your stitch width dial to bartack, in
this case the # 3 setting, set your feed* to
ZX" sew several
stitches.
6
. Raise the needle, raise feed to,
AA
reset
the zigzag width to the initial setting, in
this case #114 and sew the other side of
buttonhole to your mark, then repeat your
bartack (
5
).
7.
Lock threads by stitching a few stitches at
0 witdh. Cut buttonhole as indicated
previously.
When using this method over a buttonhole
•vhich has already been slit or damaged, be
sure to hold the buttonhole open and allow
the needle to go off the edge of the fabric.
Step 4 is all that may be needed to repair
damaged buttonholes.
Pattern: A/V\
Length:
Width:
Dog: AA.
tt
Pressure: Normal
foot: Bunonhole
Needle Position: 1
Step 3
Step 4
31