SINGER 6104 User Manual
Page 21
Attention! The text in this document has been recognized automatically. To view the original document, you can use the "Original mode".
applications
DARNING
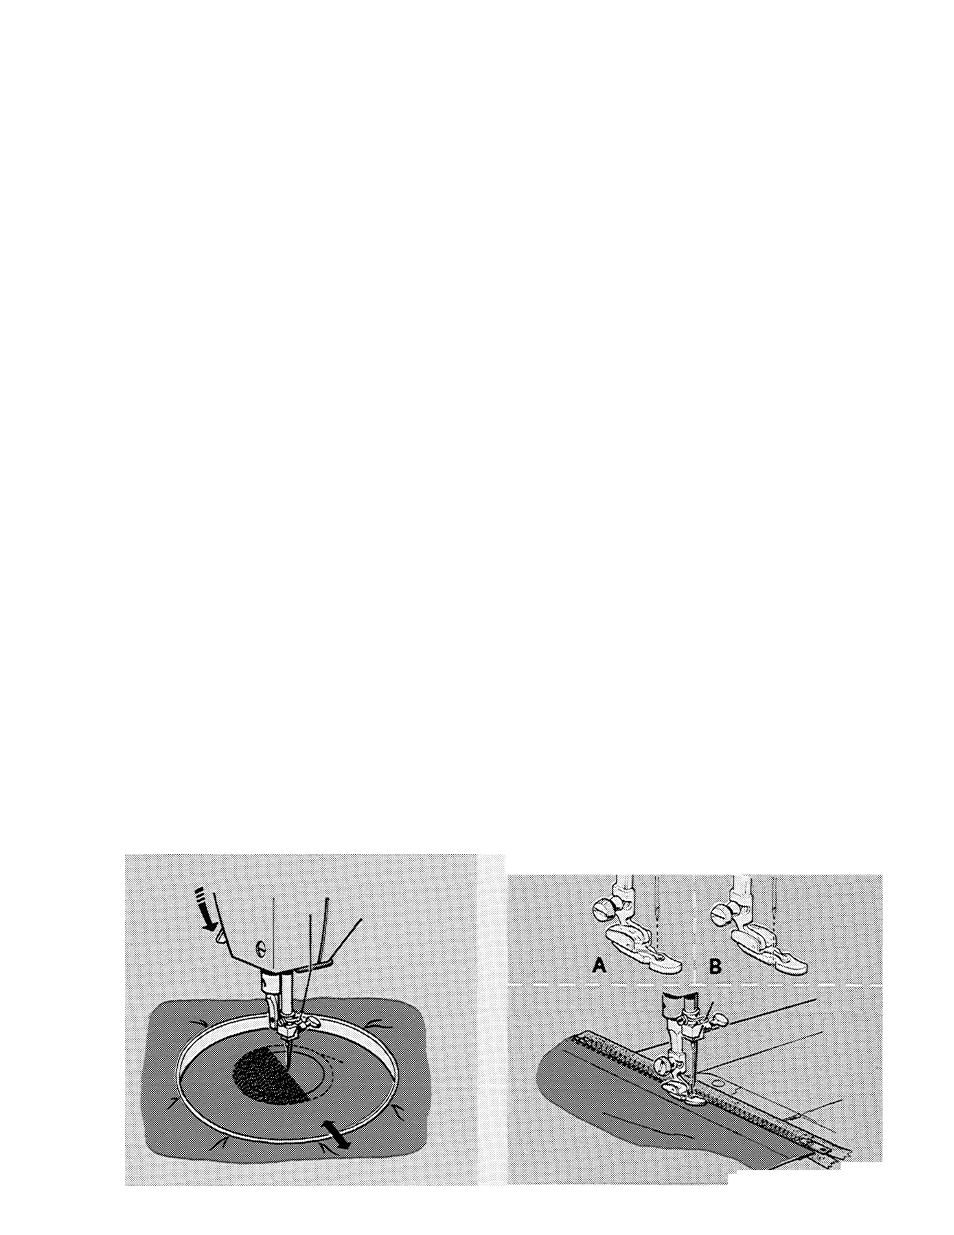
With Embroidery Hoop
♦ Needle Position:
-L
:X-
JL
♦ Stitch Width:
♦ Stitch Length: 0
♦ Snap-in Feed Cover
♦ No Presser Foot or Presser Foot Shank
♦ Presser Bar: Lowered
♦ Insert snap-in feed cover plate as instruc
ted on page 5,
♦ Trim ragged edges from area to be darned
and centre worn section in embroidery hoop
designed for machine use.
♦ Position hoop under the needle
and lower
presser bar to engage tension.
Hold needle
thread loosely with left hand, turn hand
wheel over and draw bobbin
thread
up
through fabric. Hold both thread ends and
lower needle into fabric. Take a few stitches
to secure.
Snip oft
thread
ends close to fabric.
♦ Outline area to be darned with straight
stitches for reinforcement. '
♦ Stitch across opening, moving hoop under
needle at a slight angle from lower left to
upper right. Keep lines of stitching closely
spaced and even in length. When opening
Is filled, cover area with crosswise lines of
stitching.
This
m ethod
of controlling fabric movement
with an embroidery hoop should be done with
the extension bed on the machine and may be
used to do embroidering or monogramming.
ZIPPER INSERTION
How the zipper 1$ inserted will depend on the
type of the garment and the location of the
zipper. With the adjustable zipper foot, you
will find it easy to sew an even line of stitch
ing close to the zipper.
The zipper foot can be used either to the left
or
right
of the needle, depending on where
the bulk of the garment is placed
♦ Needle Position:
-X
♦ Stitch Width: ;ji
♦ Stitch Length: To suit fabric
♦ General Purpose .Needle Plate
♦ Zipper Foot
Adjusting the Zipper Foot
When the zipper is to the right of the needle.
♦ Before attaching the
zipper
foot slide the
adjusting spacer to the left (illustration
A).
♦ Snap on the zipper foot as Instructed on
page 4.
♦ Check the position of the foot by lowering
the needle into the side notch of the foot,
making sure it clears the foot
When zipper is to the
left
of the needle, ad
just the foot to the
right
of the needle in the
same way (illustration B).