SINGER 95-100 User Manual
Page 23
Attention! The text in this document has been recognized automatically. To view the original document, you can use the "Original mode".
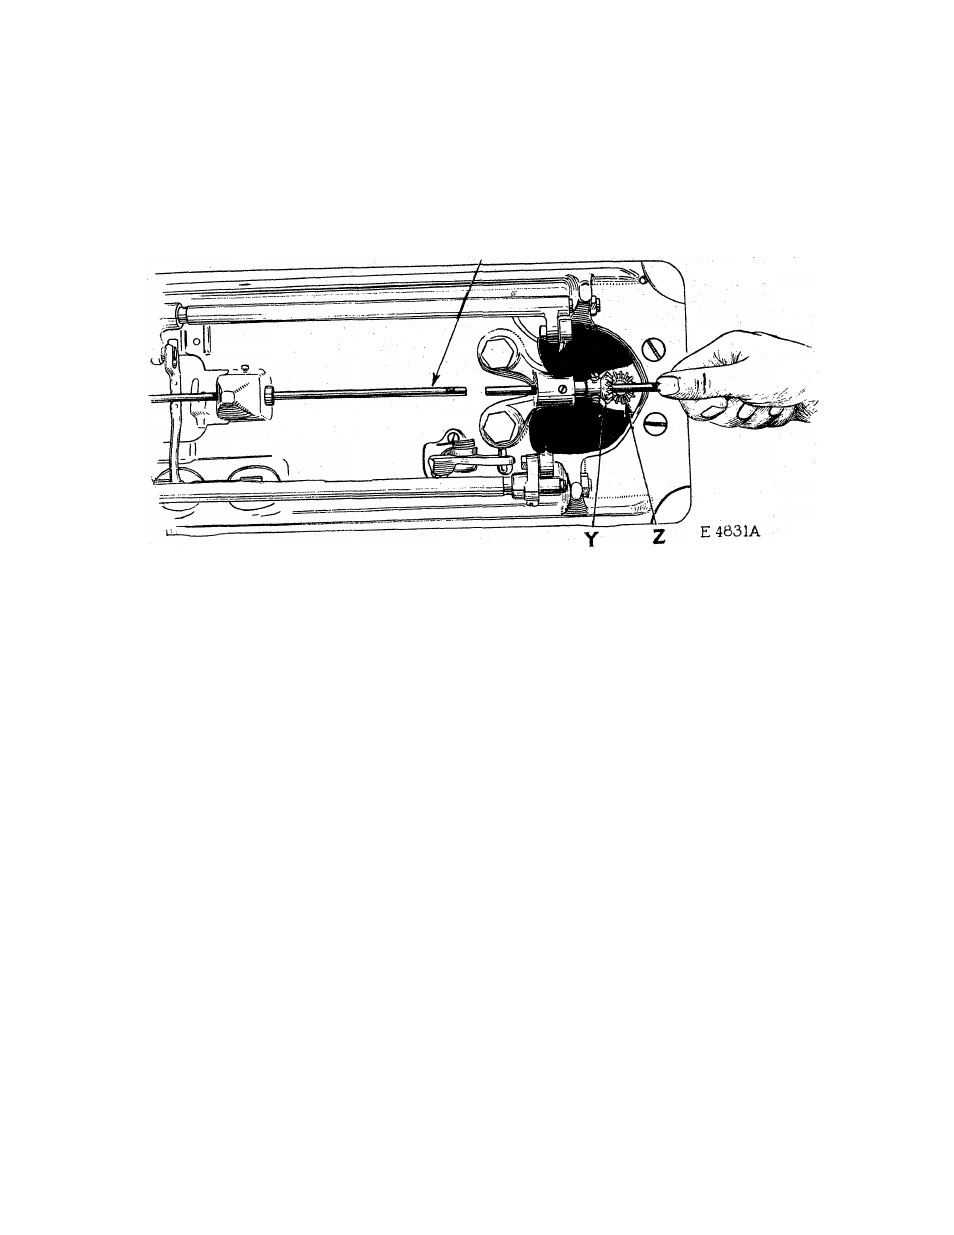
(y), from the right hand end, pushing thp old shaft out of the
gear toward the needle bar by means of the new shaft, as shown
SI ■
Fig.85. Removing and Replacing Sewing Hook Shaft
In Fig.25. By removing the old shaft In this manner, the rela
tive positions of the gears (Y and Z) will not be disturbed.
When placing the new shaft In position In the machine, see that
the flat portion near one end of the shaft Is at the right so
that one of the set screws In the gear (Y,Flg.25) will bear
against It when the gear Is fastened In position on the shaft.
The shaft should be set so that Its left end Is flush with the
front (left hand) side of the body of the sewing hook.
When the shaft Is correctly positioned, securely tighten the
two set screws In the gear (Y), making sure that one of these two
screws bears against the flat portion of the shaft.
Time the sewing hook as Instructed on pages 17 and 18.
Replace the gear case and securely fasten It In position by
means of the screw (V,Flg.24).