Making buttonholes – SINGER WS1112 User Manual
Page 16
Attention! The text in this document has been recognized automatically. To view the original document, you can use the "Original mode".
MAKING BUTTONHOLES
i-
-C
am
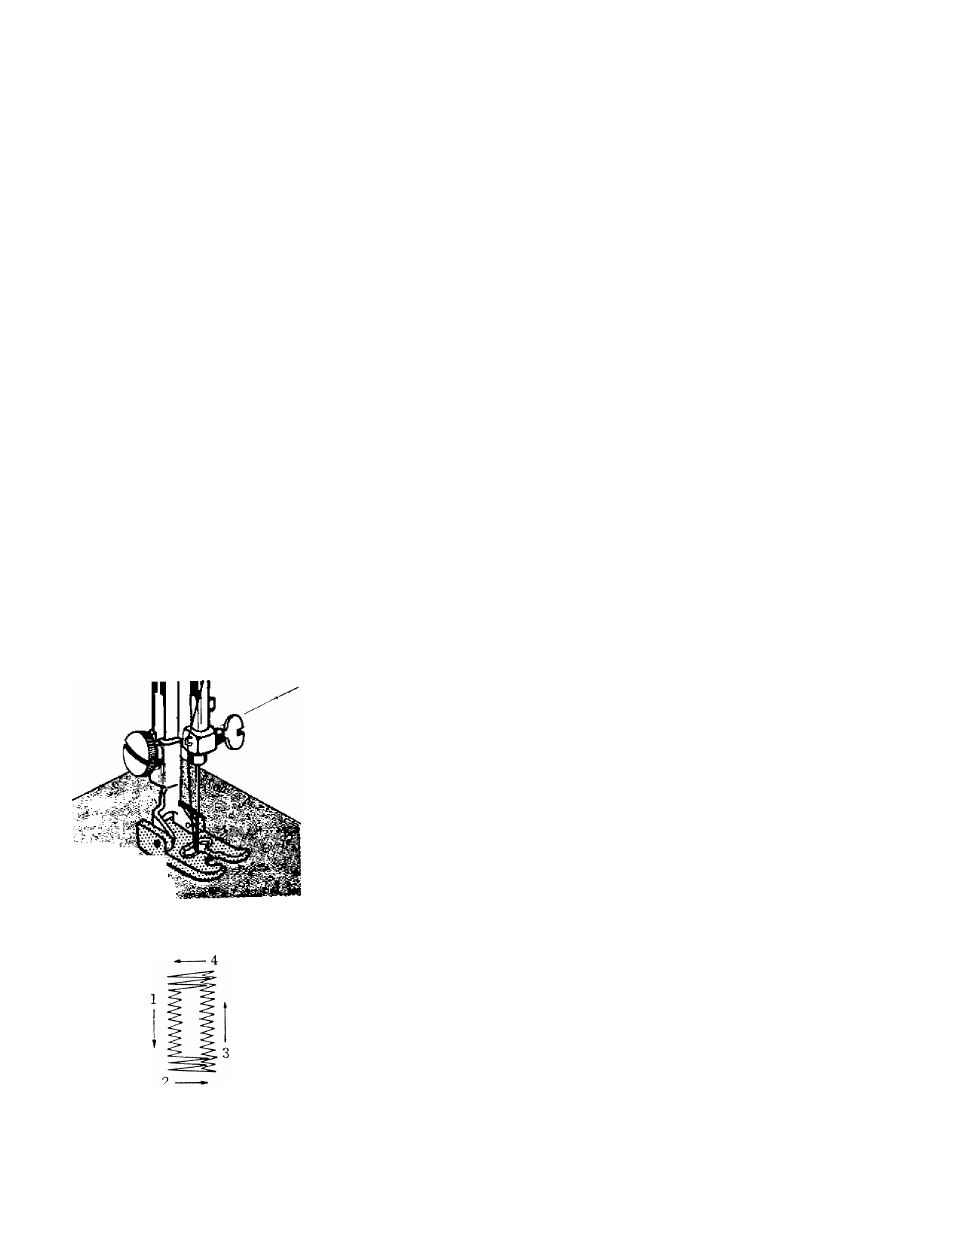
Fig. 23
4 Steps in
Making
Buttonhole
Fig. 24
A buttonhole can be made in any length within the range of
limited width.
1.
Use special purpose buttonhole foot (Fig. 23) an igzag
needle plate.
2. Mark the beginning and end of the buttonhole on fabric with a
basting line or tailor's chalk. Make one on scrap fabric followmg
directions below to be sure machine adjustments are correct.
3. Set the needle positioning lever at "L" position, and zigzag width
indicator at "0" position and stitch length indicator between
"0" and "1" position.
, , , ,
4 Turn hand wheel imtil needle is out of fabric. Turn ut on o e
control dial to No. 1 position. Sew left hand side of buttonho e.
(Forward stitching)
5. With needle out of fabric, turn dial to No. 2 position an se
4 or 5 stitches. (Bar tack)
6. Wltk «e«iU 0.1 of tho Olotl., tom di.l to No. 3 po.ltio. ood
aew right hand aide of buttonhole. (Reverae stitching)
7. With needle out of the cloth, turn dial to No. 4 position and
sew 4 or 5 stitches. (Bar tack)