Twin needle stitching – Sears 385. 17526 User Manual
Page 63
Attention! The text in this document has been recognized automatically. To view the original document, you can use the "Original mode".
Twin Needle Stitching
SECTION 3. LEARN THE STITCHES
Set the Machine
for any of these stitch
Top thread tension
control 3 to 7
[K
A: Zigzag toot
Twin needle
Stitch width
control t
tmaximum)
2 J 3^
Stitch length control
yellow stretch stitch
position or green zone
F: Satin stitch loot
Stretch Stitch
Turn off the power switch (see page jg).
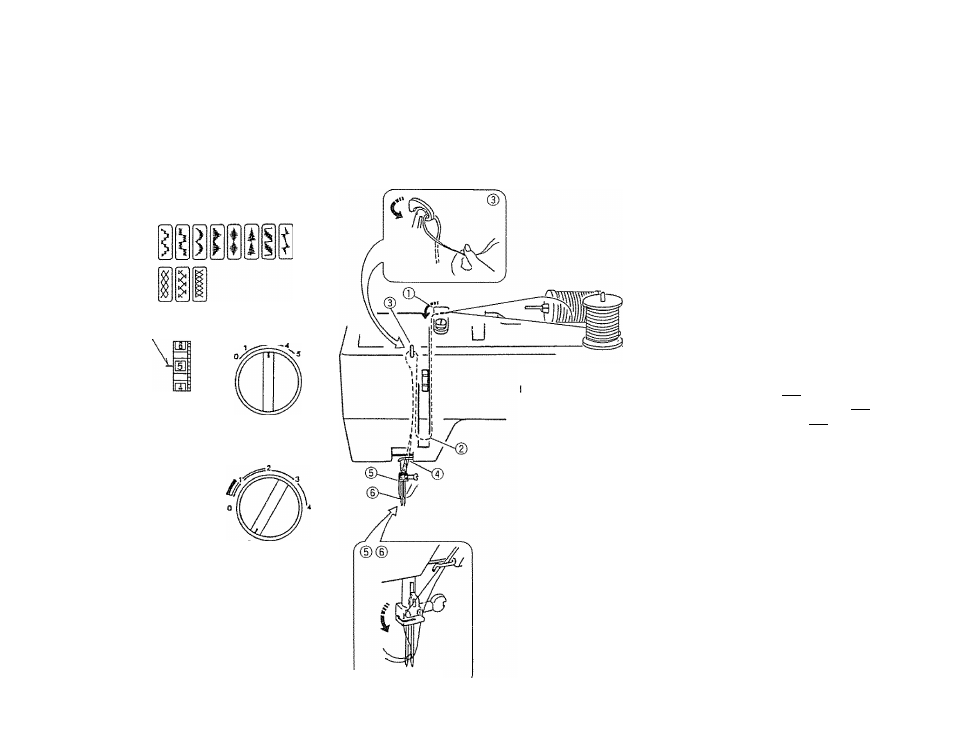
nsert the additional spool pin In the hole (see page 161.
Place the telt and the spool on the additional spool pin (see page 161.
Prepare the top thread for additional spool pin (see page 191.
Thread then is slipped into needle bar thread guide as illustration A.
Change the needle to twin needle (see page 15).
Thread needles from front to back.
NOTE; When changing the direction ot sewing, turn the hand wheel so needles are
in the position.
When sewing with twin needle do not use a stitch width which goes past the
twin needle mark (■(}■).
Twin needle is an optional item tor all models.
Illustration A
61