O embroidery, 8 embroidery – Sears 385. 17526 User Manual
Page 41
Attention! The text in this document has been recognized automatically. To view the original document, you can use the "Original mode".
SECTION 3. LEARN THE STITCHES
o Embroidery
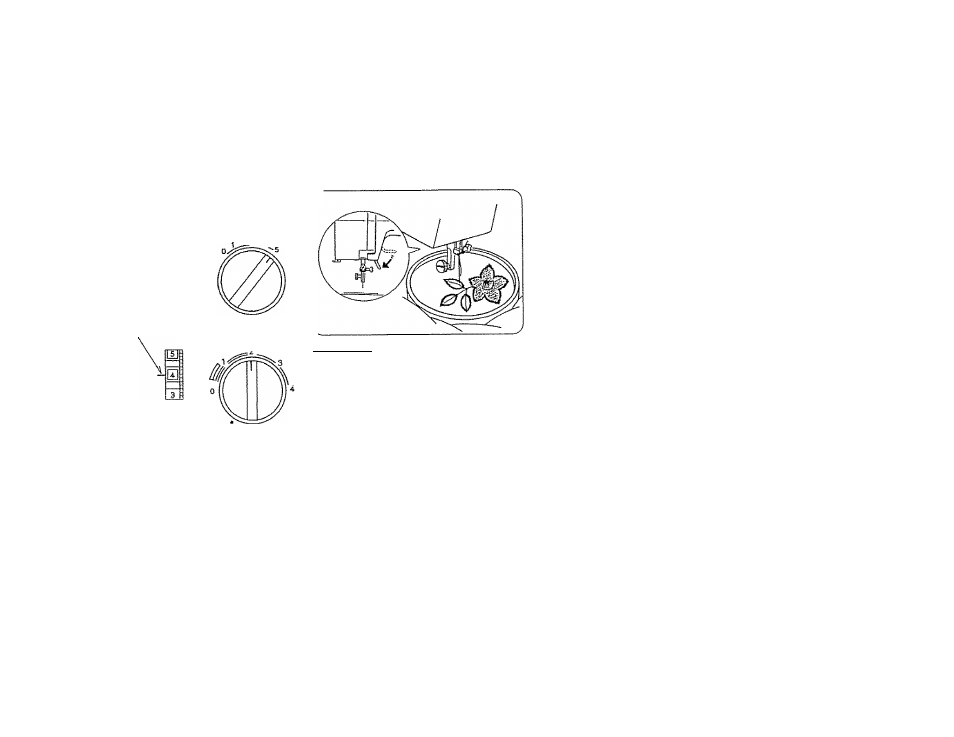
Set the Machine
r
Stitch wtdth
contro! 1 to 5
Top thread tension
corslrol 2 to 6
Stitch length control
any number (not
necessary to adjust)
Mo presser
foot
Stretch Stitch
Drop Feed lever
É
Here's How
1. Drop the feed dogs (see page 35).
2. Remove loot holder (see page H).
3. Adjust the stitch width as desired
(see page 24)-
4. Draw the design on to the fabric with
tailor's chalk.
5. Stretch the fabric between embroidery
hoops and place under the needle.
6. Lower the presser toot lever to engaged
the thread tension.
7. Holding the top thread In your left hand,
rotate the hand wheel toward you one
complete turn.
Pull the top thread to draw bobbin
thread through to the surface ot the
fabric.
8. Using a medium speed, stitch along the
marked outline, guiding the fabric
carefully by hand.
9. When finished embrodlering, raise the
feed dogs (see page 35).
An embroidery foot is an o ptional item
for all models. Available at many sears
stores.
39