Arning, Caution – Sears 10062603 User Manual
Page 5
Attention! The text in this document has been recognized automatically. To view the original document, you can use the "Original mode".
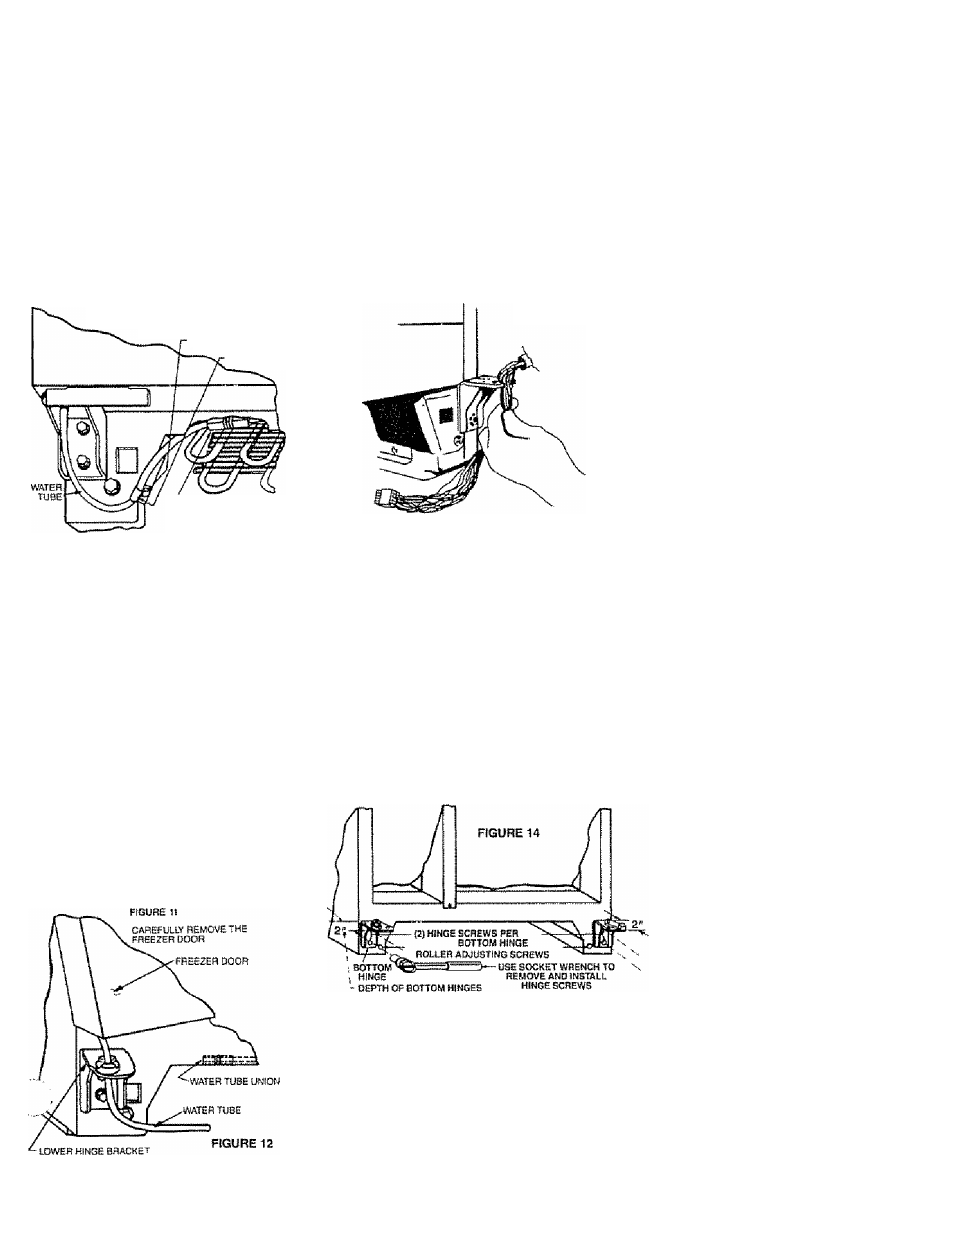
8. Disconnect freezer door
bottom
hinge
water line by disconnecting the 1/4"
0-D plastic tube union nut Slide the
comptBSsion
nut
off
the
water
tube
See Rgure 11,
TO DISCONNECT IVATEfl TU8E
REMOVE THE TUBE
CLAMP SCREW
REMOVE THE TUBE
CLAMP
14. Lift refrigerator door up to puli pin
up off the hinge.
15 Thread wires through slot in door
hinge. See Rgure 13. Hinge pin and
door closures stay attached to
the door.
FÍGURE 13
BOTTOM OP FREEZER DOOR
DISCONNECT THIS PLASTIC UNION
AND PULL THE TUBE
THROUGH THE CLAMP
FIGURE 11
9. Mark around the upper hinge
brackets with a pencil to locate them
for reassembly.
lemove the upper door hinges, (3)
three screws per upper hinge. See
Figure 10.
A
caution
To Avoid The Risk Of Personal
Injury Or Property Damage have
two people remove the door. One
to hold the door and one to
rarrvmtics
!!arTH Hckirs
I
ted
I
with the tools.
11 Remove tape from top of freezer.
12. The freezer door water line will
thread through the bottom hinge, lift
the door off carefully. See Figure 12.
13. Remove tape from top of
refrigerator door.
16.
A
CAUTION
To Avoid The Risk Of Property
Damage set refrigerator door
down carefully to avoid dam
aging electrical wires.
NOTE: At this point, the refrigerator may
fit through the doorway, if not, proceed
to steps 17 and 18,
17 Mark around the lower hinge
brackets with a pencil,
18, Remove the lower hinge bracket
screws (2) screws per lower hinge.
See Rgure 14
A
w
ARNING:
TO AVOID RISK OF ELECTRICAL
SHOCK, PERSONAL INJURY OR
DEATH, THE GROUND WIRES
MUST BE CONNECTED WHEN THE
DOORS ARE REASSEMBLED
To install the door assemblies,
assemble in reverse order.