Always unplug router, Before mounting, Craftsman routers with three-hole and 6 – Sears 26462_0 User Manual
Page 7
Attention! The text in this document has been recognized automatically. To view the original document, you can use the "Original mode".
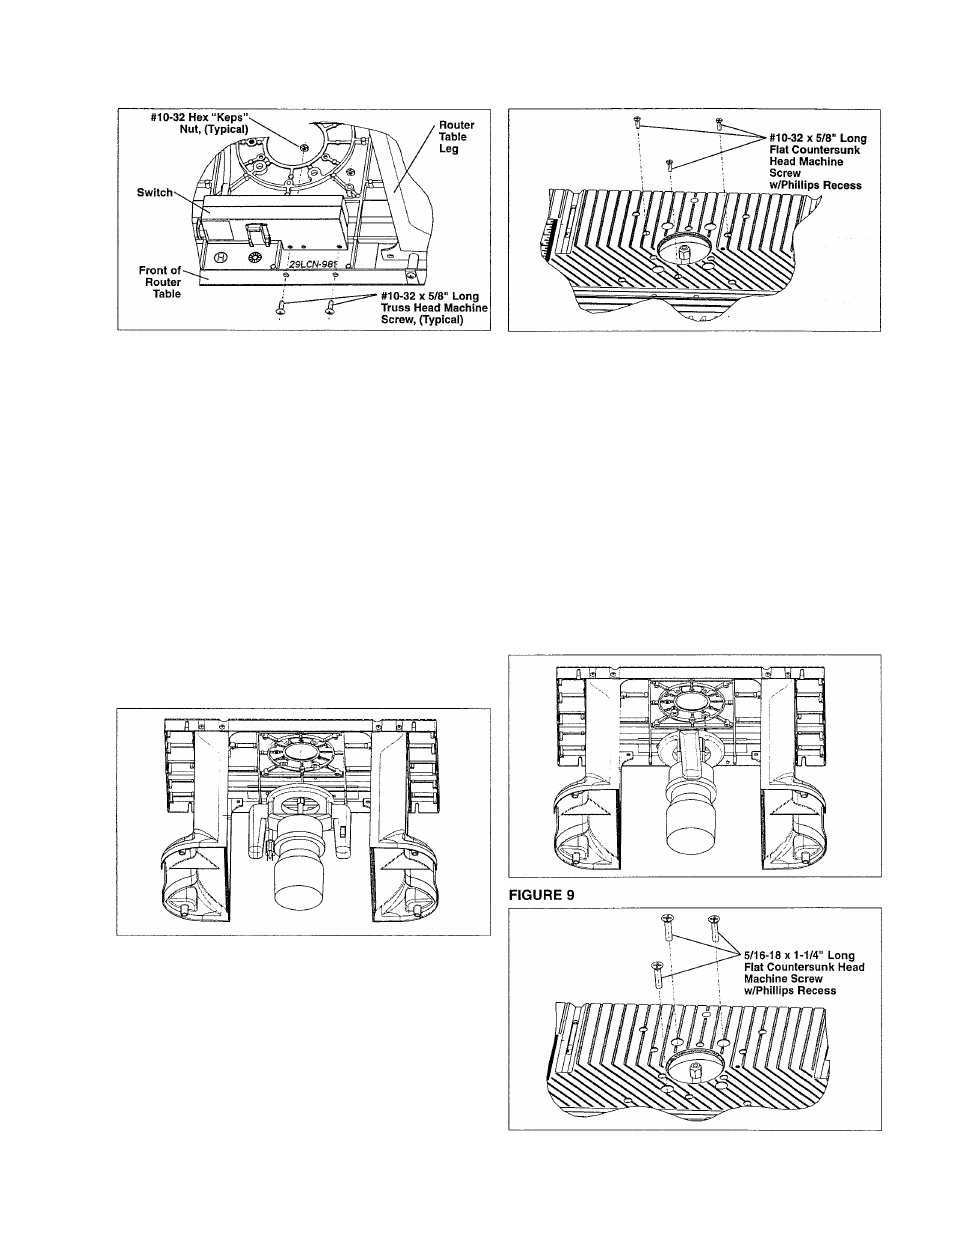
FIGURE 5
FIGURE 7
MOUNTING ROUTER TO THE ROUTER TABLE
A
warning
ALWAYS UNPLUG ROUTER
BEFORE MOUNTING.
Craftsman Routers with Three-Hole and 6"
Diameter Base Piates
1. Remove the router base plate (back plate) from the
router.
2. Store the screws and the base plate in a convenient
location.
3. While holding the router upside down, position the
router against the bottom of the router table as shown
in Figure 6. Rotate the router until the three threaded
holes in the router base line up with the three corre
sponding countersunk holes in the top of the router
table. (The router handies should be oriented as shown
in Figure 6.)
FIGURE 6
2. Store the screws and the base plate in a convenient
location.
3. While holding the router upside down, position the
router against the bottom of the router table as shown
in Figure 8. Rotate the router until the three threaded
holes in the router base line up with the three corre
sponding countersunk holes in the top of the router
table. The holes will line up in ONE position only.
(The router handles should be oriented as shown in
Figure 8.)
4. Insert three 5/16-18 x 1-1/4" long flat countersunk
head machine screws through the three holes in the
table top, as shown in Figure 9, and thread them into
the threaded holes in the router base housing.
5. TIGHTEN the screws SECURELY to the router.
FIGURE 8
4. Insert three #10-32 x 5/8" long flat countersunk head
machine screws through the three holes in the table
top, as shown in Figure 7, and thread them into the
threaded holes in the router base housing.
5. TIGHTEN the screws SECURELY to the router.
Craftsman Router Models 9-27500, 9-27510,
and 9-27511
1. Remove the router base plate (back plate) from the
router.