Push block assembly to the router table fence, Miter gauge assembly, Dust collecting attachment – Sears 26462_0 User Manual
Page 10: When doing the above, keep the following in mind, A caution
Attention! The text in this document has been recognized automatically. To view the original document, you can use the "Original mode".
A
warning
The vibrations from operating the
router can, from time to time, cause the hex nut
and the clamp plate to become loose on the clamp
rod. PERIODICALLY CHECK THESE FASTENERS
AND ALL FASTENERS to ensure that they are tight
and secure.
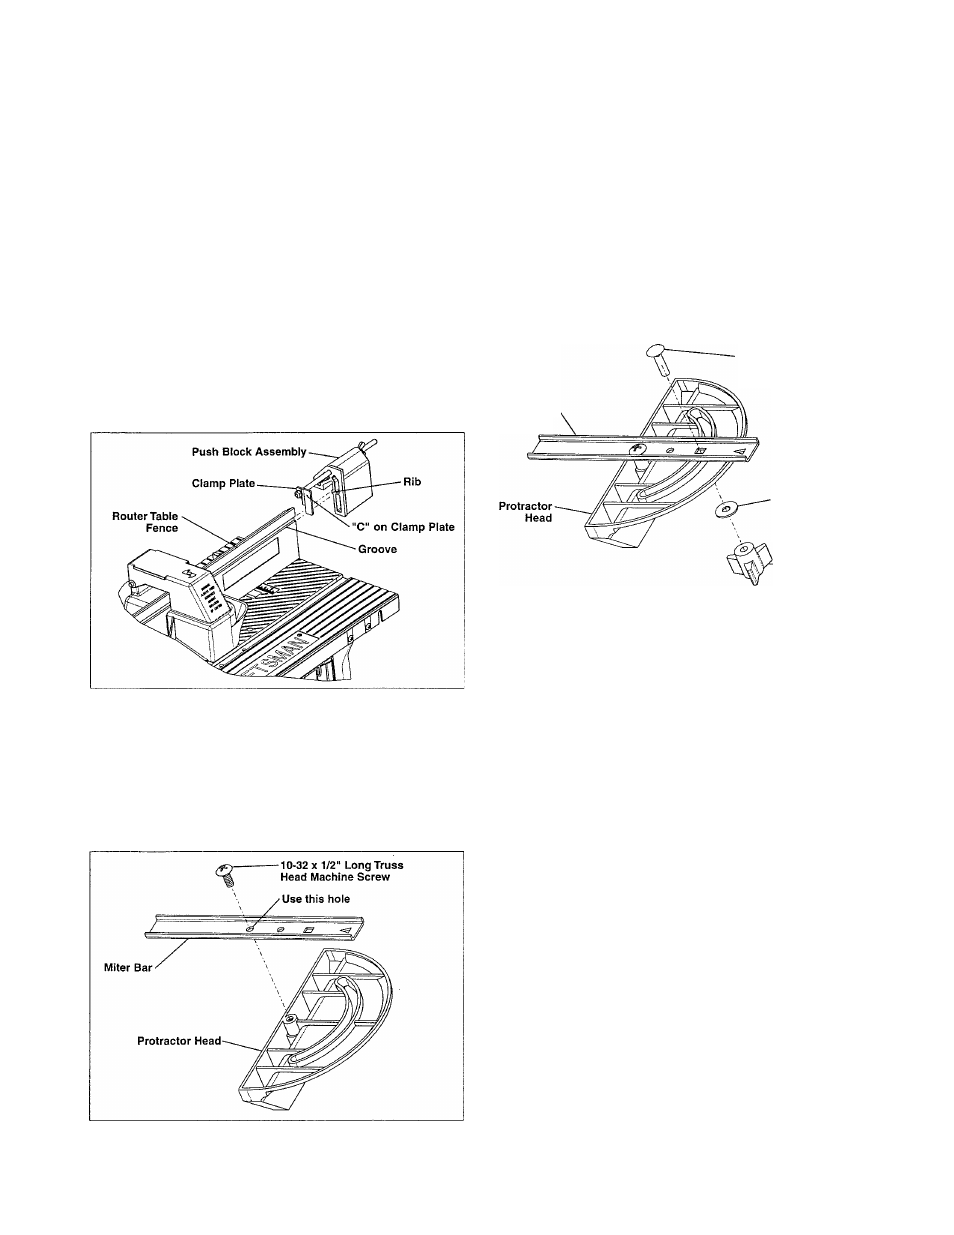
PUSH BLOCK ASSEMBLY TO THE ROUTER
TABLE FENCE
1. Position the clamp plate relative to the push block,
as shown in Figure 18.
2. Align the rib on the push block with the groove in the
front face of the fence.
3. Assemble the push block to the fence as shown in
Figure 18. The push block should move freely along
the full length of the fence.
FIGURE 18
NOTE
MITER GAUGE ASSEMBLY
Assemble the protractor head (Part No. 29L-293) to
the miter bar (Part No. 29LCN-1119), as shown in
Figure 19, using a #10-32 x 1/2" long truss head
machine screw. The screw will self thread into the hole
in the protractor head.
FIGURE 19
There are two round holes in the
miter bar. Make sure the #10-32 x 1/2" long truss
head machine screw enters the hole shown in
Figure 19.
1. Tighten the screw so that it touches the miter bar
but still provides a resistance to rotating the protractor
head.
2. Assemble the knob (Part No. 31L-560), the
13/64" I.D.
X
9/16" O.D.
X
.040" thick washer and the
#10-24
X
3/4" long round head square neck bolt to the
miter gauge, as shown in Figure 20.
FIGURE 20
Miter Bar
#10-24
X
3/4" Long
Round Head
Square Neck Bolt
13/64" I.D.
X
9/16" O.D.
X
.040" Thick
Washer
— Knob
DUST COLLECTING ATTACHMENT
The router table fence is equipped with a port at the
back for the attachment of the hose from a wet/dry vac
The port will accommodate a 2-1/2" diameter hose
nozzle.
To attach, push the nozzle into the port while holding
the fence in place.
A CAUTION
Operating the router table without
the use of a wet/dry vac may result in an excessive col
lection of saw dust and chips under the fence assembly
and the overhead guard. This can hinder the perform
ance of the router table and the fence assembly.
A
warning
When doing the above, keep
the following in mind:
•The router table must be turned OFF.
•The router bit must not be turning.
•The router power cord must be unplugged from
the outlet.
MOUNTING ROUTER TABLE TO A WORKBENCH
OR WORK SURFACE
A
warning
I router table must always
be FIRMLY and SECURELY mounted to a work
10