Sears PRO-FORM 831.297741 User Manual
Page 15
Attention! The text in this document has been recognized automatically. To view the original document, you can use the "Original mode".
PROGRAMS
. _
v5:
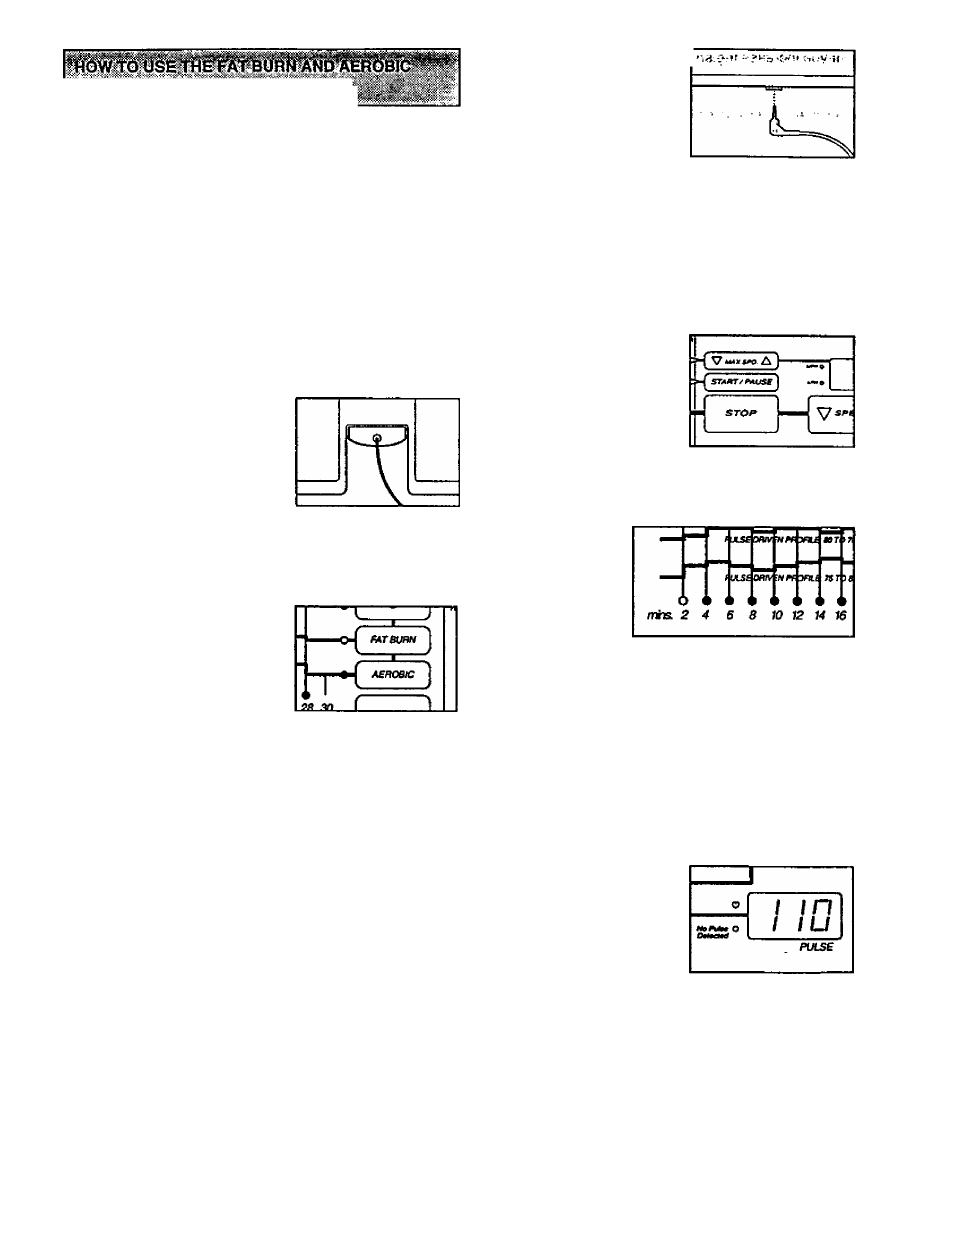
The FAT BURN and AEROBIC programs automatically
control the speed and incline of the treadmill to keep
your pulse within a predetermined range during your
workouts. Both programs are 30-minute programs. The
speed profiles on the left side of the console show how
your pulse will change during each program. Each pro
gram begins with a warm-up period, and ends with a
cool-down period.
To use one of these programs, follow the steps below.
D
Make sure that the key is fully inserted into the
console.
□
Stand on the foot rails
and insert the key.
Various displays and in
dicators will light. Find
the clip attached to the
key, and slide it onto the
waistband of your cloth
ing.
Select the FAT BURN or AEROBIC program.
Press the FAT BURN or
AEROBIC button. An in
dicator will light next to
the button you press.
Note: If the walking belt
is moving, it will slow to
a stop.
Enter your weight
When the FAT BURN or AEROBIC program is se
lected, the letters “LbS’ wilt flash in the CALORIES
display. You must enter your weight and age before
either of these programs can be started. To enter
your weight, see step 3 on page 11. If you have al
ready entered your weight, you must press one of
the WEIGHT buttons to verify the weight setting.
Enter your age.
After you have completed st^ 3, the letters “AGE"
will flash in the PULSE display. To enter your age,
see step 4 on page 11. If you have already entered
your age, you must press one of the AGE buttons to
verity the age setting.
'
Put on the pulse sensor.
The pulse sensor must be worn when the FAT BURN
or AEROBIC program is used. To put on the ^Ise
• sensor; see HOW TO.i-, n ■.
USE THE PULSE
SENSOR on page 8.
Plug the pulse sensor ’
wire fully into the jack
on the front of the con
sole. Note: The FAT
BURN and AEROBIC programs can be started with
out your pulse being detected; however, the pro
grams will automatically stop iif your pulse is not de
tected 2 minutes after the programs are started.
Press the START/PAUSE button to start the pro
gram.
When the START/
PAUSE button is
pressed, the TIME dis
play will begin count
ing down from 30 min
utes. After a moment,
the walking belt will
begin to move. Hold the handrails and carefully
begin walking.
The indicators
below the
speed profiles
will show the
progress of
the program.
During the first
2 minutes of the program, the indicator above the
number 2 will light. After 2 minutes, the indicators
above the numbers 2 and 4 will light. After 4 min
utes, the indicators above the numbers 4 and 6 will
light, and so on. The speed and incline of the tread
mill will change periodically to keep your pulse
within a predetermined range, shown by the speed
profiles. When the time shown in the TIME display
reaches zero, the walking belt will slow to a stop and
the program will be completed.
Note: If your pulse is
not detected during
the program, the NO
PULSE DETECTED
indicator will light and
the letters “PLS* will
flash in the PULSE
display. (See GUIDELINES FOR ACCURATE
PULSE READINGS on page 8.) If your pulse is not
detected at the end of any 2-minute period during
the program (after 2 minutes, after 4 minutes, after 6
minutes, etc.), the program will automatically stop.
Note: Minor adjustments can be made to the speed
or incline of the treadmill during the program by
pressing the SPEED or INCLINE buttons. However,
15