Chuck removal, To retighten a loose chuck, Operation – Sears 315.10186 User Manual
Page 14
Attention! The text in this document has been recognized automatically. To view the original document, you can use the "Original mode".
OPERATION
CHUCK REMOVAL
See Figures 12-14.
■
Lock the switch trigger by piecing the direction of rotatbn
seiector in center position. See Figure 5.
■
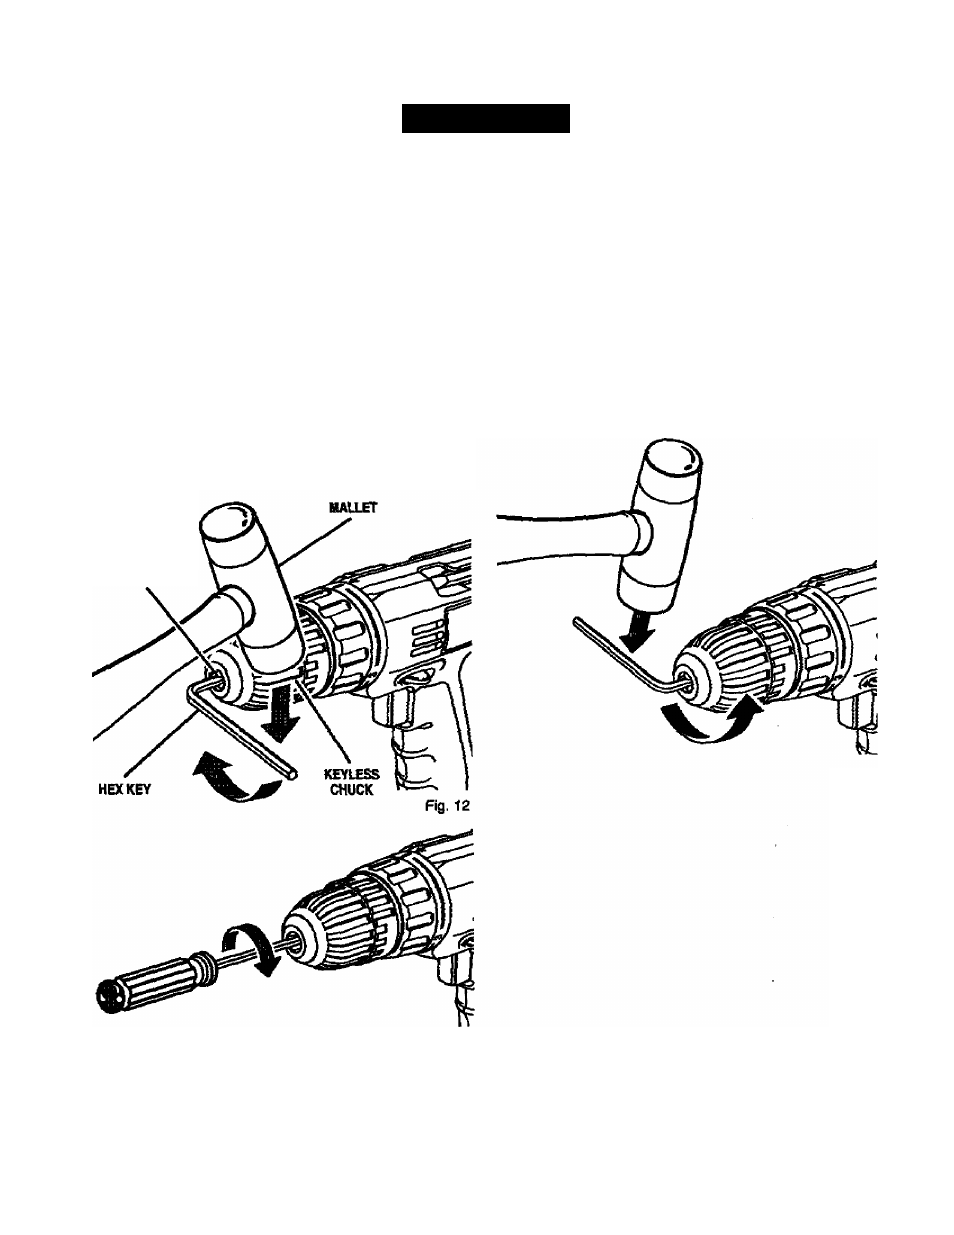
Insert a 5/16 inch or iarger hex key into the chuck of
your driif and tighten the chuck jaws securely.
■
Tap the hex key sharply with a mallet in a clockwise
direction. See Figure 12. This wilt loosen the screw in
the chuck for easy removal.
■
Open chuck j'aws and remove hex key. Remove the
chuck screw by turning It In a clockwise direction.
See Figure 13.
Note: The screw has left hand threads.
■
I nsert hex key in chudc and tighten chuck |aws securely.
Tap sharply With a mallet in acounterdodwise direction.
This will loosen chuck on the spindle. It can now be
unscrewed by hand. See Figure 14.
TO RETIGHTEN A LOOSE CHUCK
The chuck may become loose on spindle and develop a
wobble. Periodicafiy check the chuck screw for tightness.
To tighten, follow these steps:
■
Lod( the switch trigger by pladr^ the direction of rotation
selector In center position. See Figure 5.
■ Open the chuck jaws.
■
Insert hex key into chuck and tighten chuck jaws
securely. Tap hex key sharjsty with a mallet in a ciodwise
direction. This will tighten chuck on the spindle.
■ Open the chuck jaws and remove hex key.
■ Tighten the chuck screw.
Note: The chuck screw has left hand threads.
CHUCK JAWS
Fig. 14
Fig. 13
U