Operation, A. power cord use and storage, A. power cord use – Sears DESTINY PLUS 204.3699969 User Manual
Page 6: Storage, Connecting the handle
Attention! The text in this document has been recognized automatically. To view the original document, you can use the "Original mode".
CONNECTING THE HANDLE
The Handle/Wand Assembly has been packed separately with
the main unit. To assemble the Wand into the Hose:
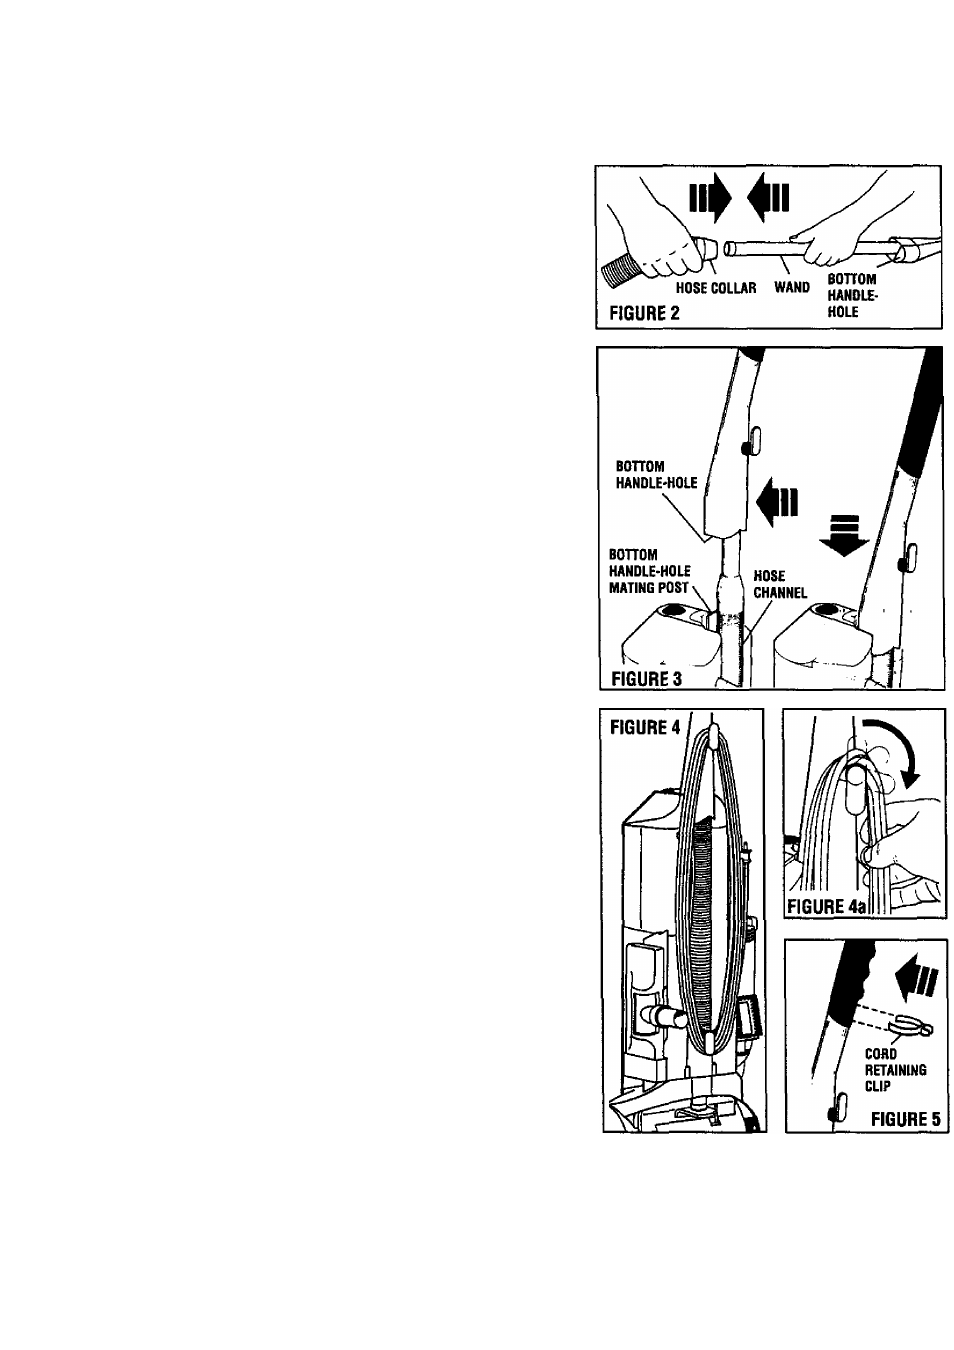
a) Hoid the Hose Collar tightly in one hand.
b) Insert the Wand end into the Hose Collar and push firmly
until the Wand enters and slides easily into the full length
of the Hose. Make sure the Wand reaches the bottom of the
Hose. (Figure 2)
c) Next, place this HoseA/Vand Assembly into the Hose
Channel located at the rear of the machine. (Figure 3)
d) Engage the bottom Handle-hole over its mating post at the
rear of the top of the machine. (Figure 3)
e) Once engaged, press the Handle down until it locks into
place with an audible click.
OPERATION
The DESTINY® PLUS vacuum cleaner is ready to go to work
for you as soon as you connect the Handle to the unit. BUT
FIRST, PLEASE READ THESE INSTRUCTIONS:
IMPORTANT:
DO NOT ATTEMPT TO PICK UP LARGE SURFACE LITTER,
CELLOPHANE, TWINE, OR LARGE SOLID OBJECTS LIKE
PAPER CLIPS, SAFETY PINS, ETC. IF OBJECTS SUCH AS
THESE ACCIDENTALLY BECOME CAUGHT IN THE
ROTATING BRUSH, A LOSS OF SUCTION AND CLEANING
ABILITY CAN RESULT.
A. POWER CORD USE AND STORAGE
1
.
2
.
3.
4.
Uncoil the Cord which is coiled tightly for shipping.
To store the Cord on the machine, wind the Power Cord
around the Upper and Lower Cord Hooks. Fasten the Cord
Plug to the Power Cord by snapping the Cord Plug Retainer
over the Power Cord. (Figure 4)
To ready the machine for use, rotate the Upper Cord Hook
to the down position, then remove the Power Cord from the
Upper and Lower Hooks. (Figure 4a)
A Cord Retainer Clip is provided to enable the Cord to be
retained in a more convenient location. Attach the Cord
Retainer Clip onto the lower part of the Handle Grip.
(Figure 5)
Note: Remember to remove the Cord from the Cord
Retainer Clip before activating the Cleaning Wand.