A. blockage alarm, B. removing a blockage, B. removing a blockage , 9 – Sears DESTINY PLUS 204.3699969 User Manual
Page 10: Maintenance
Attention! The text in this document has been recognized automatically. To view the original document, you can use the "Original mode".
MAINTENANCE
A. BLOCKAGE ALARM
When the air intake of the machine is substantially restricted or
blocked, a whistling sound will be heard at the top of the
machine.
If this occurs, check for a blockage, (see “REMOVING A
BLOCKAGE”)
B. REMOVING A BLOCKAGE
If the DESTINY® PLUS vacuum cleaner shuts itself off, or if
you experience a loss of suction power, it may be due to a
blockage in air passage.
1. Unplug the machine.
2. Press the Reset Button if the Overload Protection System
has shut the machine down. (Figure 19)
3. Lay the machine down on its front face with the rear of the
base facing up.
4.
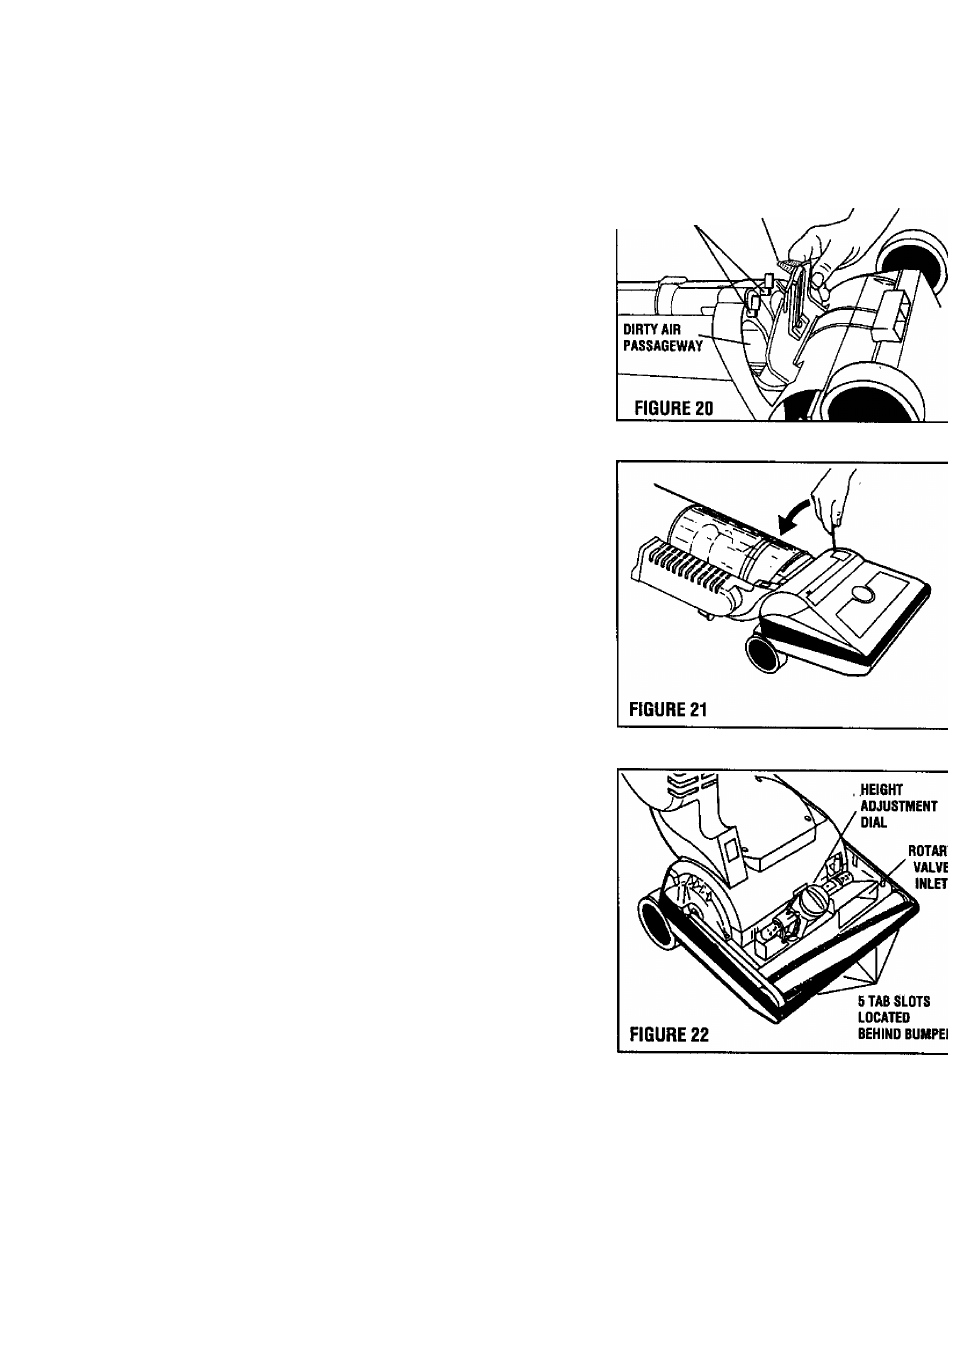
Rotate both of the two Inspection Plate Knobs out of their
locked position and then swing the Rear Inspection Plate
away from the rear of the machine, Three openings will be
visible. (Figure 20)
5. With the Rear Inspection Plate open, remove any fluff that
may have accumulated in the Fluff Collector. (Figure 20)
6. To check for blockage in an air passageway, with the Rear
Inspection Plate still open, stand the vacuum upright,
remove the Collection Bin and;
a) Check the Cyclone Entrance to ensure it is clean.
(Figure 17, page 7)
b) Also check the Dirty Air Passageway to ensure there are
no clogs along this passageway. (Figure 20)
7. Now replace the Collection Bin, reclose the Rear
Inspection Plate and then pivot both Inspection Plate
Knobs back in their locked position.
8. Press the Reset Button if the Overload Protection System
has again shut the machine down. (Figure 19)
9. Unplug the machine.
10. Release the machine from its Upright Storage Position and
lower the Handle to the floor. (Figure 21)
11. This position will expose the Front Inspection Plate.
12. Insert a blade screwdriver into the Inspection Plate slot and
gently pry the front Inspection Plate away from the main
housing. (Figure 21)
REAR INSPECTION
PLATE KNOBS
(SHOWN UNLOCKED)
FLUFF
COLLECTOR