Sears PRO-FORM 831.23744.1 User Manual
Page 11
Attention! The text in this document has been recognized automatically. To view the original document, you can use the "Original mode".
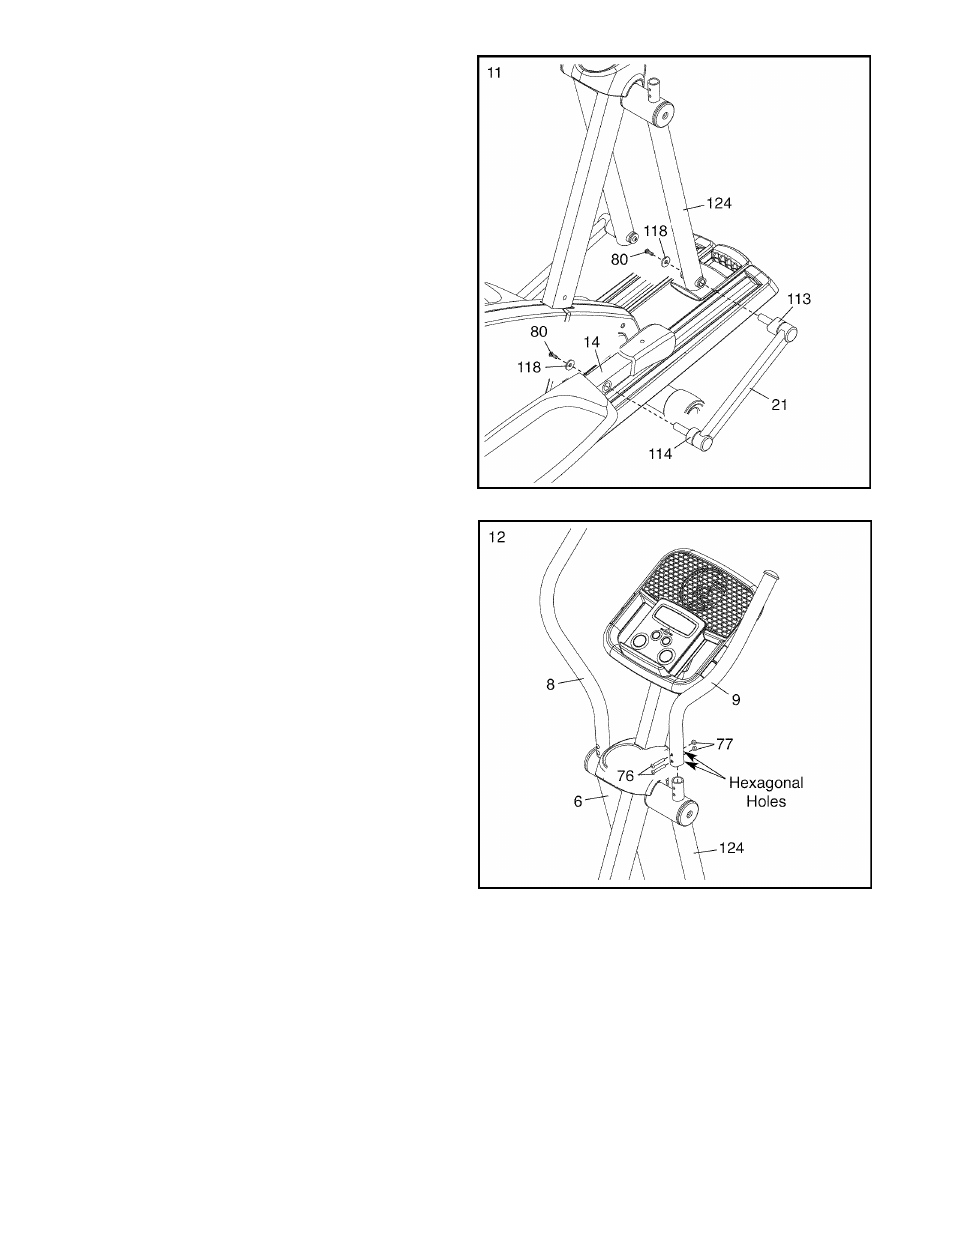
11. At the same time, insert a Pedal Arm Axle (21)
into the Right Upper Body Leg (124) and into
the right Pedal Arm (14); make sure that the
Upper Body Leg Spacer (113) and the Pedal
Leg Spacer (114) are in the indicated loca
tions.
Attach the Right Upper Body Leg (124) with an
M6 X 16mm Button Screw (80) and an M6
Washer (118).
Then, attach the right Pedal Arm (14) with an
M6
X
16mm Button Screw (80) and an M6
Washer (118).
Repeat this step for the other side of the
elliptical exerciser.
See step 3. Tighten the four M10 x 20mm
Button Screws (79). Tip: Tighten the two
Button Screws on the front of the eiiiptical
exerciser before tightening the other two
Button Screws.
12. Identify the Right Upper Body Arm (9), which is
marked with an “R” sticker. Orient the Right
Upper Body Arm as shown; make sure that
the hexagonai hoies in the Right Upper
Body Arm are in the indicated location.
Slide the Right Upper Body Arm (9) onto the
Right Upper Body Leg (124). Attach the Right
Upper Body Arm with two M6 x 38mm Button
Bolts (76) and two M6 Locknuts (77); make
sure that the Locknuts are inside the hexag
onal holes.
Repeat this step for the Left Upper Body
Arm (8) and the Left Upper Body Leg (6).
13. Make sure that aii parts of the eiiipticai exerciser are properly tightened. Note: Some hardware may be
left over after assembly is completed. To protect the floor or carpet from damage, place a mat under the
elliptical exerciser.
11