Carrier 51CV/GY User Manual
Page 9
Attention! The text in this document has been recognized automatically. To view the original document, you can use the "Original mode".
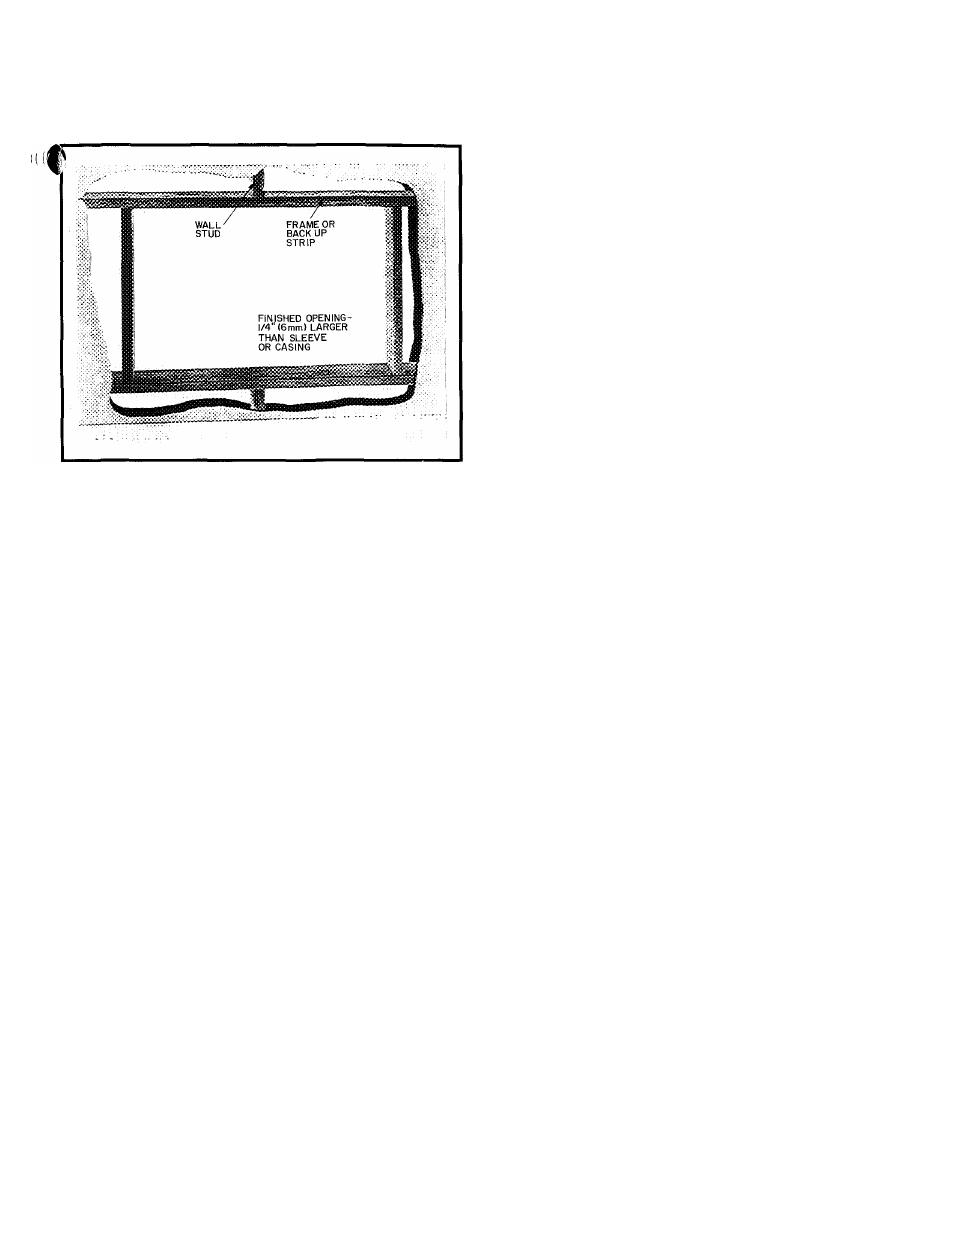
For Wood Framing:
Provide a wooden framing
support for fastening casing in wall opening.
I
With a pencil, mark location of screw holes to
be drilled through each side of casing to fasten it in
wall opening.
NOTE:
If existing holes in casing will
suffice for attachment to framing, additional drilled
holes may not be required. Be sure to seal any
fcunused holes in this area. Make sure unit is level.*2
I Fasten casing in wall opening using masonry
or wood screws, anchors, mounting angles or
expansion shields as needed (depending on type
of construction frame used).
I
Recheck pitch of unit for level installation.*3
I
Using
2
people, lift chassis and re-insert into
casing installed in wall opening. See steps 28
through 32 under Window Installation. Follow same
procedures for Through-the-Wall Installation.
CAUTION:
Coil fins on chassis are sharp and
chassis is heavy.
I
Finish exterior and interior of wall opening
surrounding installed unit. Grouting, caulking or
flashing may be used for sealing and weather
proofing-exterior. *4
Plug in unit and slide excess cord into cord
storage opening.
If needed, drill 2 or 3 screw holes (spaced as
needed, depending on construction frame used) for
each side of casing.
I
Paint or apply silicone on edges of drilled holes
to protect against corrosion.
*2
Front
Of
unit casing must project at least
'k
inch into room
to assure proper fit of grille casing on units front.
*3 When casing is installed, using proper installation steps,
unit is properly pitched towards the outdoors to allow for
condensation run-off. An Accessory External Drain Kit is
available to route excess unit condensaron away from build
ing exterior. If unit is installed where condensate drainage will
drip onto pedestn'ans or neighboring properTes, contact your
independent Carrier Dealer, or call
1
-800-CARRIER to order
the External Drain Kit.
*4
Be sure to weatherproof exterior area around the wall-
installed unit, and finish surrounding interior walls.
8