Through-the-wall installation steps, Through-the-wall installation – Carrier 51CV/GY User Manual
Page 8
Attention! The text in this document has been recognized automatically. To view the original document, you can use the "Original mode".
THROUGH-THE-WALL
INSTALLATION STEPS
The 51 CV/GY is normally installed through a wall.
During installation, you will remove the unit’s chassis
from the casing, install the casing first and then re-insert
the chassis. To slide out chassis, you must first loosen
the chassis security screw.
CAUTION: COIL FINS ON CHASSIS ARE SHARP AND
CHASSIS IS HEAVY.
NOTE:
This unit may also be installed in a window. An
additional accessory kit must be ordered separately for
window mounting. Contact your independent Carrier
Dealer, or call 1-800-CARRIER for information, and
refer to page 9 for Window Installation Steps.
Two people recommended for installation.
Use Steps 1 through 8 from Window Installation
instructions (page 9) to prepare chassis and casing
for wall installation.
Standard construction and masonry tools are needed
forthrough-the-wall installation. This will include at least
the following;
Screwdrivers—Both Phillips and regular head types
Power drill (1 /8" dia. drill bit)
Pencil
Measuring Tape
Scissors or a razor-edged knife
I
Cut opening in wall for insertion of unit’s
casing. Finished wall opening must be at least V4
inch larger than unit’s casing on all sides. See
casing dimensions below.
51 CV - W (24 7/16")
X
H (15 9/16") x D (27 5/16")
51 GY - W (26")
X
H (17 9/16") x D (28 1 /16")
Note:
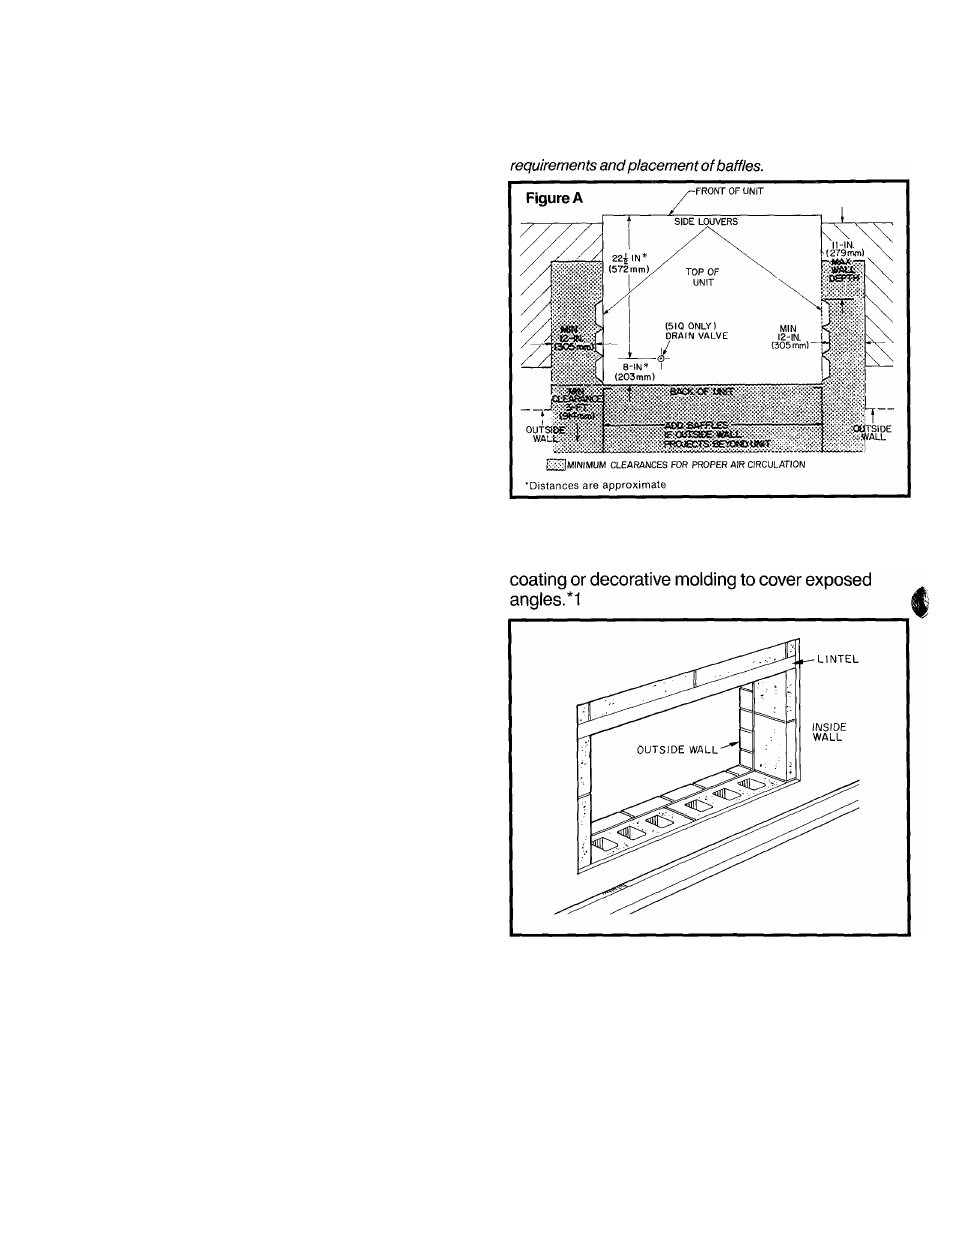
If wall thickness obstructs unit’s side vents, make wall
opening wider as shown in Figure A. Allow for condensate
drainage from thermostatic drain valve located in basepan. If
outside wall projects beyond back of unit, use baffles on cas
ing ’s rear corners. See Figure A for minimum dimension
For Masonry Framing: Use lintel to support upper
wall and mounting angles if desired. If mounting
angles are used, you may choose to use a plaster
NOTES
Through-the- Wail Installation of the air conditioner unit is
possible in wood framing or masonry weJI, using units casing
as a sleeve. Installation should be level as unit has a built-in
pitch for draining condensation.
Good framing construction practices must be used to ensure
a properly installed unit.
'1 To prevent a possible air leakage path, sea! the hole in the
bottom of the casing near the front of the unit.
%