VACUUBRAND MV 10C VARIO User Manual
Page 44
page 44 of 51
Documents are only to be used and distributed completely and unchanged. It is strictly the users´ responsibility to check carefully
the validity of this document with respect to his product. manual-no.: 999073 / 15/12/2009
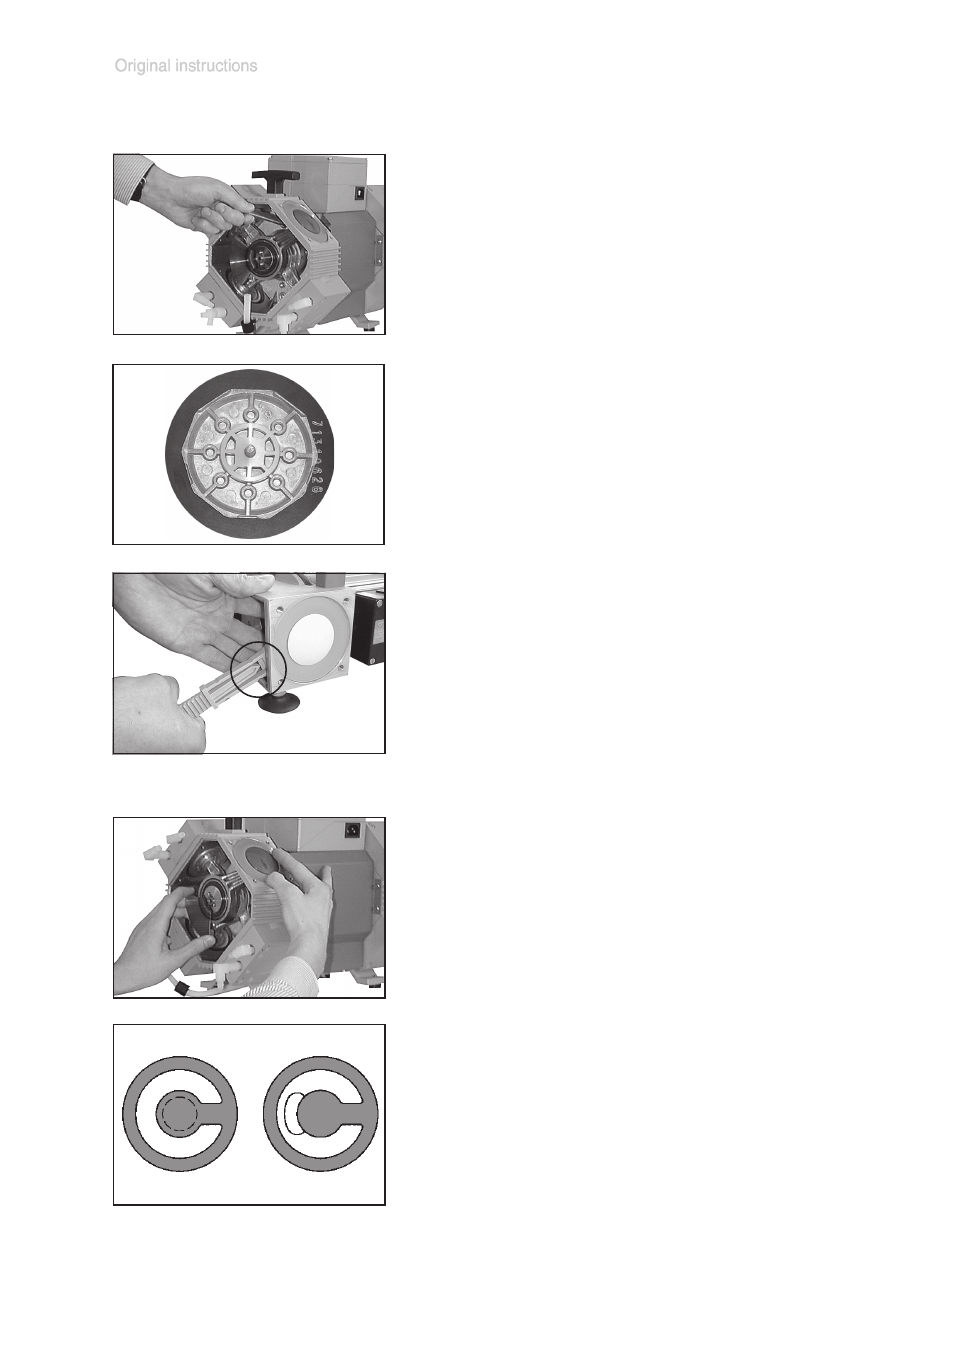
Replacing the diaphragm:
Assembling pump heads:
➨ Use a face wrench to remove diaphragm support disc.
➨ Check for washers under support disc. Do not mix the wash-
ers from the different heads. Make sure that the original
number is reassembled at the individual pump head.
☞ Smaller number of washers: The pump will not attain ulti-
mate vacuum. More washers: Clamping disc will hit head
cover; noise or even blockade of the pump.
➨ By turning eccentric bushing (front of connecting rod), bring
connecting rod into a position in which diaphragm is in con-
tact with housing and centred with respect to bore.
Reassemble in reverse order.
➨ Install head cover, O-rings, valves and housing cover with
housing cover insert.
☞ Make sure that the valves are correctly seated: Valves at
the outlet with round centred opening under valve, valves
at the inlet with kidney-shaped opening beside valve.
➨ By turning eccentric bushing, bring connecting rod into up-
per turning point position (Max. stroke of the rod).
☞ Pay attention that the diaphragm stays positioned centrally
so that it will become clamped uniformly between housing
and head cover.
Position new diaphragm between diaphragm clamping disc with
square head screw and diaphragm support disc.
☞ Note: Position diaphragm with white PTFE side to diaphragm
clamping disc (to pump chamber).
Use the face wrench with torque indicator to assemble dia-
phragm clamping disc, diaphragm and diaphragm support disc
(and eventually washers) to the connecting rod.
☞ Make sure that the square head screw of the diaphragm
clamping disc is correctly seated in the guide hole of the
diaphragm support disc.
Optimum torque for the diaphragm support disc: 6 Nm.
☞ The optimum torque is achieved if the pointer in the handle
of the VACUUBRAND face wrench shows to the longer mark-
ing line.