Curb hinge installation (optional - grv, lug), Roof curb installation, Insect screen (optional) – Twin City Gravity Relief / Intake Ventilators - IM-4700 User Manual
Page 3: General, Installation
Twin City Fan IM 4700
3
Curb Hinge Installation (Optional - GRV, LUG)
General
1. The curb hinge option assists unit maintenance and
cleaning by allowing easy access to the underside of
the unit.
2. Pilot holes are provided in the unit curb cap for
attaching the curb hinge to the unit as standard. The
option is available factory or field installed.
Installation
1. Ensure the unit will not be restricted from pivoting
and that airflow to the unit is not restricted. (See note
under “Service Clearance.”)
2. Bolt the hinge to the unit curb cap through the holes
provided by using
1
⁄
4
-20 self-tapping screws (see
Figure 2).
3. Place the unit with the hinge on the roof curb and
align hinge holes with roof curb holes.
4. Now bolt the hinge to the roof curb using
1
⁄
4
-20 self-
tapping screws (see Figure 2).
Roof Curb Installation
General
1. Roof curbs are shipped fully assembled. Leveling and
mounting on the roof structure are the responsibility
of the installing contractor. All curb installations must
comply with the established guidelines of the National
Roofing Contractors Association.
2. Curb flashing, cant strips, and general roofing materi-
als are to be furnished by the contractor. Wood nail-
ing strip is provided with standard curb; gasketing is
provided with self-flashing and straight-sided curbs.
3. The unit and curb accessories are designed to allow
vertical duct installation before unit placement. Duct
installation after unit placement is not recommended.
NOTE: Outside dimensions of roof curb top should be
1
⁄
2
" to 1
1
⁄
2
" less than inside unit curb cap dimension
depending on thickness of flashing material used. If curb
hinge accessory is used, specify 1
1
⁄
2
" difference.
NOTE: On self-flashing and straight-sided curbs check
top of curb to make sure gasket has been applied
properly. Gasket should be firmly applied to top of curb
perimeter.
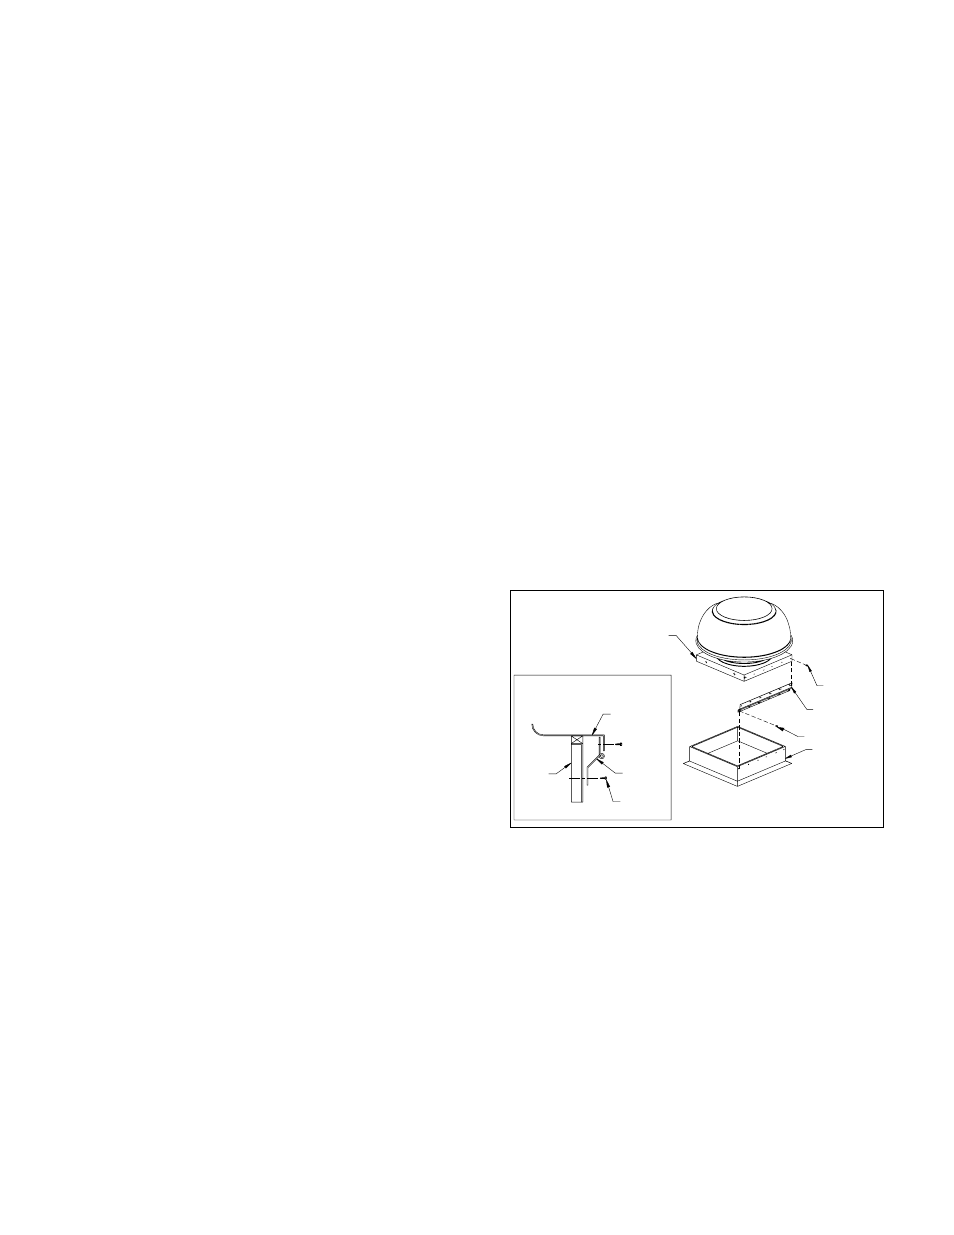
Figure 2. Curb Hinge Installation
Installation
1. Place curb in proper location over roof opening.
2. Curb must be level. Shim curb as required to level curb.
3. Attach leveled curb to roof structure following indus-
try accepted practice.
4. Install cant strips, roofing materials, flashing and
counterflashing in accordance with the established
guidelines of the National Roofing Contractors
Association. The finished roof, including counterflash-
ing around the curb, must be installed prior to setting
unit on the curb.
UNIT CURB CAP
(PREPUNCHED
MOUNTING HOLES)
CURB HINGE DETAIL
(END VIEW)
UNIT CURB
CAP
ROOF
CURB
OFFSET
HINGE
1/4-20
SCREW
1/4-20 SCREW
CURB HINGE,
PIANO
1/4-20 SCREW
ROOF CURB
Note: Roof curb to be 1
1
/
2
" smaller than unit base (curb cap).
Insect Screen (Optional)
General
1. The insect screen is a separate part and should not
be confused with the bird screen. It contains a finer
screen and needs to be installed while the unit is
being fastened to the roof curb.
Installation
1. Place the insect screen assembly on top of the roof
curb.
2. When the unit is placed on and being bolted to the
roof curb the insect screen will be held in place
between the unit curb cap and the roof curb.