Top Flite TOPA0970 User Manual
Page 10
10
❏
❏
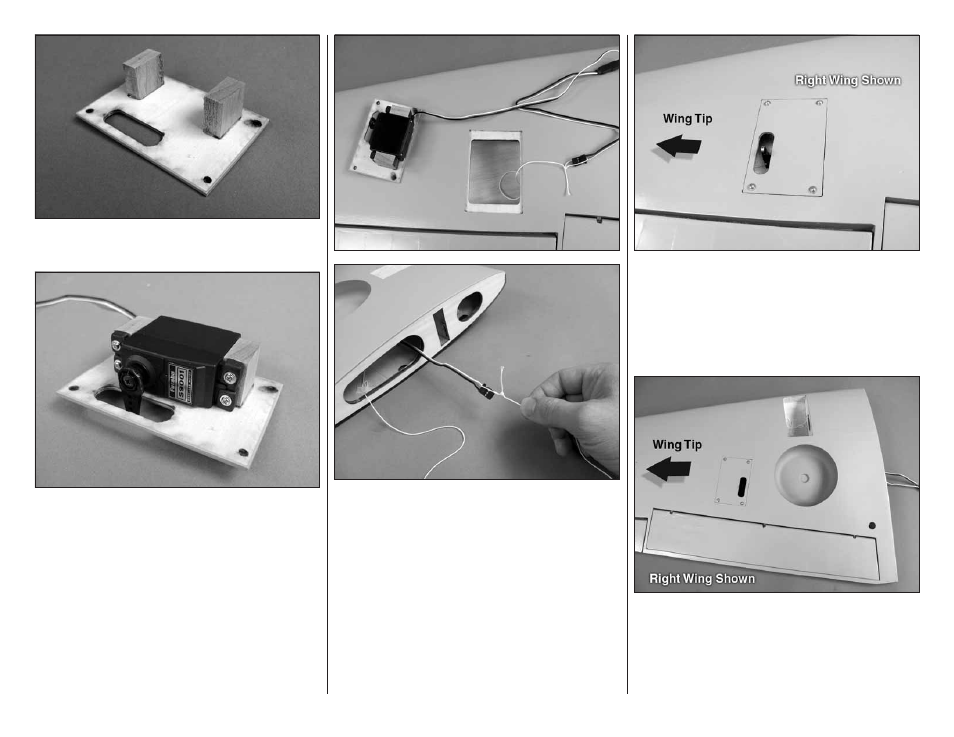
4. Remove the servo from the hatch cover and
use epoxy to glue the blocks to the hatch cover.
❏
❏
5. When the epoxy is fully cured, position the
servo against the underside of the aileron servo hatch
cover between the mounting blocks. Place a piece of
paper folded several times between the servo and
the hatch cover to space the servo away from the
hatch cover. Drill 1/16" [1.6mm] holes through the
mounting tabs on the servo case into the blocks.
Thread a servo mounting screw (included with the
servo) into each hole and back it out. Remove the
piece of paper and apply a drop of thin CA to each
hole to harden the wood. When the CA has dried,
install the servo onto the hatch cover using the
hardware supplied with the servo.
❏
❏
6. Use the strings taped inside the aileron servo
hatches to pull the servo leads through the wing ribs.
❏
❏
7. Drill a hole into the wing through each hole in
the hatch cover using a 1/16" [1.6mm] drill bit. Thread
a #2 x 3/8" [9.5mm] self-tapping screw into each hatch
mounting hole and back it out. Apply a drop of thin CA
to each hole to harden the wood. Install the aileron
hatch cover to the wing as shown using four #2 x 3/8"
[9.5mm] self-tapping screws and four #2 fl at washers.
❏
❏
8. Mount the fl ap servo and hatch cover in the
same way. If using a Y-harness, the fl ap servo requires
a 6" [152mm] servo extension. If you plan to connect
the fl ap servo directly to the receiver, install a 12"
[305mm] extension.