Top Flite TOPA0906 User Manual
Page 17
hardwood rails using a 1/16" [1.6mm] drill bit. Thread a
#2 x 3/8" [9.5mm] self-tapping screw into each hole and
back it out. Apply a drop of thin CA to each hole and
let it harden. Install the trays into the fuselage using six
#2 x 3/8" [9.5mm] self-tapping screws.
o
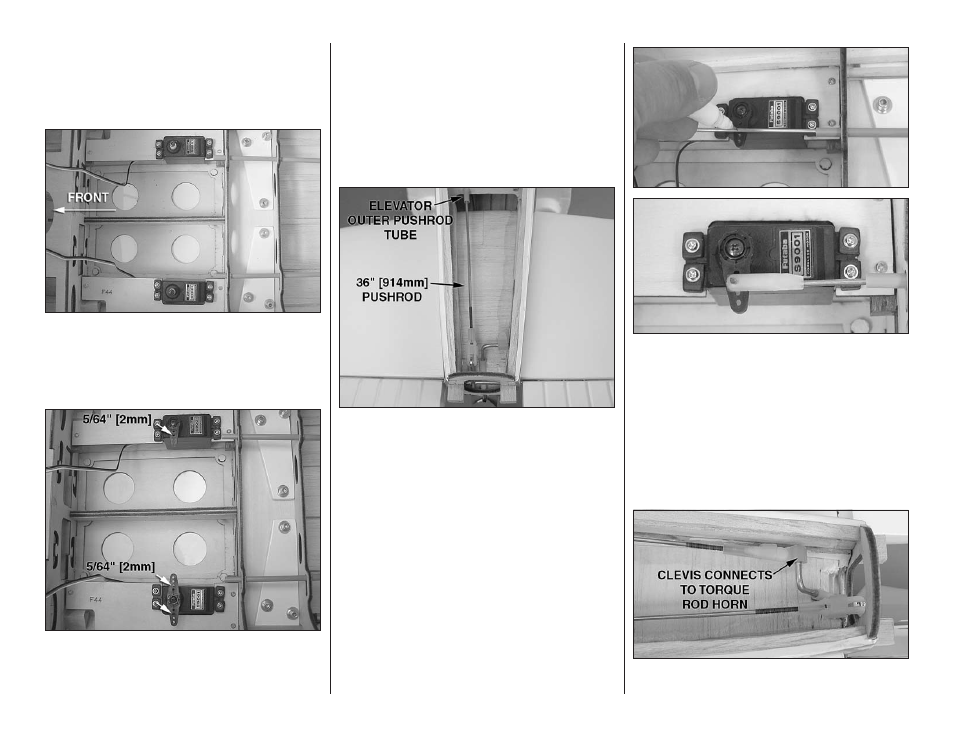
2. Install the elevator and rudder servos onto the
trays with the servo splines toward the front of the
plane. Use the hardware included with the servos
to mount them to the trays. Be sure to reinforce the
servo mounting holes with thin CA.
o
3. Center the elevator and rudder servos with your
radio system. Cut three arms from a four-armed servo
arm for your elevator servo. Enlarge the second inner
hole in the remaining arm with a 5/64" [2mm] drill bit.
Install the servo arm perpendicular to the length of
the fuselage pointing inward as shown. Cut two arms
opposite each other from a four-armed servo arm for
your rudder servo. Enlarge the second inner holes
in both remaining arms with a 5/64" [2mm] drill bit.
Install the servo arm perpendicular to the length of
the fuselage.
o
4. Thread a nylon clevis 15 complete turns onto a
36" [914mm] pushrod. Slide a silicone clevis retainer
onto the clevis. Insert the pushrod through the aft end
of the elevator outer pushrod tube and connect the
clevis to the outer hole of the elevator control horn.
o
5. With the elevators in the neutral position, mark
the pushrod where it crosses the second inner hole
in the elevator servo arm. Make a 90° bend at the
mark on the pushrod and cut off the excess pushrod
1/4" [6mm] beyond the bend. Attach the pushrod
to the servo arm using a nylon FasLink. Thread the
clevis up or down on the pushrod as necessary to
center the elevators with the servo arm centered.
Slide the silicone clevis retainer to the end of the
clevis to secure it.
o
6. Install the rudder pushrod in the same manner.
17