Top Flite TOPA0310 User Manual
Page 41
❏ ❏
3. From inside the fuselage, use the bottom of
the 1/4" ply fuse sides as a guide to mark the outline
of the bottom of the door on the 1/8" balsa fuse sides
with a ballpoint pen. Cut the opening in the fuse for
the door. Be certain to cut at least an 1/8" away from
formers 3 & 4 and from the bottom of the door outline
you marked earlier to allow for accurate trimming.
❏ ❏
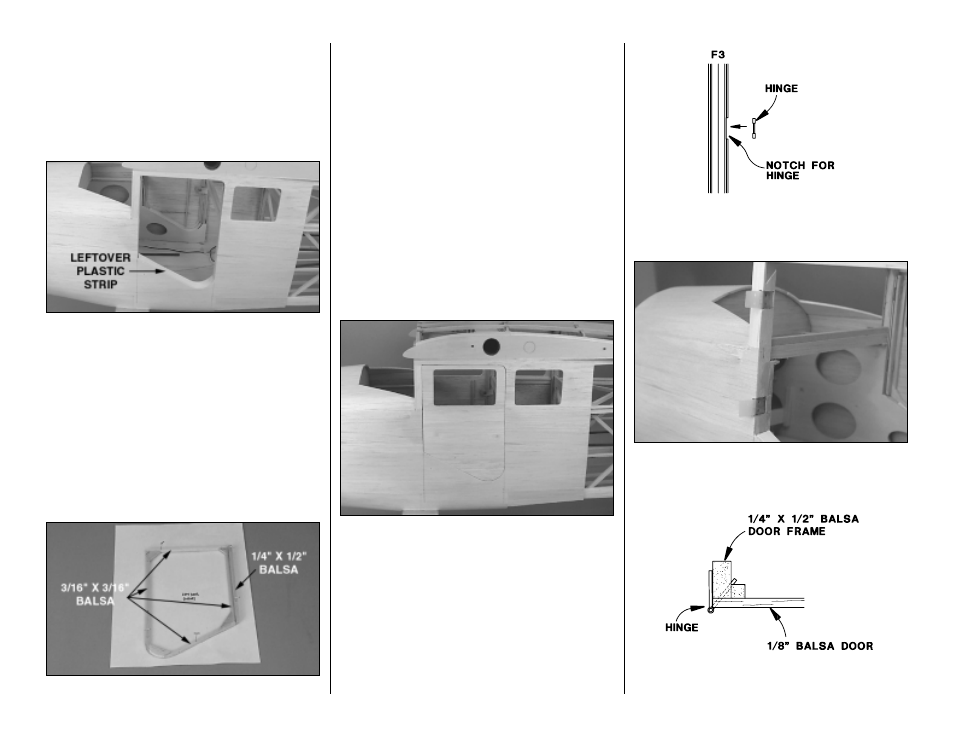
4. Cut a 7/8" x 6-3/8" strip of plastic from one
of the molded ABS landing gear fairings. Test fit, then
glue the strip to the bottom of the door opening
joining the 1/8" fuse sheeting to the 1/4" ply fuse
sides. Trim the inner edge even with the ply fuse
sides. Trim the edges of the door opening even with
the formers, the top longeron and the plastic sheet.
❏ ❏
5.
Hold a piece of paper backed up by a
magazine or cardboard to the door opening. From
inside the fuse, use a ballpoint pen to trace the
edges of the door outline onto the sheet of paper.
This is your “plan” for building the door frame.
Refer to this photo for the following two steps.
❏ ❏
6. Build the door frame over the plan using a 3/16"
x 3/16" x 36" balsa stick and a 1/4" x 1/2" x 24" balsa
stick. Make the gussets from the 3/16" x 3/16" stick.
❏ ❏
7. Trim the door frame to match the curve on
the plan at the bottom corner.
❏ ❏
8. Build the window frame for the door just the
same way you did for the fuse (aft of the door). Sheet
the rest of the door with 1/8" x 3" x 24" balsa.
❏ ❏
9. Test fit the door in the fuse.Trim where necessary
for a good fit.
Note:
For hinging your doors, you may use the Great
Planes hinges included with the kit, or hinges of your
own choice. Hinges with removable pins are
recommended, so the doors may be removed during
finishing and covering and after the model is
completed. If you use the Great Planes hinges, make
removable hinge pins from large T-pins or similar size
piano wire. Make an “L” bend on the end of the hinge
pin so it can be removed.
❏ ❏
10. Cut two notches in the aft edge of former 3
to accommodate the door hinges so they will be flush
with the aft edge of the former.
❏ ❏
11. Confirm that the door fits well in the fuse. Make
any final adjustments necessary, then glue one half of
both hinges into the notches you cut in former 3.
❏ ❏
12. Mark the hinge locations on the door. Cut
the hinge slots in the door to position the hinges as
- 41 -