Top Flite TOPA0400 User Manual
Page 39
❏ ❏
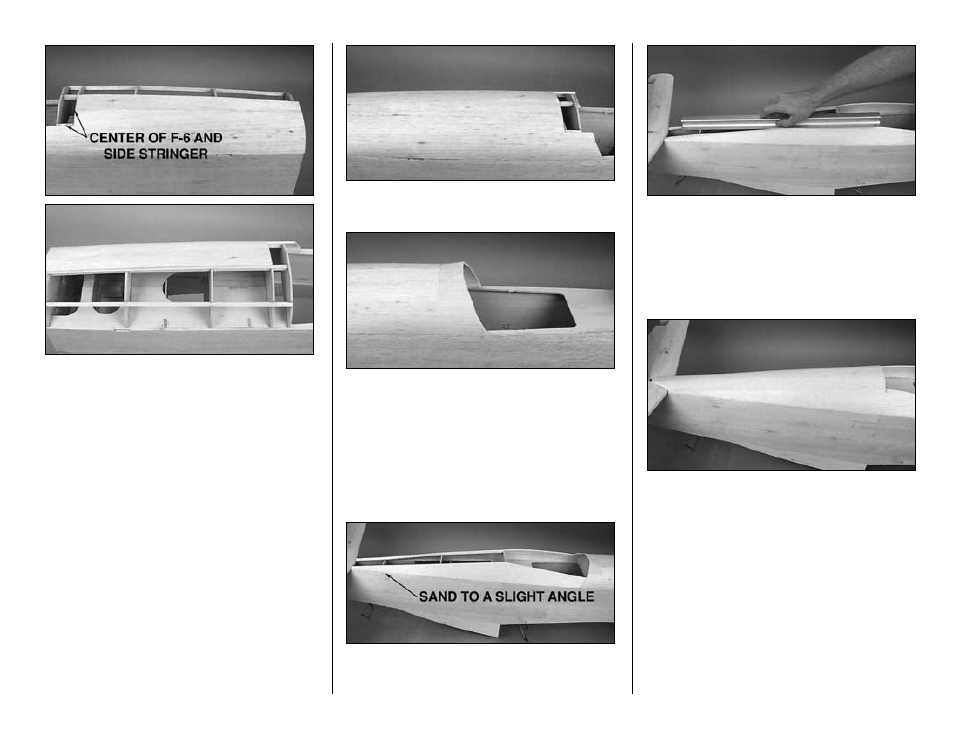
15. Thoroughly wet the outside of the
forward deck sheeting with warm water. Allow the
water to soak into the wood for a few minutes. Test
fit the sheet to the stringers and formers. The deck
sheeting between formers IP and F-6 should go to
the middle of the side stringer and the center of
former F-6. Glue the forward deck sheet along the
top edge of the fuse sides.
❏ ❏
16. Apply glue to the formers and stringers.
Bend the wood around and attach it to formers F-2
and F-4 first. Hold the deck so it conforms to former
F-6. Apply some additional thin CA to the joint.
❏ ❏
17. Holding the deck so it conforms with F-1,
apply CA to the joint. Trim the sheeting along the
centerline of the top stringer.
❏
18. Repeat steps 15 through 17 for the other
side of the fuse.
❏
19. Fit leftover 1/8" forward deck sheeting from
F-6 to behind the IP.
❏
20. Cut the two aft deck sides out of two 1/8" x
3" x 36" balsa sheets. Use the pattern on the fuse
plan as a guide. Sand a slight angle on the bottom
of the deck side at the aft end. This will allow the
aft end of the deck side to be installed at a slight
angle (see the next step).
❏
21. Glue the aft deck sides to the top of the
fuse sides. Wet the deck sides before bending and
gluing them to the formers and stringers.
❏
22. True the top of the aft deck sheeting and
1/4" stringers with a razor plane and a bar sander.
❏
23. Trace the shape of the top of the fuse deck
onto the 5/8" x 4" x 24" balsa aft deck block.
Rough cut the block to shape, carving the aft edge
of the block so it will fit over the stab.
❏
24. Glue the aft deck block to the stab, aft deck
sides and the formers. Shape the block as shown
in the fuselage cross-sections.
- 39 -