Top Flite TOPA0400 User Manual
Page 10
the die-cut 1/8" balsa S-1 ribs and insert the
assembly into position to check the fit. Use
6-minute epoxy to glue the assembly into position,
making sure all parts are properly aligned and the
S-1 jig tabs contact the work surface.
❏
13. Using medium CA, reinforce any glue joints
that do not look strong.
❏
14. Carefully remove the stab from the building
board without damaging the jig tabs.
❏
15. Use a razor plane and a sanding bar to
blend the LE and TE to the top of the ribs.
❏
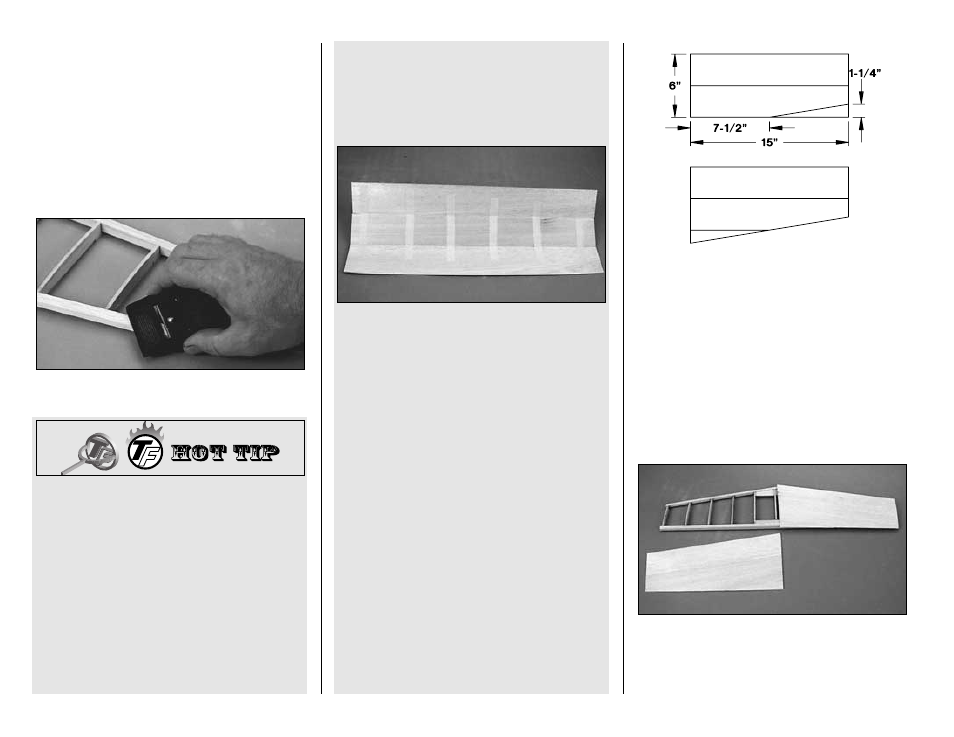
16. Make four stab skins from four 3/32" x 3" x
30" balsa sheets. Cut each sheet in half and edge
glue two sheets together to make four skins 6" x
15". Trim the corner from the skin and glue the
corner to the opposite end of the skin. See the
sketch for the proper layout of the sheets.
❏
17. Pin the stab back down on the building
surface. Test fit the skins on the top of the stab.
You will need to trim the skins at the root end,
making sure the skins butt against each other with
no gap at the root end.
❏
18. Apply an even bead of medium or thick CA
to the right top edges of the stab. Place the right
stab skin in position and press it firmly down until
the glue has set. Repeat the process to install the
left stab skin.
❏
2. Test fit the sheets together to make sure
they match well. Tightly tape the sheets together
with masking tape placed every 4" along the
seam. The sheets may not lay flat because they
are tightly taped together.
❏
3. Place wax paper on your workbench. Flip
the sheets over and apply a bead of aliphatic
resin (
wood workers glue such as Great Planes
Pro
™
) between the seams. Immediately proceed
to the next step.
❏
4. Use a credit card or a piece of thin plywood
to simultaneously press the sheets flat as you
squeegee the excess glue from the seam. Wipe
the glue off your squeegee with a paper towel.
Immediately proceed to the next step.
❏
5. Press the joining edges of the sheets down
with your fingers so they are flat and even.
Place weights on top of the sheets to hold them
flat until the glue dries.
❏
6. After sheeting the structure, save any
excess sheeting for possible use in later steps.
D. To make skins the following steps are
suggested:
❏
1. True up the edges of the sheets with a
metal straightedge and a sharp knife or a long
bar sander.
HOW TO MAKE THE SKINS
A. Whenever possible, pre-join the balsa sheets
to make a “skin” before attaching them to
the structure.
B. Many modelers like to sort the wood to put
the best wood with the most even grain structure
on the top of the wing and stab.
C. Make your skin larger than needed to allow
for misalignment. On a large surface like the
wing, 3/8" extra is suggested.
- 10 -