Toa SP-301 User Manual
Page 3
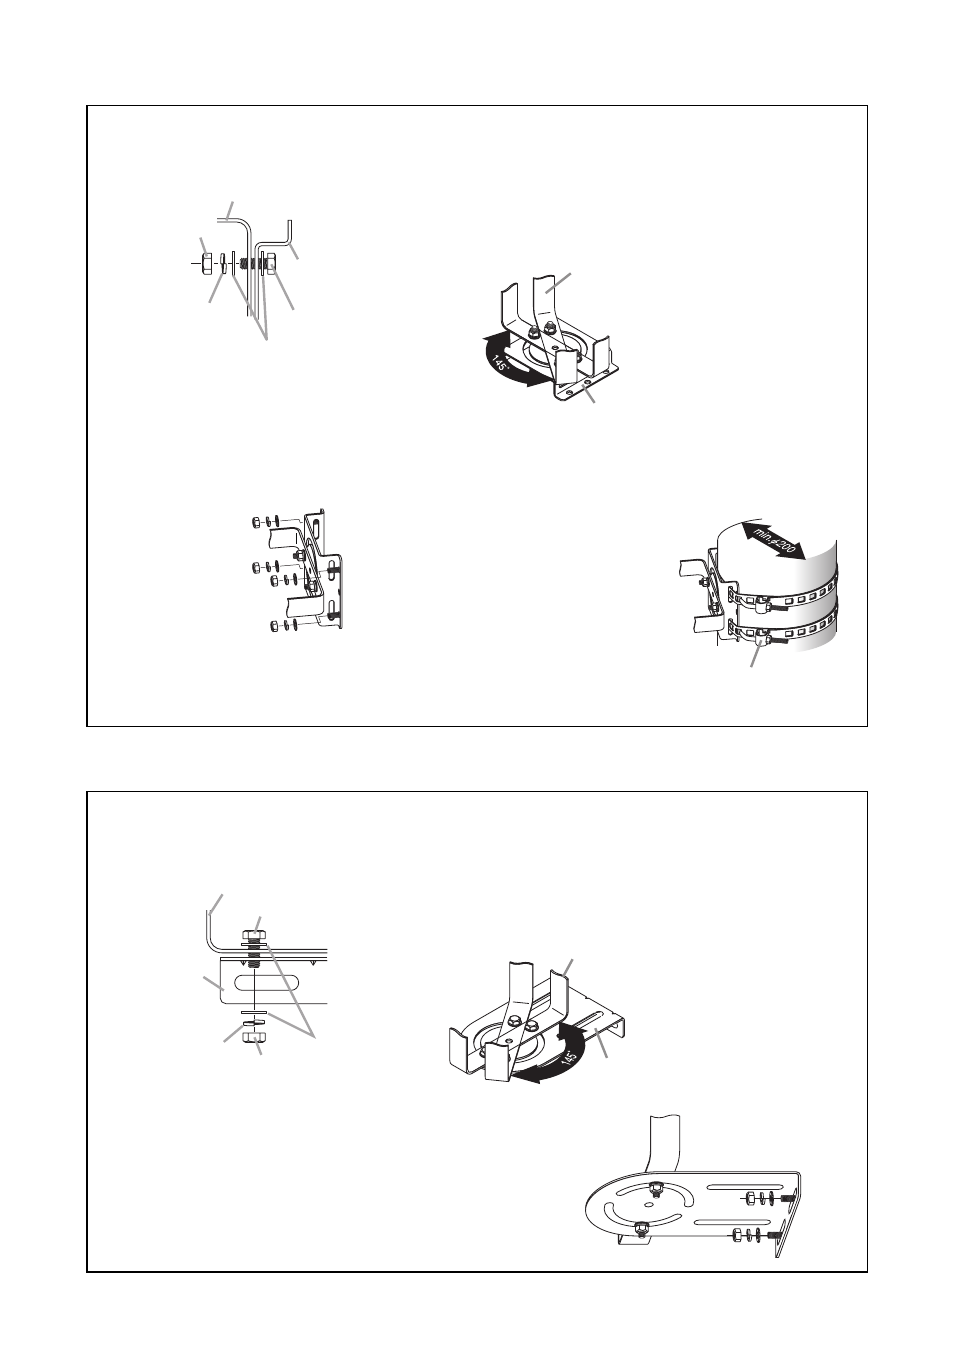
4.2. SP-201 (Designed for wall or pole mounting)
4.3. SP-301 (Designed for wall mounting)
Step 1. Attach the SP-201 base bracket to the speaker's mounting bracket.
Use the supplied bolts that fit holes in the speaker mounting bracket.
Step 2. Adjust the mounting angle of the
speaker's mounting bracket.
Adjustable range: Up to 145°
Step 3. Mount the SP-201 base bracket to the wall or pole.
[Example of wall mounting]
Note
Any bolts, nuts, and washers for
wall mounting are not supplied.
Separately prepare ones appropriate for walls.
Step 1. Attach the SP-301 base bracket to the speaker's mounting bracket.
Use the supplied bolts that fit holes in the speaker mounting bracket.
Step 2. Adjust the mounting angle of the
speaker's mounting bracket.
Adjustable range: Up to 145°
Step 3. Mount the SP-301 base bracket to the wall.
Note
Any bolts, nuts, and washers for wall mounting are
not supplied.
Separately prepare ones appropriate for walls.
Nut
Spring washer
Speaker's mounting bracket
Plain washers
SP-201
base bracket
Hexagon bolt
SP-201 base bracket
Speaker's
mounting bracket
YS-60B (option)
[Example of pole mounting]
Use 2 of the optional YS-60B Pole
Bands as shown at right.
Note
The YS-60B permits speaker
mounting to a pole of 20 to 34 cm
in diameter.
Speaker's mounting bracket
SP-301
base bracket
Hexagon bolt
Spring washer
Nut
Plain washers
Speaker's mounting bracket
SP-301 base bracket
Note
Tighten the bolts after angle
adjustment.
Note
Tighten the bolts after angle
adjustment.