Component parts 4. installation – Toa SP-301 User Manual
Page 2
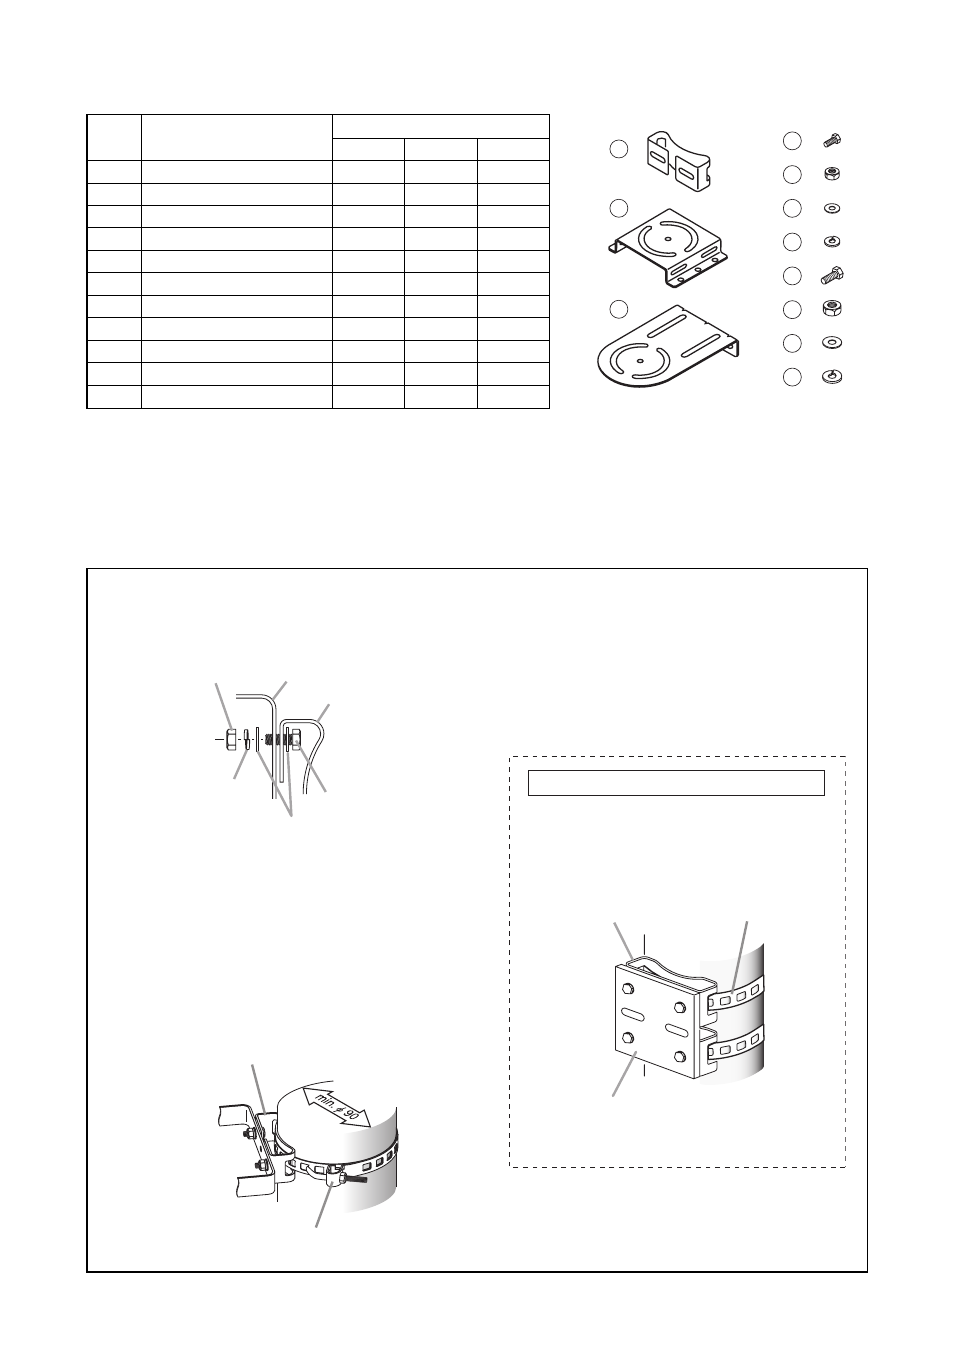
3. COMPONENT PARTS
4. INSTALLATION
4.1. SP-131 (Designed for pole mounting)
Quantity
SP-131*
SP-201
SP-301
2
-
-
-
1
-
-
-
1
4
2
2
4
2
2
8
4
4
4
2
2
4
2
2
4
2
2
8
4
4
4
2
2
No.
1
2
3
4
5
6
7
8
9
10
11
Part name
SP-131 pole bracket
SP-201 base bracket
SP-301 base bracket
Hexagon bolt M8 x 20
Nut (for M8)
Plain washer (for M8)
Spring washer (for M8)
Hexagon bolt M10 x 25
Nut (for M10)
Plain washer (for M10)
Spring washer (for M10)
1
2
3
4
5
6
7
8
9
10
11
* The SP-131 contains 2 sets of brackets.
Step 1. Attach the SP-131 pole bracket to the speaker's mounting bracket.
Use the supplied bolts that fit holes in the speaker mounting bracket.
Step 2. Mount the SP-131 pole bracket to
the pole by using the YS-60B Pole
Band.
Note
The YS-60B permits speaker mounting to
a pole of 9 to 34 cm in diameter.
Example of mounting reinforcement
If the installation location is susceptible to
vibrations or strong wind, use the SP-131 in
combination with 2 YS-60Bs to reinforce the
mounting strength as shown below.
SP-131 pole bracket
YS-60B (option)
Reinforcing plate
Note: Separately prepare the one with 5 mm or
more in thickness.
Nut
Spring washer
Speaker's mounting bracket
Plain washers
SP-131 pole bracket
Hexagon bolt
SP-131 pole bracket
YS-60B (option)