Toa PE-304 User Manual
Page 4
533-06-154-3A
URL: http://www.toa.jp/
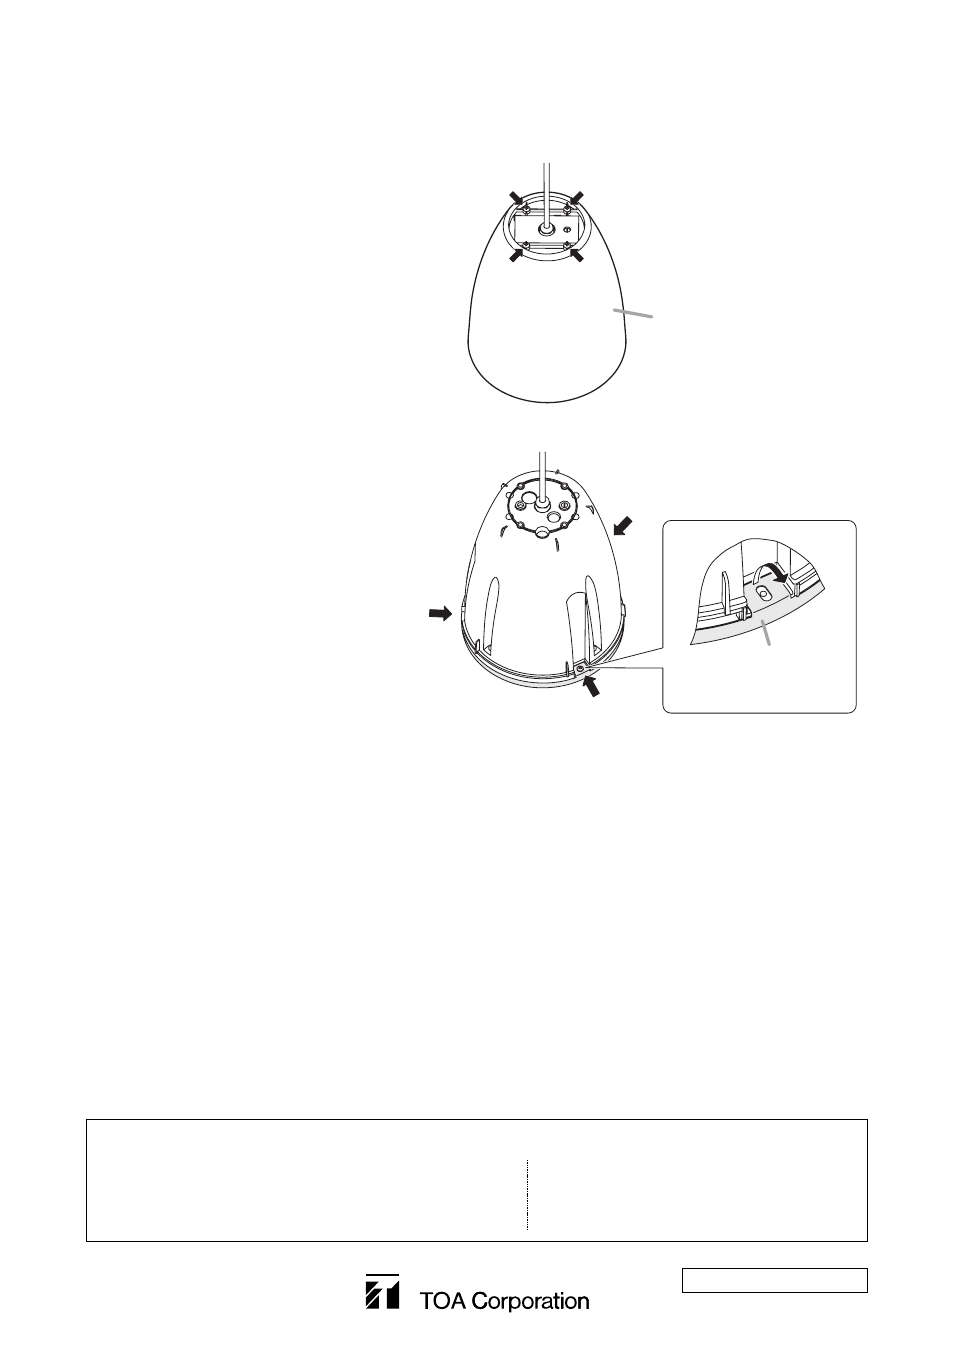
7. REPAINTING THE SPEAKER
Step 1. Remove 4 screws on the upper side of the
speaker cover to detach the cover.
Step 2. Remove 3 screws that fix the mesh net,
then raise the turndown tabs of the mesh
net to detach.
Step 3. Clean the speaker cover and mesh net.
Wipe with a soft cloth damped in a detergent.
Note
Do not use thinner or other volatile liquids to clean them as doing so may cause deformation.
Step 4. Use spray paint to apply uniform and thin coat of paint.
Notes
• Avoid painting with a roller or brush, as the mesh net could become clogged with paint.
• Use appropriate paints for the speaker cover and mesh net materials.
· Speaker cover: Fire-resistant HIPS resin
· Mesh net:
Rolled steel plate (acrylic paint)
Step 5. After the paint has dried, apply another light coat.
Repeating Step 4, apply 2 or more light coats of paint. Application of one thick coat of paint all at once
may cause drips or unevenness to show up in the painted finish, or clog the mesh holes.
Step 6. After the paint has dried, replace the speaker cover and mesh net.
Follow the procedure below when repainting the speaker cover and mesh net.
Note: Never touch the inner speaker diaphragm during work.
Remove 4 screws indicated by arrows.
Speaker cover
Raise the turndown tab.
Mesh net
Remove 3 screws indicated by arrows.
Traceability Information for Europe (EMC directive 2004/108/EC)
Manufacturer:
TOA Corporation
7-2-1, Minatojima Nakamachi, Chuo-ku, Kobe, Hyogo,
Japan
Authorized representative:
TOA Electronics Europe GmbH
Suederstrasse 282, 20537 Hamburg,
Germany