Setting the timer, Operation (continued) – Shellab SMO28-2 User Manual
Page 19
19 |
P a g e
OPERATION (CONTINUED)
S
ETTING THE
T
IMER
This procedure enters a timed heating cycle into the Timer. The cycle will run the oven for a set
time, at the currently programed temperature set point. The oven will stop heating once the heating
cycle is finished.
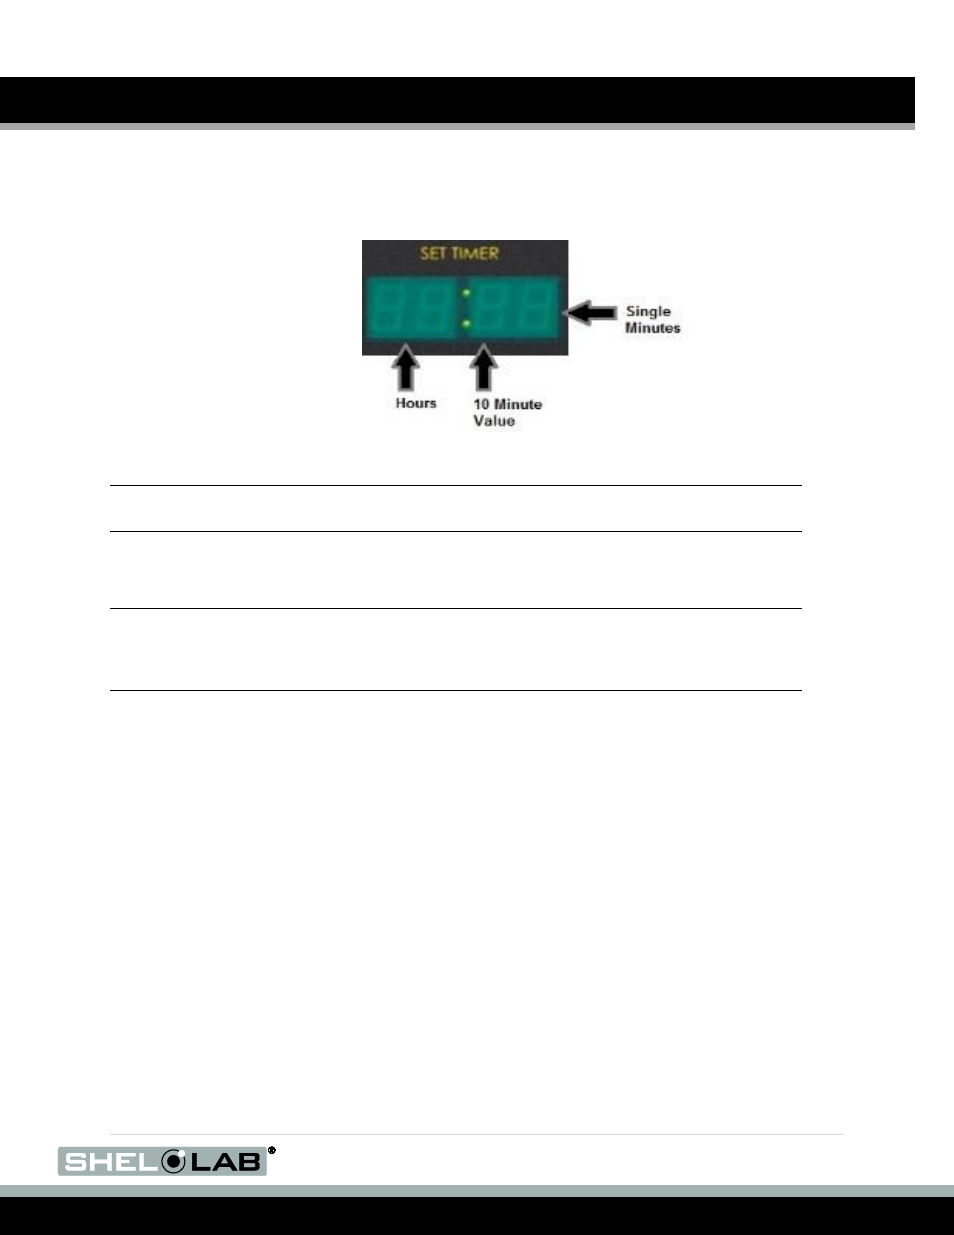
Figure 1: Order of Time Value Entry for the Heating Cycle Timer
Note: When the Timer is on, the heating elements will de-energize and not heat until either a timed
heating cycle is initiated, or the Timer is turned off.
1. Turn on the Timer by depressing the black Timer switch in the I (On) position.
2. The Timer Display will illuminate.
Note: If several seconds elapse with no activity on the Arrow Pad buttons while setting a heating
cycle time period, the Timer Display will cease blinking, and the heating cycle time will revert
to a default setting. The cycle time is entered in hours, tens of minutes, and then single
minutes.
3. Press and hold the Rest button until the Timer Display begins to blink, with a decimal point
illuminated between the 2
nd
and 3
rd
digits.
4. Use the Up and Down Arrow pad to enter a the number of hours the heating cycle will run
for, between 0 and 99
5. After selecting the number of hours, press the Reset button. The decimal will move one
place to the right.
6. Use the Up and Down Arrow pad to enter how long the heating cycle will run for in tens of
minutes. Choose a 10 minute value between 0 and 5 (0, 10, 20, 30, 40, or 50 minutes).
7. After selecting a 10 minute value, press the Reset button. The digit will move one place to
right, again.
8. Use the Up and Down Arrow pad to enter how long the heating cycle will run for in single
minutes. Enter a value between 0 and 9 minutes.
9. After entering the number of single minutes, wait for three seconds. The Timer Display will
stop blinking, and your heating cycle time is now entered into the oven’s timer. This is the
duration the oven will run for when you initiate a timed heating cycle.