Replacing the sleeve cuffs, User maintenance (continued) – Shellab BACTRONEZ User Manual
Page 52
52 |
P a g e
USER MAINTENANCE (CONTINUED)
R
EPLACING THE
S
LEEVE
C
UFFS
A sleeve cuff should be replaced if it shows signs of brittleness or dryness, or
if cracks are visible.
Standard Sleeve Cuff (4 Inches / 10cm)
1. Remove the sleeve cuff by performing the following.
a. Remove the black O-ring located on the outside of the
sleeve assembly, around the cuff. Gently roll the ring off
to avoid damaging it or the sleeve.
b. Slowly and gently remove the sleeve-cuff and its sleeve
cuff-ring from the sleeve.
c. Remove the second (2
nd
) black O-ring, which holds the
sleeve-cuff to the cuff-ring.
d. Remove the old sleeve-cuff from the cuff-ring and
discard. Inspect the cuff-ring. Replace the cuff-ring if
there are cracks, dryness, brittleness, or a loss of
flexibility.
e. Inspect the black O-rings. Replace if cracks, dryness,
brittleness, or a loss of flexibility are present.
f.
Inspect the sleeve. Replace if cracks, dryness, or
brittleness are present.
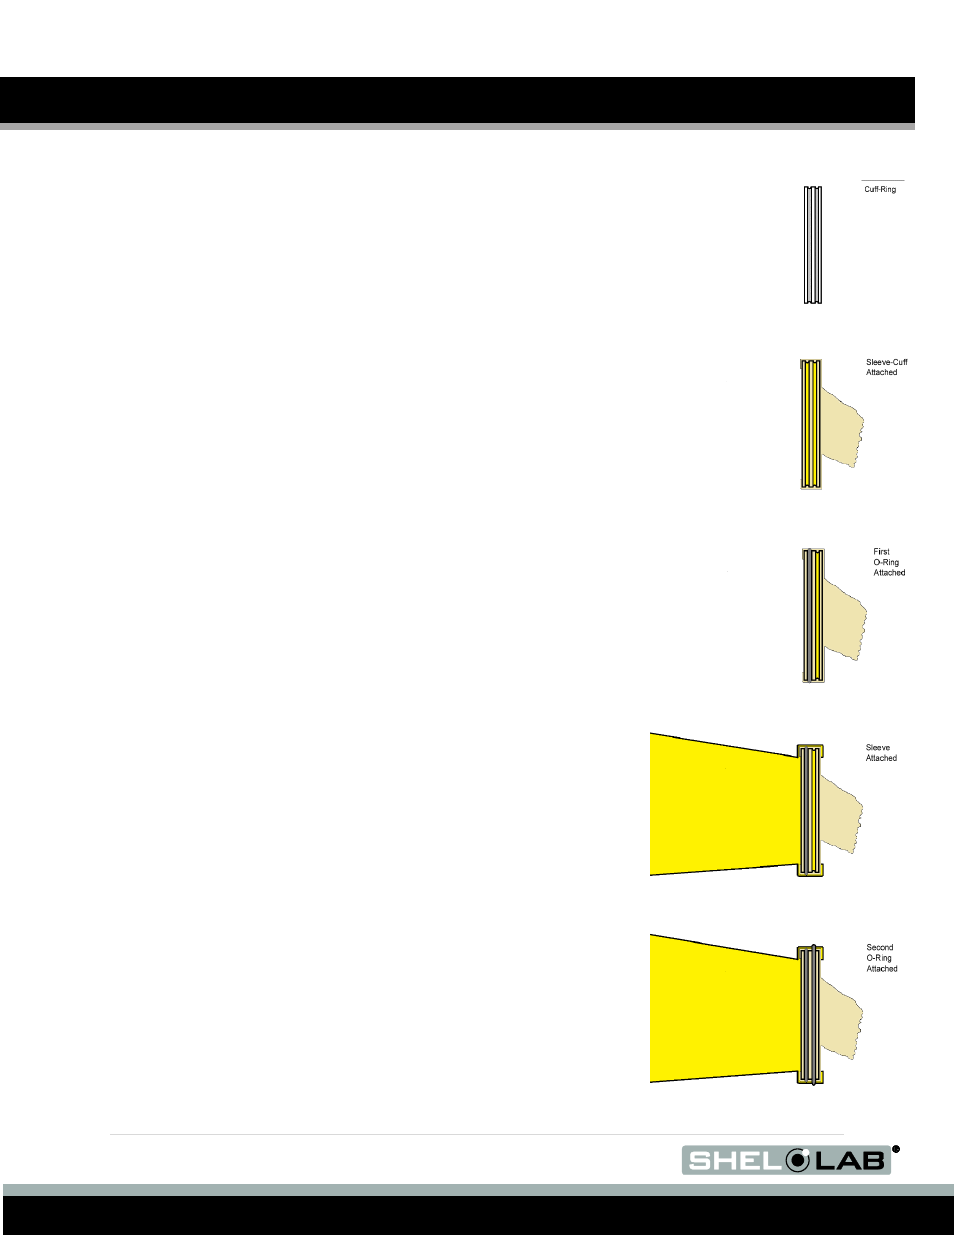
2. Replace the sleeve-cuff.
a. Pull a new sleeve-cuff on over the cuff-ring.
b. Pull an O-ring onto the cuff-ring, over the sleeve-cuff.
Fit the ring into the groove oppo
site the cuff’s fringed
side.
c. Pull the lip of the sleeve over the sleeve-cuff and cuff-
ring. The cuff’s fringed end should be left outside the
sleeve.
d. Pull on the second O-ring. Fit the O-ring into the groove
on the outside of the sleeve and sleeve cuff. This is the
unoccupied cuff-ring groove.
End of procedure